Tefiti
Thank you so much for purchasing our Tefiti WordPress theme. Feel Free to contact with us if you face any troubles with our theme. You can write us here: labartisan@codexcoder.com
First Steps
Before you start playing around with this free theme, let’s check what you’ve downloaded so far:
- Documentation – That’s where you
- License – Some info’s about theme licencing terms
- Upload – This is where all Theme files are (zipped & unzipped format)
Theme Installation
The first option how to install Tefiti WordPress Theme would be to directly upload the tefiti.zip file via WordPress Theme Uploader.
- Log into your WordPress back-end
- Navigate to Appearance > Themes
- Click Install Add New
- Click Upload Theme
- Now you just need to find the “tefiti.zip” in the Upload folder and hit Install now.
- After Installed then click Active Now
Theme Installation From FTP
The second option how to install this Theme would be the upload via FTP manager. It really dosen’t matter which of the two ways you choose, just choose the one you feel more comfortable with.
- Login to your FTP account and navigate to your WordPress Installation directory
- Navigate to the folder /wp-content/themes
- Upload the “tefiti” folder (not the .zip-file). This is the folder located inside the “Upload” folder in the zip-file you’ve downloaded from Labartisanprofile of Envato.
- Now log into your WordPress backend
- Navigate to Appearance > Themes
- Find the Theme and click Activate
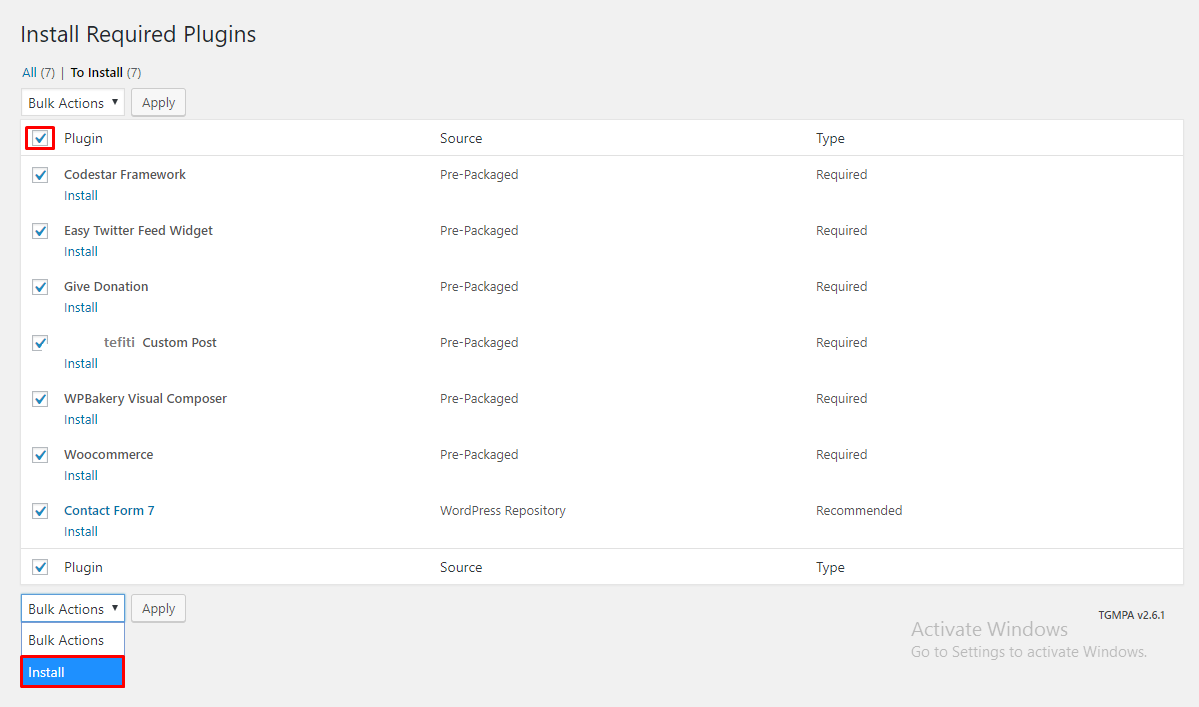
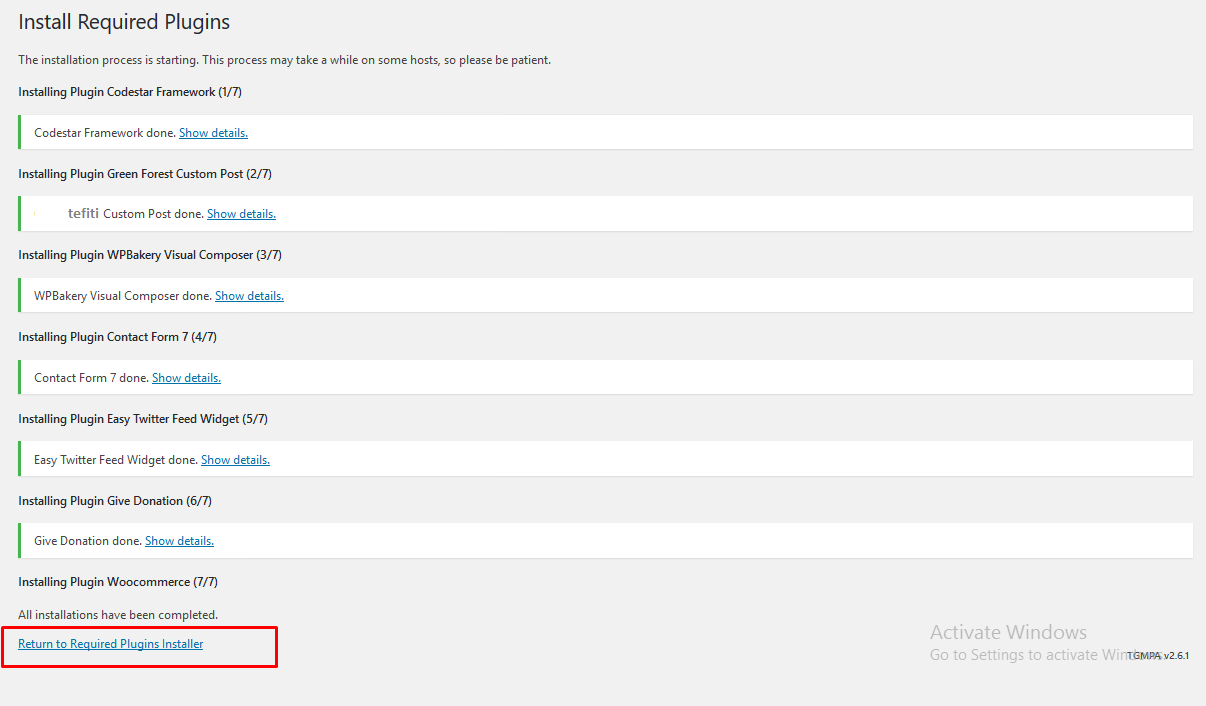
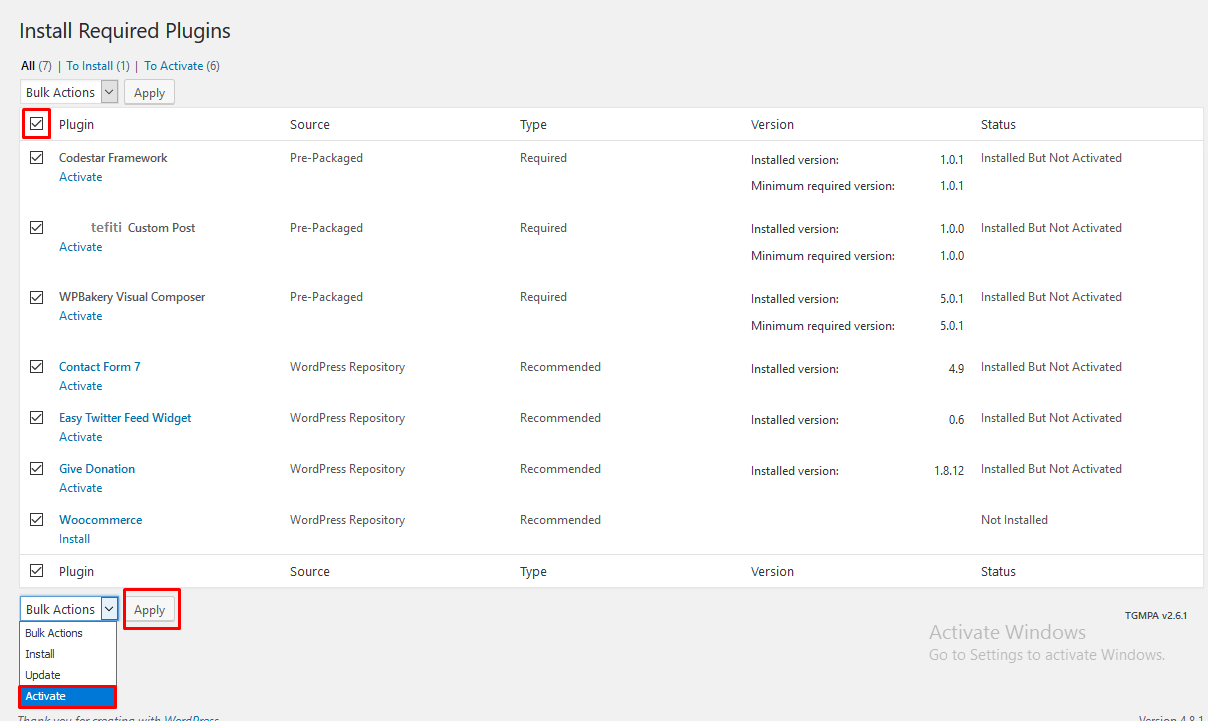
Plugin Setup
So at this stage you have probably noticed a warning, asking you to install recommended plugins. This is needed to get the Codestar Framework, tefiti custom post, Contact Form 7 and Custom Post Type. Installing that is very simple, you just need to click Begin installing plugins and you will be redirected to the plugin installation page where you can install Plugins.

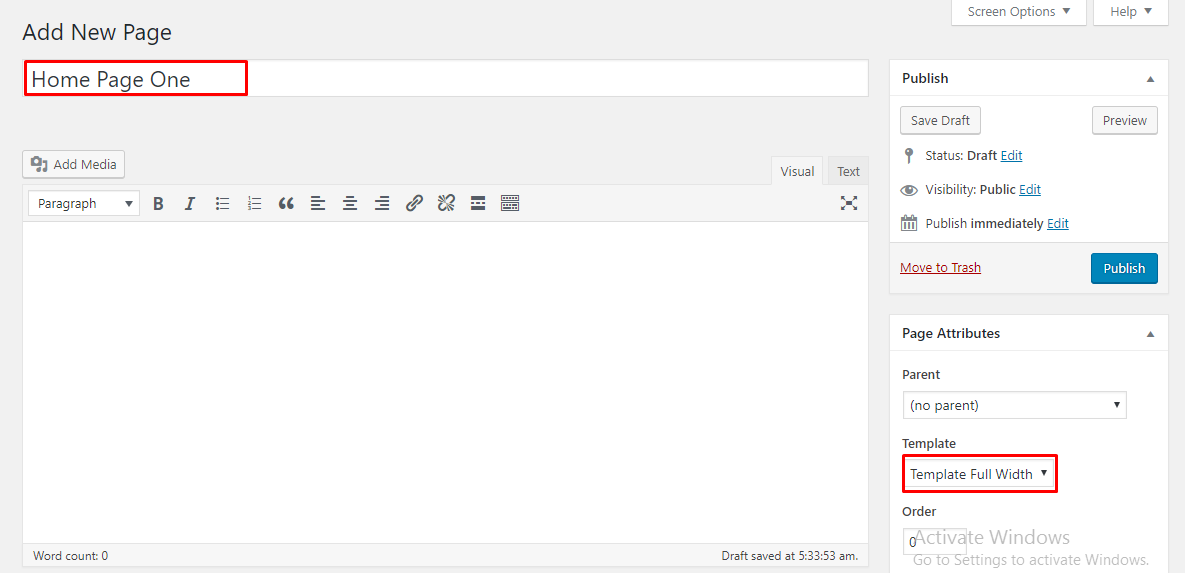
Home Page Setup
- Go to Dashboard and click on Pages
- Now click on Add new
- Write a title of your page into Title field.
- Now select the Template Full Width from Template option.
- Now click on Publish button.
Now go to Dashboard and click on Settings > Reading. Please see the screenshot below and do as it.

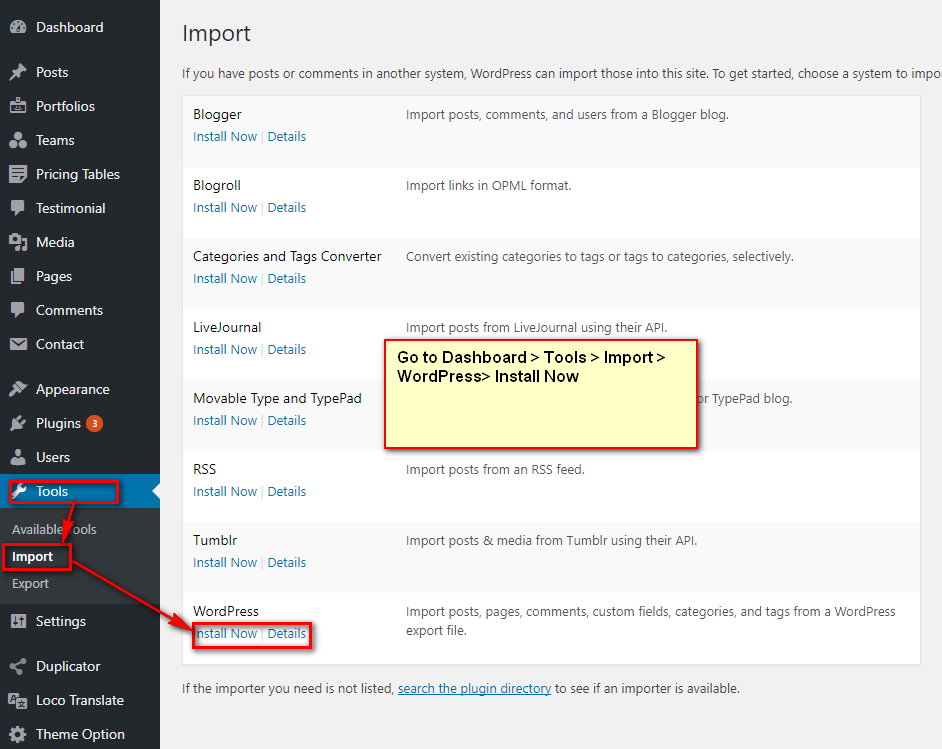
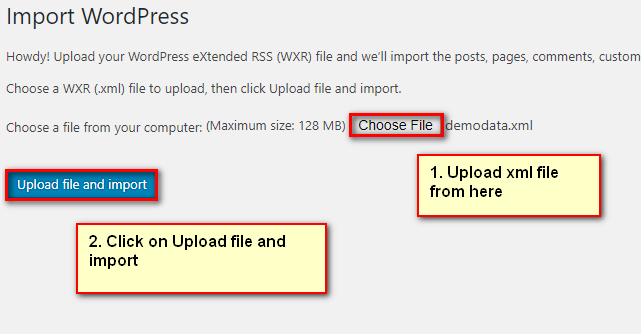
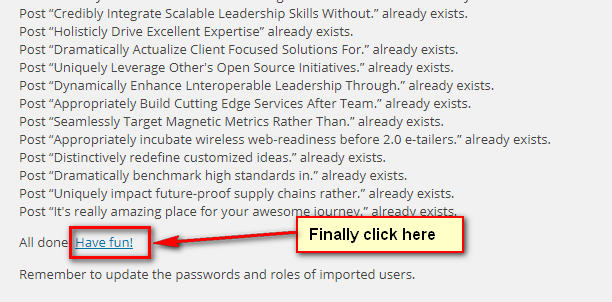
Demo Content Import

Home Page One
- Go to Dashboard and click on Pages
- Now click on Add new
- Write a title of your page into Title field. Example as : Home Page One
- Then use the short-codes which you want to show in home page version one.
- You can use the custom page setting option from Custom Page Settings option.
- In Custom Page Settings option you will able to change the header style
- Using Page Header option, if you want to show your page header, you can show or hide.
- Using Page Header Top option, if you want to show your page header top option, you can show or hide.
- Using Page Header Add To Cart option, if you want to show your page header add to cart option, you can show or hide.
- Using Page Header Image option, if you want to show your page header image option, you can show or hide.
- Finally click on Publish button.
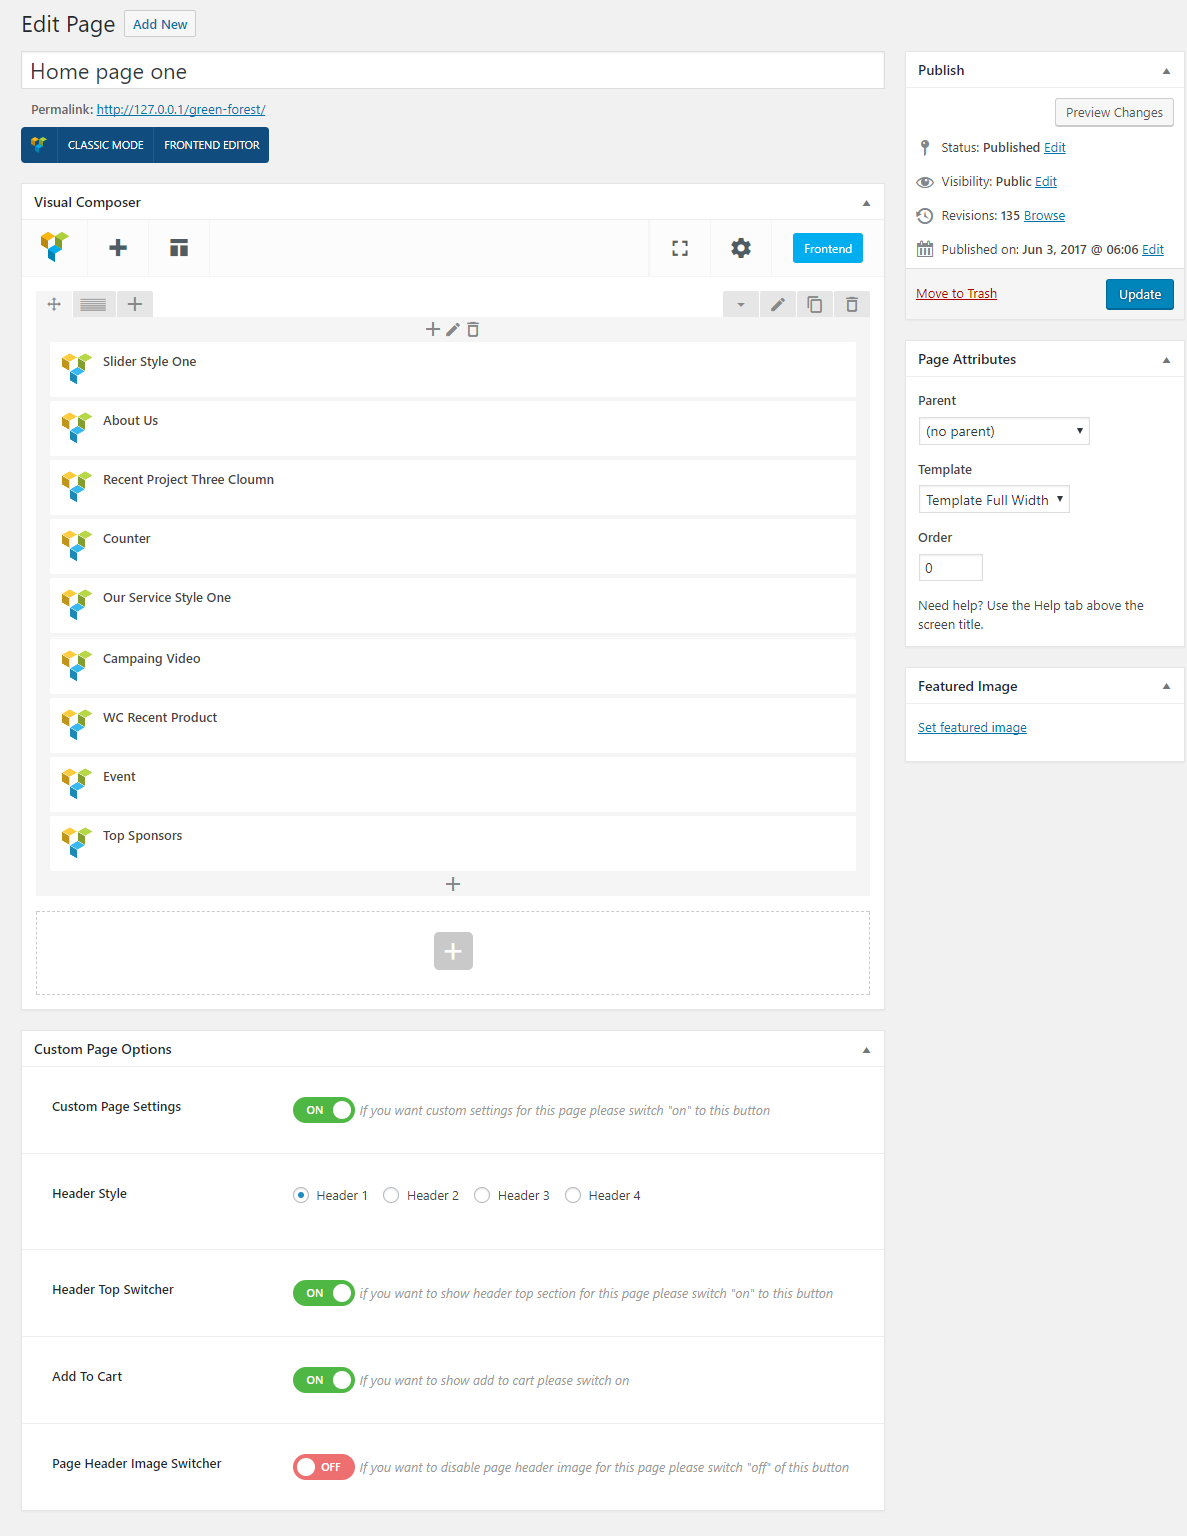
Fill up all fields carefully, you will able to see the screenshot below:(We mention here the banner area only.)
Home Page Two
- Go to Dashboard and click on Pages
- Now click on Add new
- Write a title of your page into Title field. Example as : Home Page Two
- Then use the short-codes which you want to show in home page version one.
- You can use the custom page setting option from Custom Page Settings option.
- In Custom Page Settings option you will able to change the header style
- Using Page Header option, if you want to show your page header, you can show or hide.
- Using Page Header Top option, if you want to show your page header top option, you can show or hide.
- Using Page Header Add To Cart option, if you want to show your page header add to cart option, you can show or hide.
- Using Page Header Image option, if you want to show your page header image option, you can show or hide.
- Finally click on Publish button.

Fill up all fields carefully, you will able to see the screenshot below:(We mention here the banner area only.)
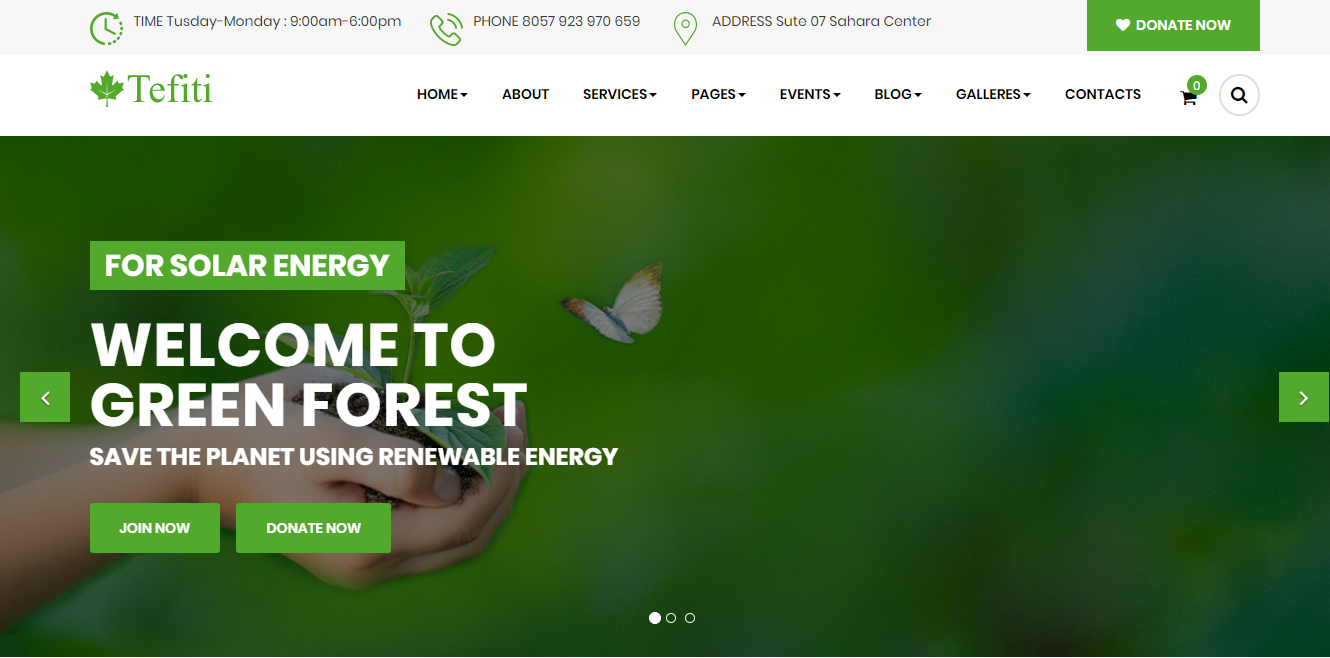
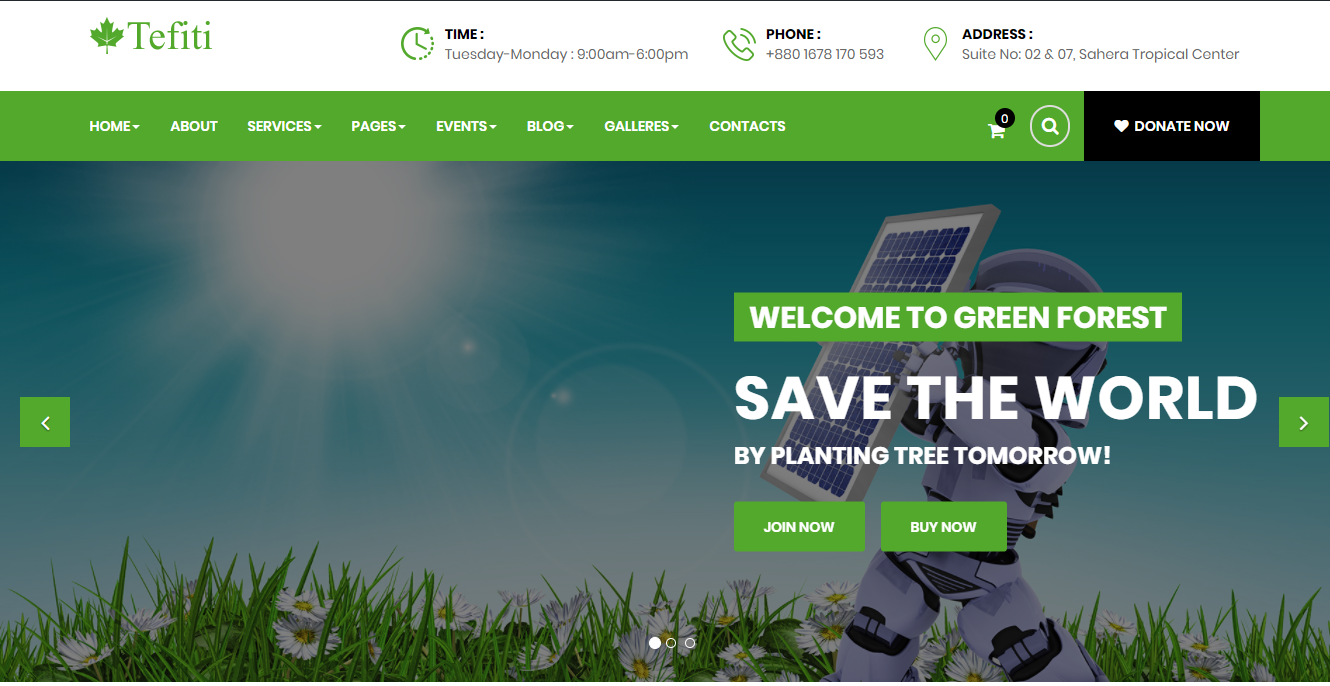
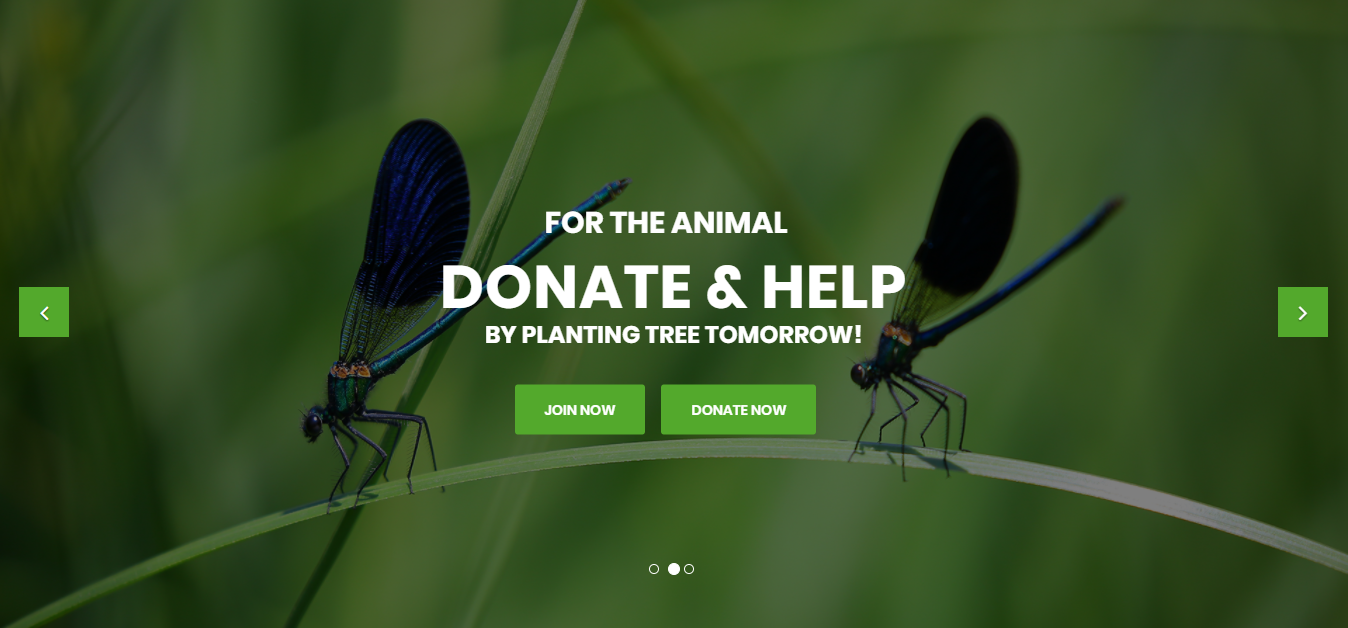
Home Page Three
- Go to Dashboard and click on Pages
- Now click on Add new
- Write a title of your page into Title field. Example as : Home Page Three
- Then use the short-codes which you want to show in home page version one.
- You can use the custom page setting option from Custom Page Settings option.
- In Custom Page Settings option you will able to change the header style
- Using Page Header option, if you want to show your page header, you can show or hide.
- Using Page Header Top option, if you want to show your page header top option, you can show or hide.
- Using Page Header Add To Cart option, if you want to show your page header add to cart option, you can show or hide.
- Using Page Header Image option, if you want to show your page header image option, you can show or hide.
- Finally click on Publish button.
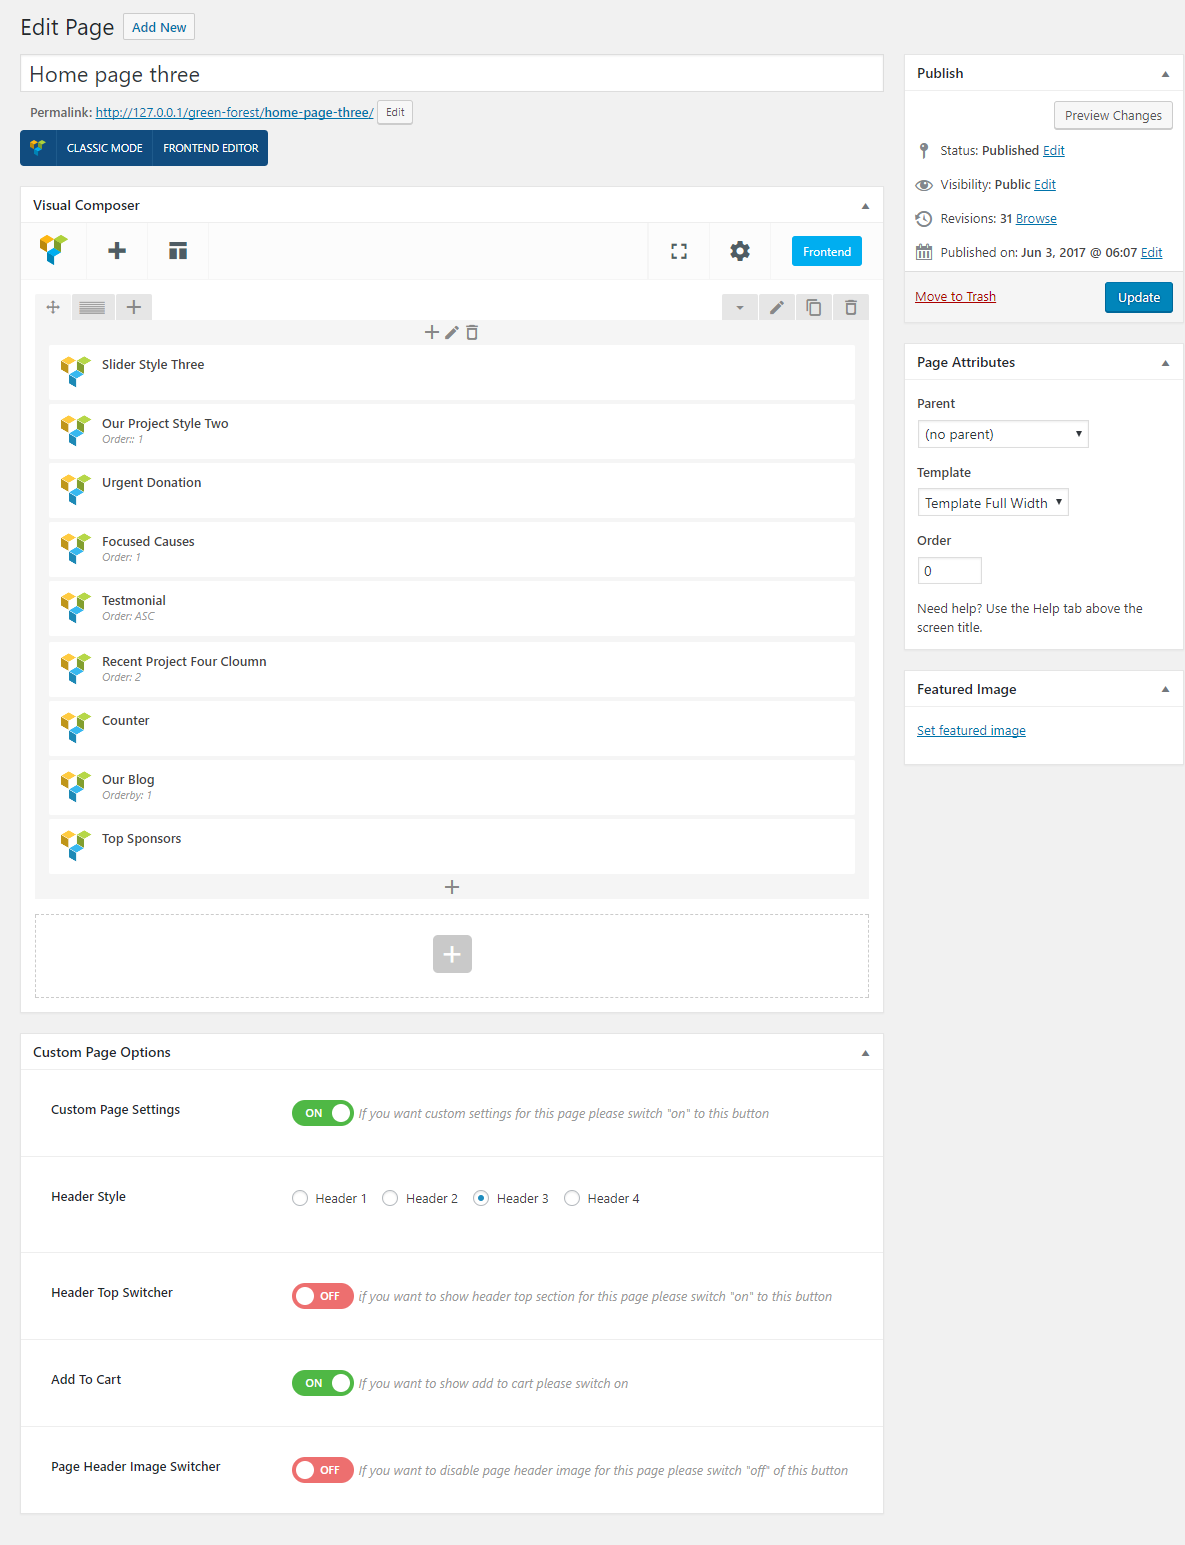
Fill up all fields carefully, you will able to see the screenshot below:(We mention here the banner area only.)
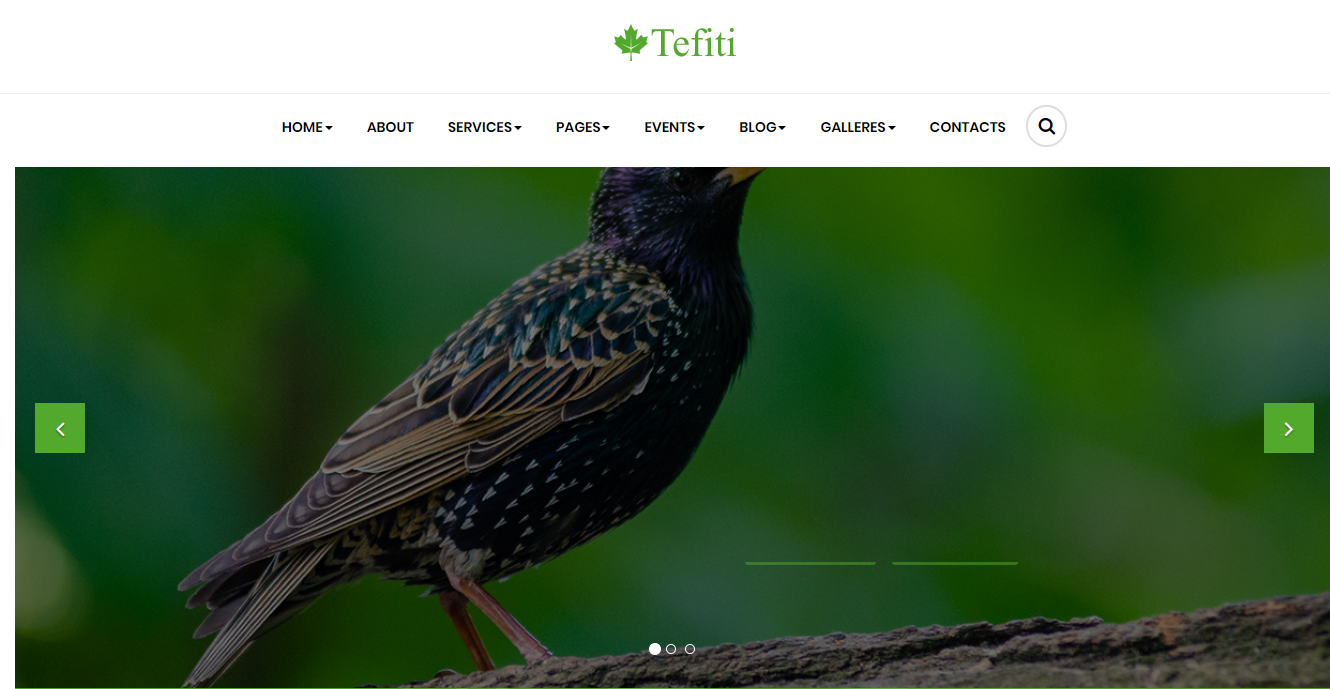
Home Page Box Style
- Go to Dashboard and click on Pages
- Now click on Add new
- Write a title of your page into Title field. Example as : Home Page Three
- Then use the short-codes which you want to show in home page version one.
- You can use the custom page setting option from Custom Page Settings option.
- In Custom Page Settings option you will able to change the header style
- Using Page Header option, if you want to show your page header, you can show or hide.
- Using Page Header Top option, if you want to show your page header top option, you can show or hide.
- Using Page Header Add To Cart option, if you want to show your page header add to cart option, you can show or hide.
- Using Page Header Image option, if you want to show your page header image option, you can show or hide.
- Finally click on Publish button.
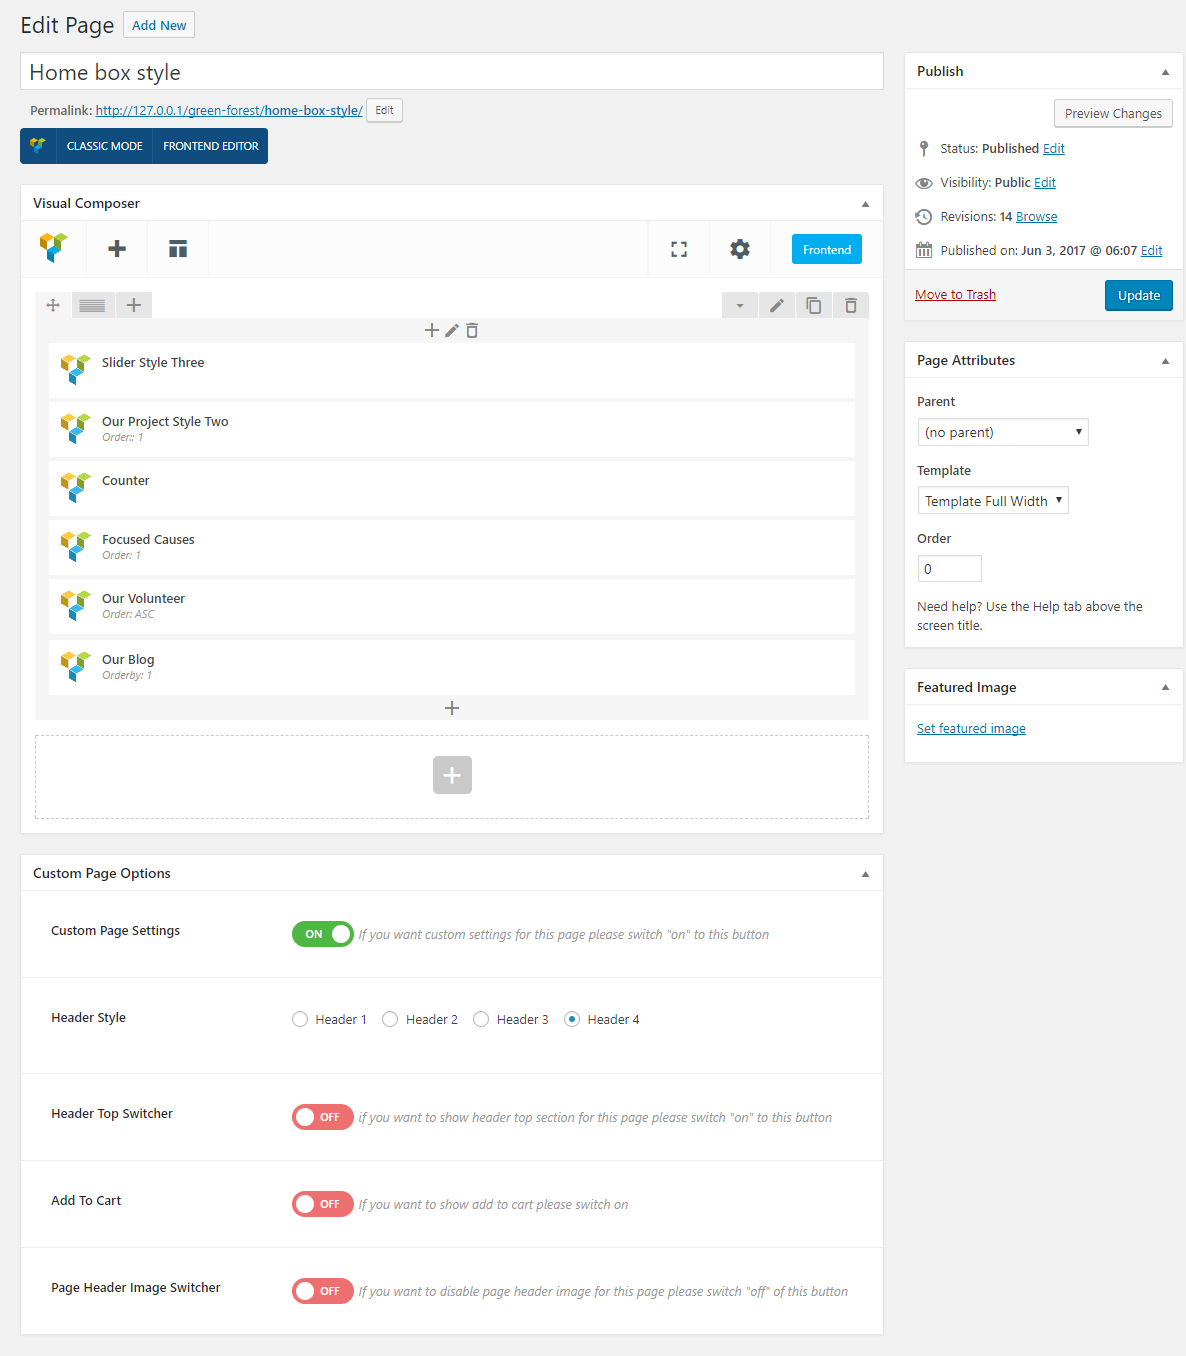
Fill up all fields carefully, you will able to see the screenshot below:(We mention here the banner area only.)
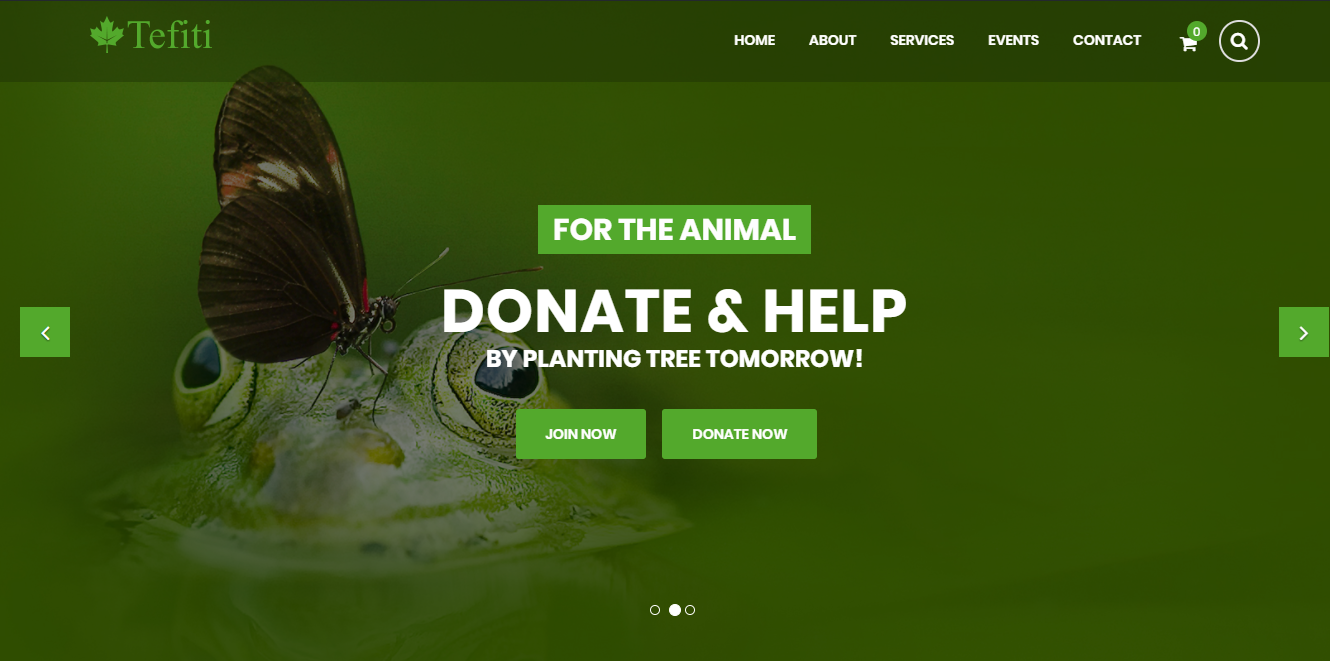
Home One Page
- Go to Dashboard and click on Pages
- Now click on Add new
- Write a title of your page into Title field. Example as : Home One Page
- Then use the short-codes which you want to show in home page version one.
- You can use the custom page setting option from Custom Page Settings option.
- In Custom Page Settings option you will able to change the header style
- Using Page Header option, if you want to show your page header, you can show or hide.
- Using Page Header Top option, if you want to show your page header top option, you can show or hide.
- Using Page Header Add To Cart option, if you want to show your page header add to cart option, you can show or hide.
- Using Page Header Image option, if you want to show your page header image option, you can show or hide.
- Finally click on Publish button.
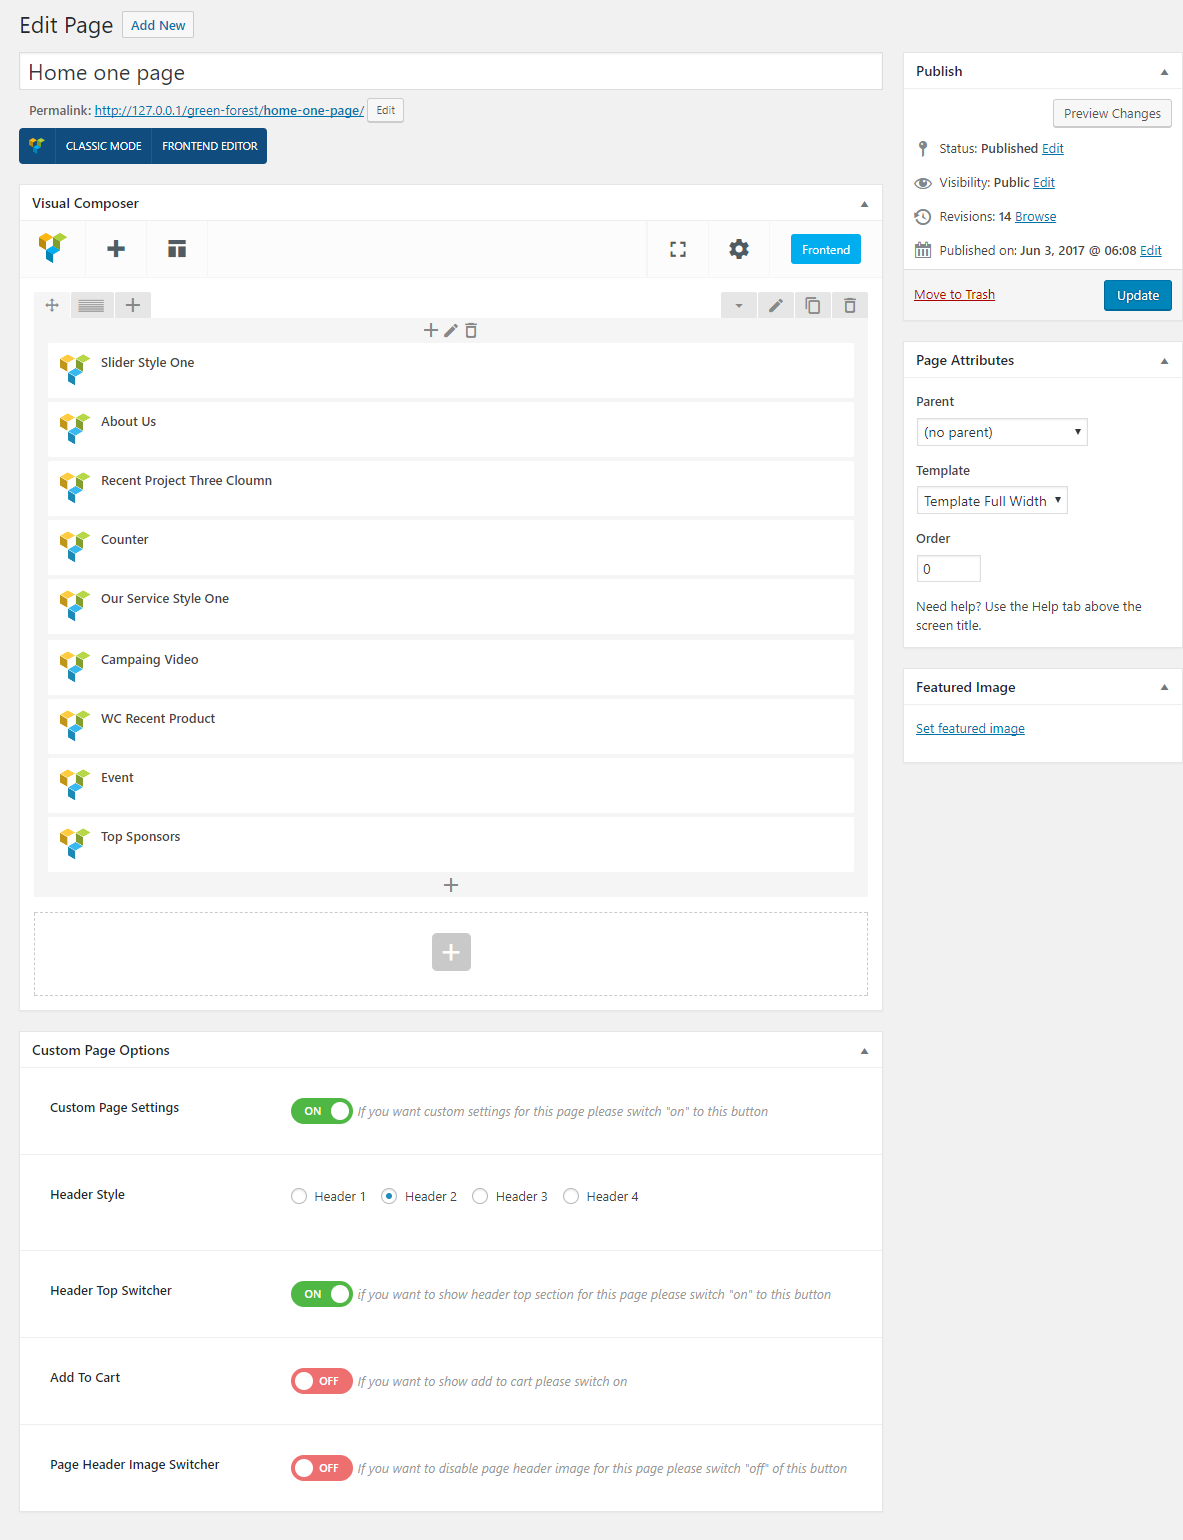
Fill up all fields carefully, you will able to see the screenshot below:(We mention here the banner area only.)
Menu Settings
Setting up your menu, do as attached screenshot below:
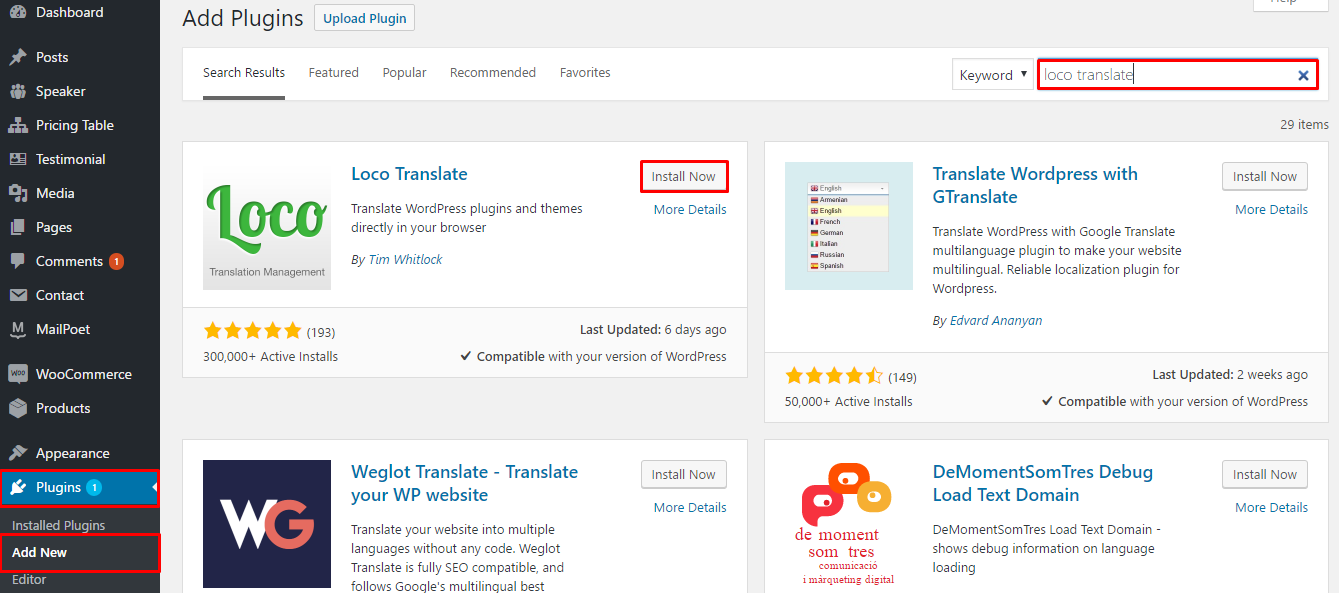
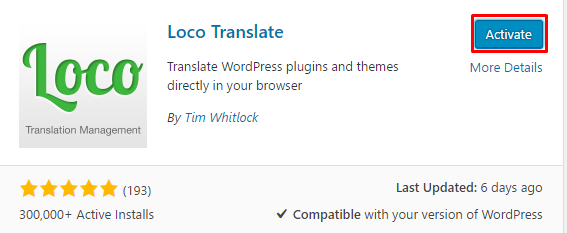
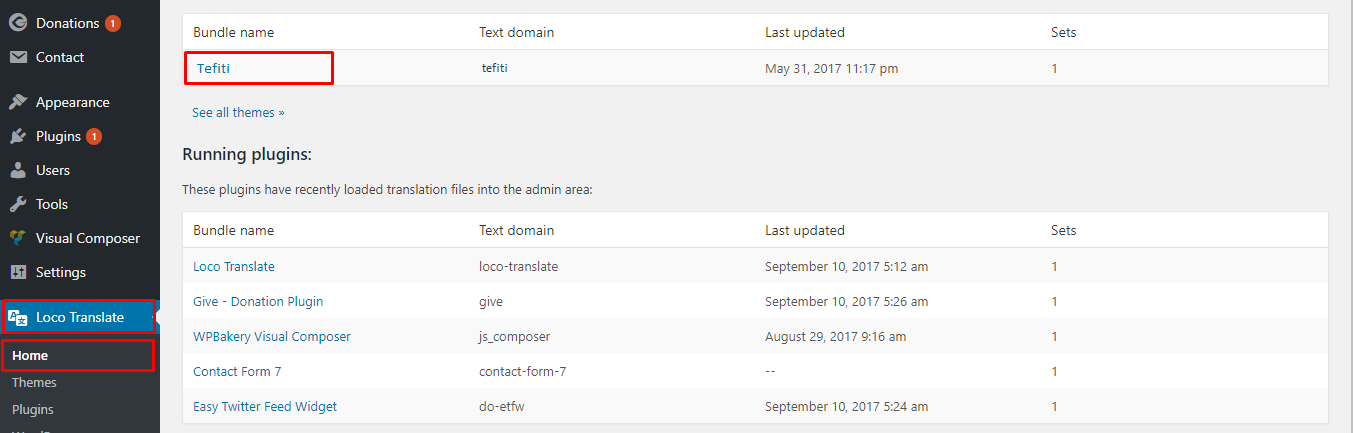
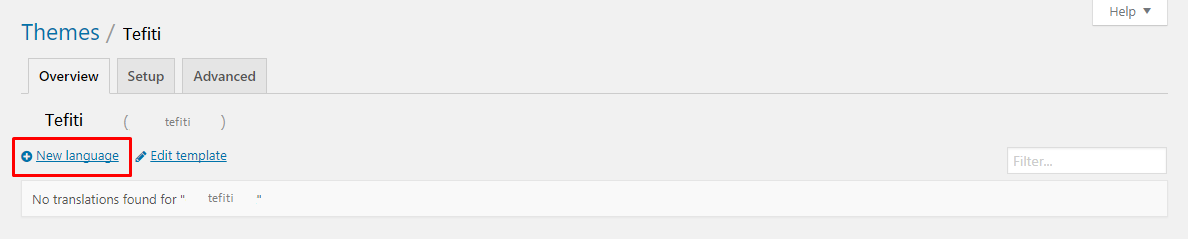
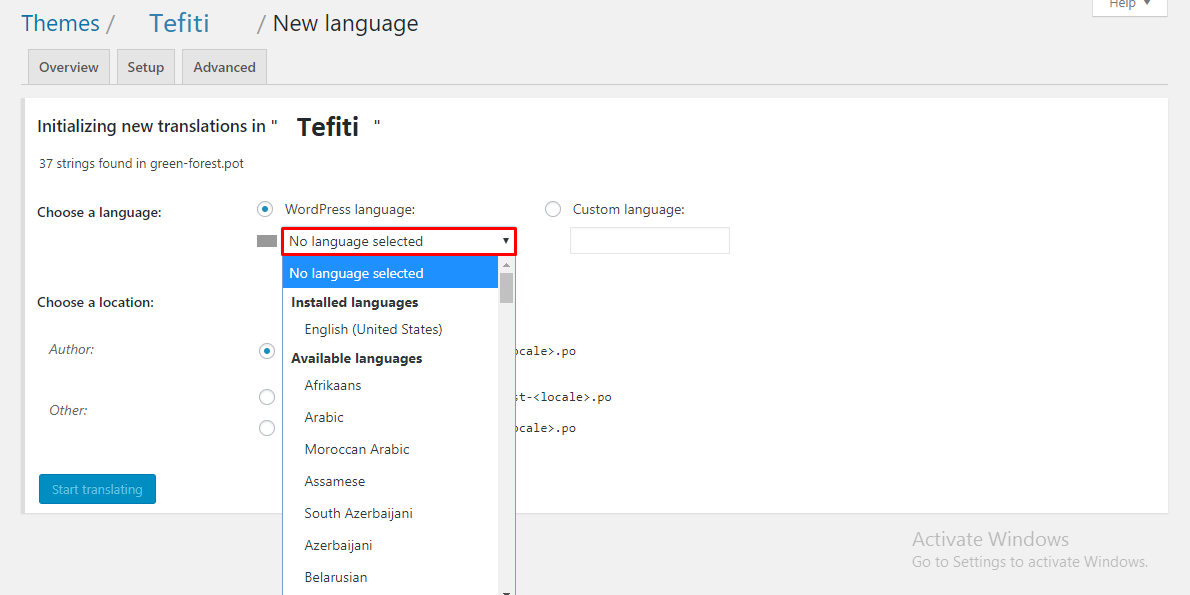
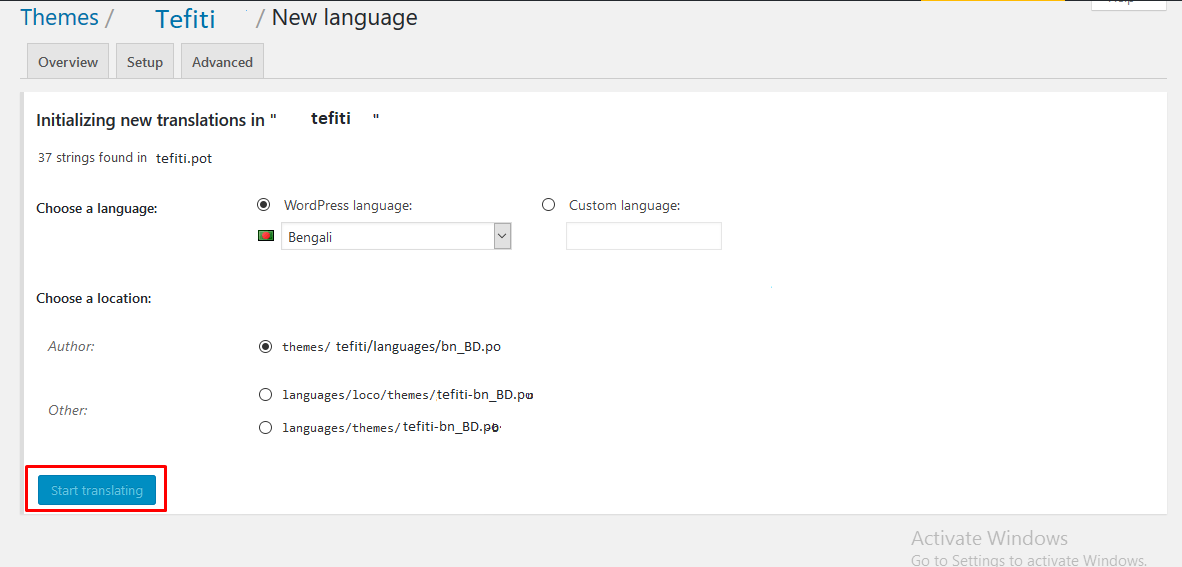
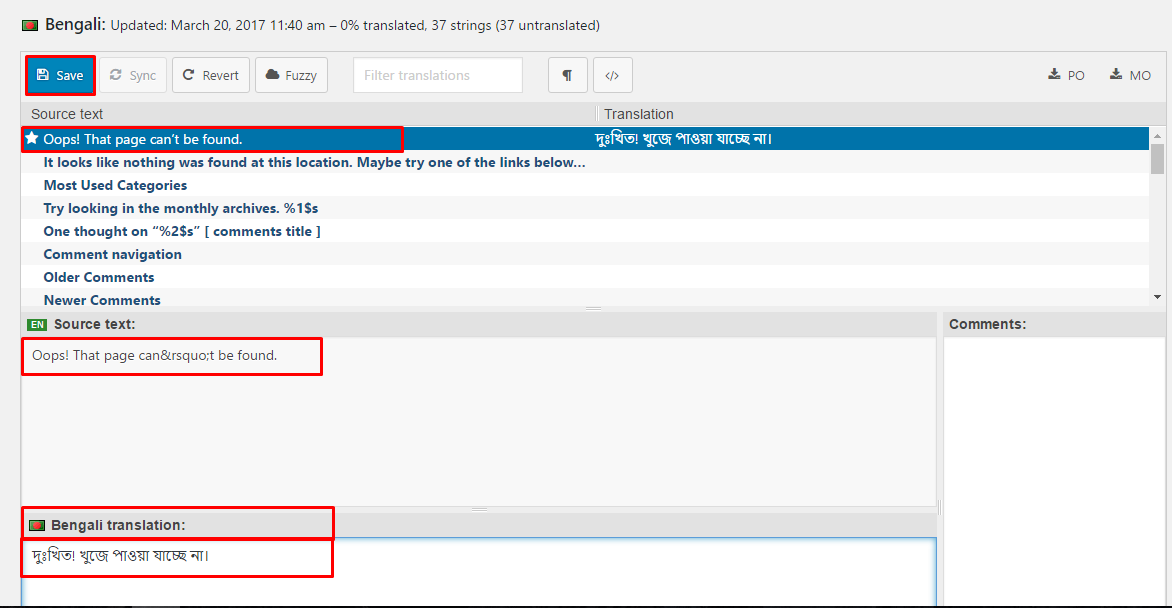
Language Translation
In this section we will cover localization of our site. Firstly, we will go to Dashboard > Plugins > Add New > and do as attached screenshots below:
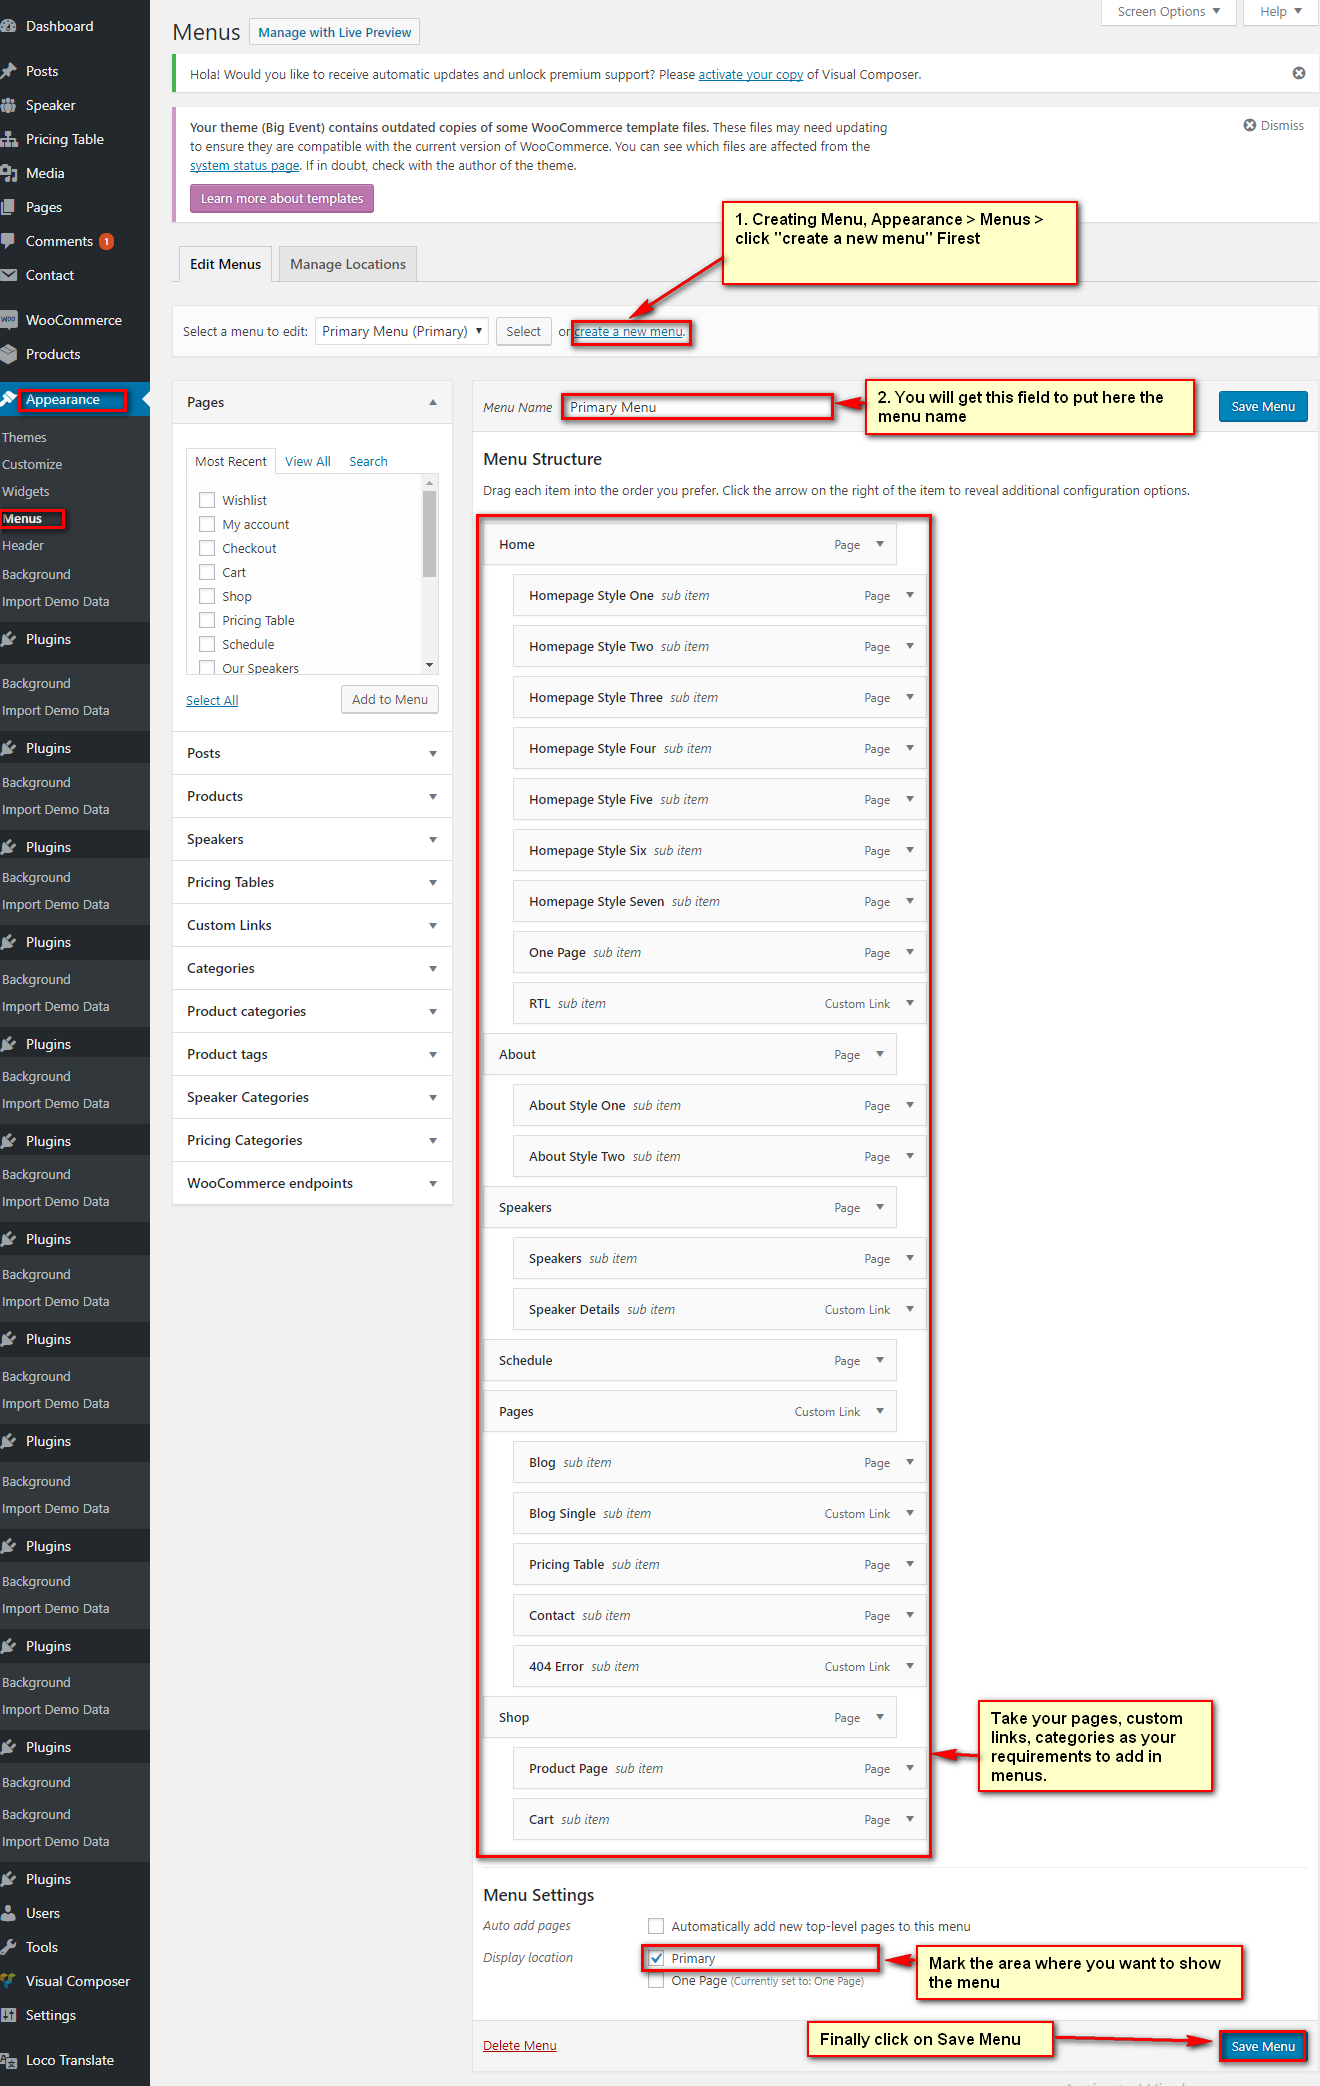
Theme Navigation
Primary Menus
For your primary menu first go to dashboard
- Click on Appearence
- Click on Menus
- Click on create a new menu(Primary Menu)
- Write your menu name. Example: Main Menu.
- Click on Create Menu.

- 6. Select menu’s element from Pages or Custom Links. (Put tick)
- 7. Click on Add to Menu button.
- 8. Now decorate your menu drugging up and down by cursor.
- 9. Put tick in Primary Menu.
- 10. Click on Save Menu.
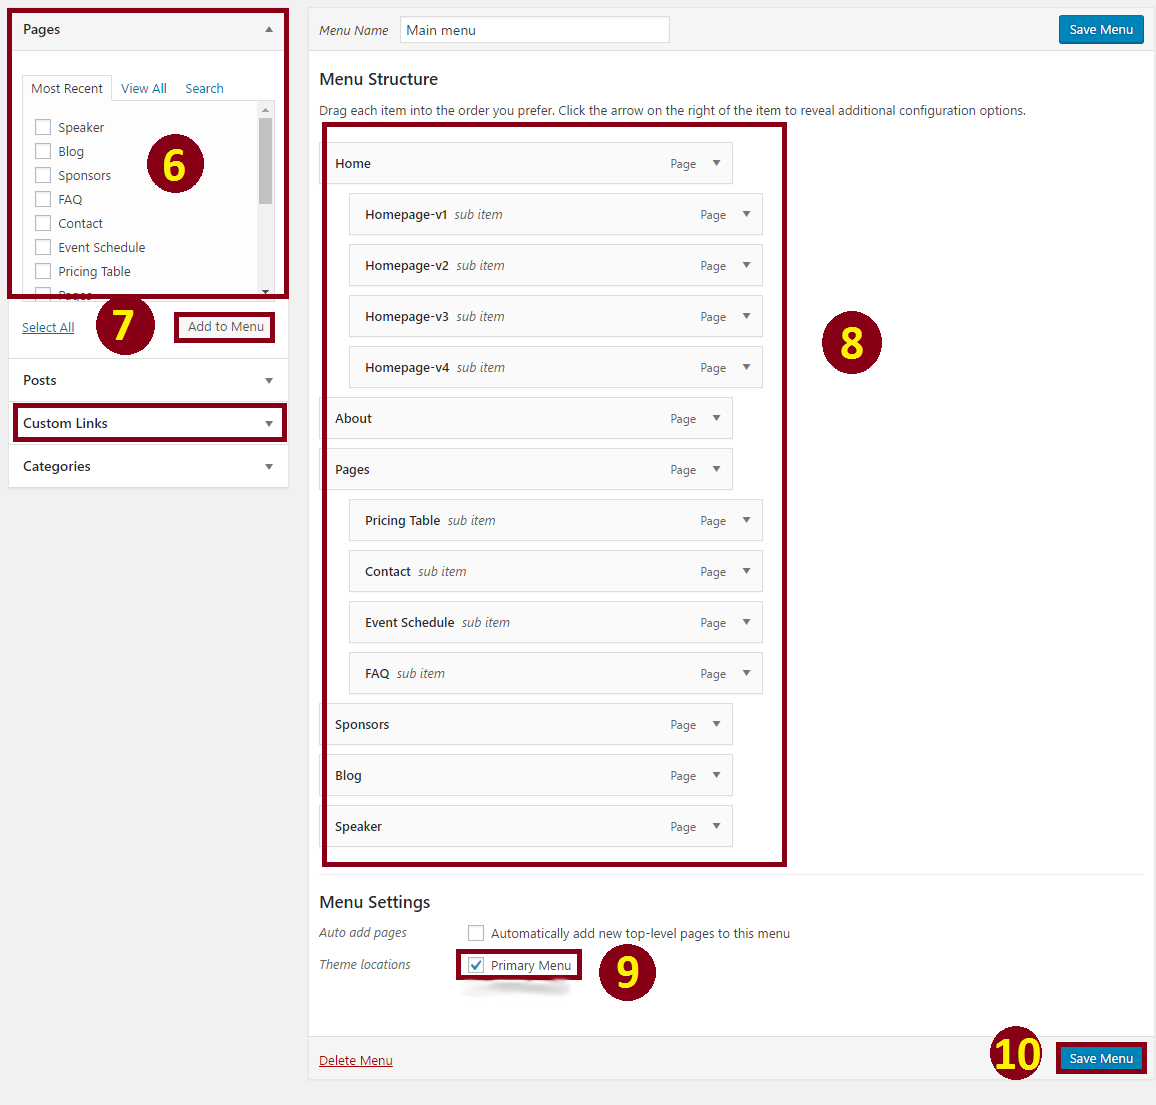
Now you can see the outlook of your selected menu.

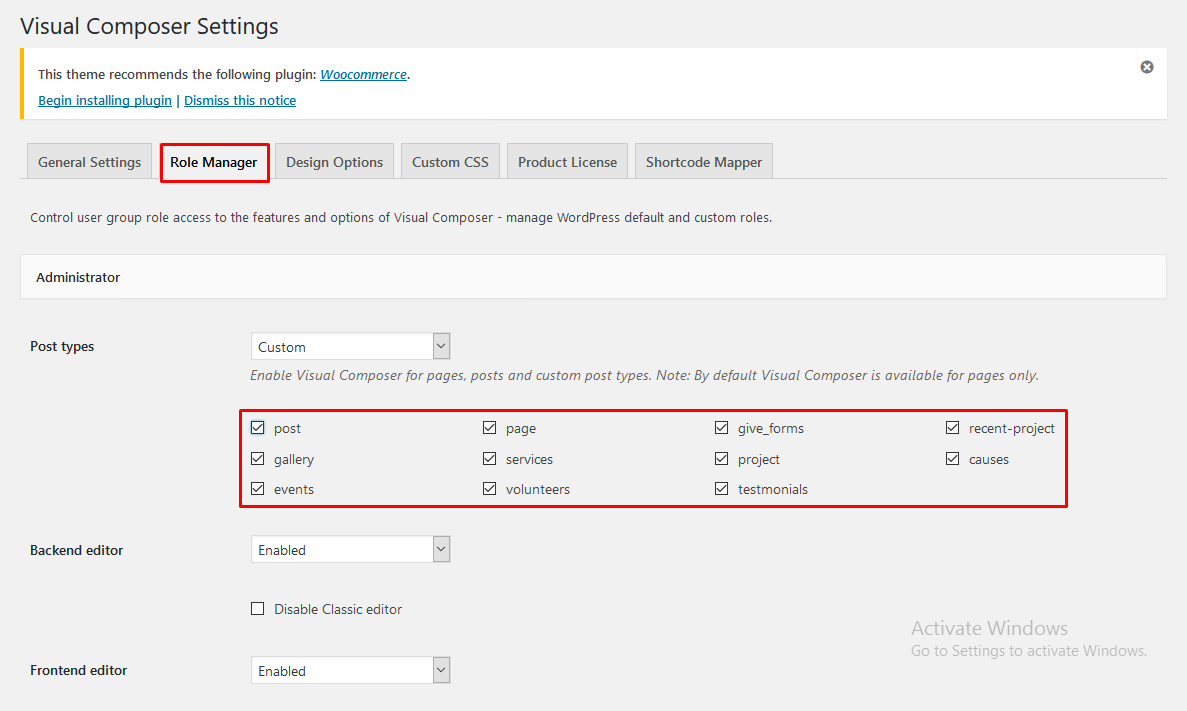
Page Builder
- At first you need to go dashboard and click on visual composer > role manager > select the checkbox for
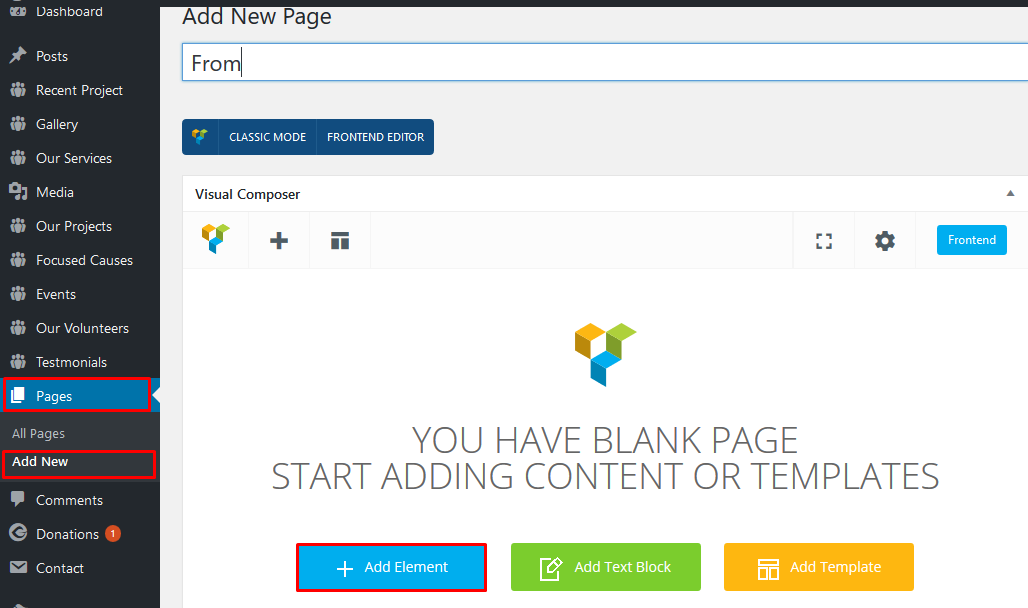
- 1. Click on pages > 2. Click on Add New > 3. Put the title of your page. > 4. Click on visual composer BACKEND EDITOR
- 5. Now click on + Add Element .
- 6. Then click on Tefiti .
- 7. And choose an element. Example: Event .
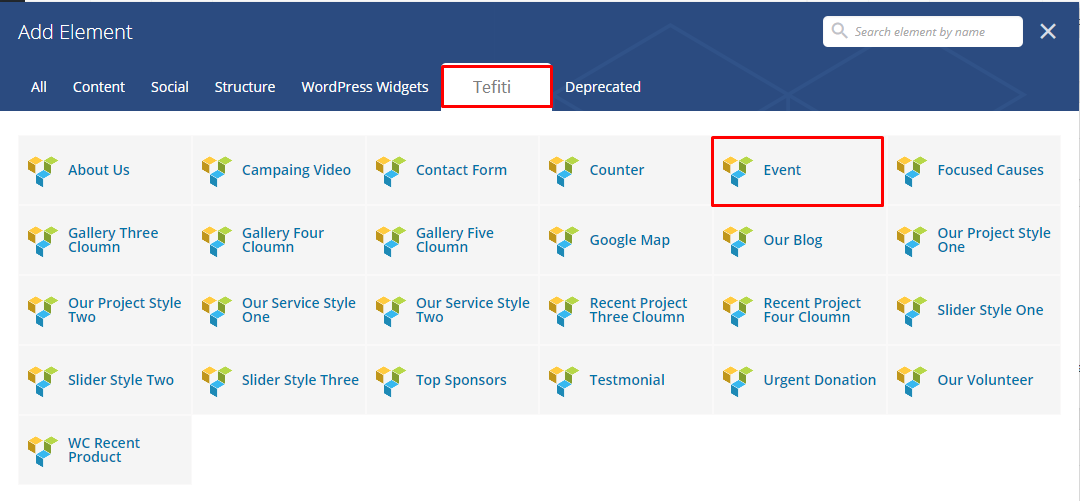
- 8. Write a title into Title options.
- 9. Write sub title into Sub Title optios.
- 10. Mention your post limit from Post Limit optios.
- 11. Write button text into Button Text optios.
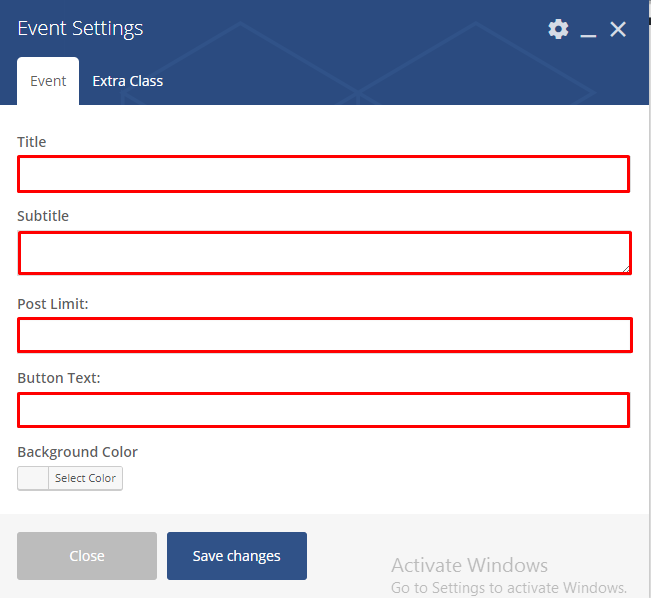
- 11. Put the extra class name if you want.
- 12. Finally click on Save Changes optios.
- 13.Click on Publish button.

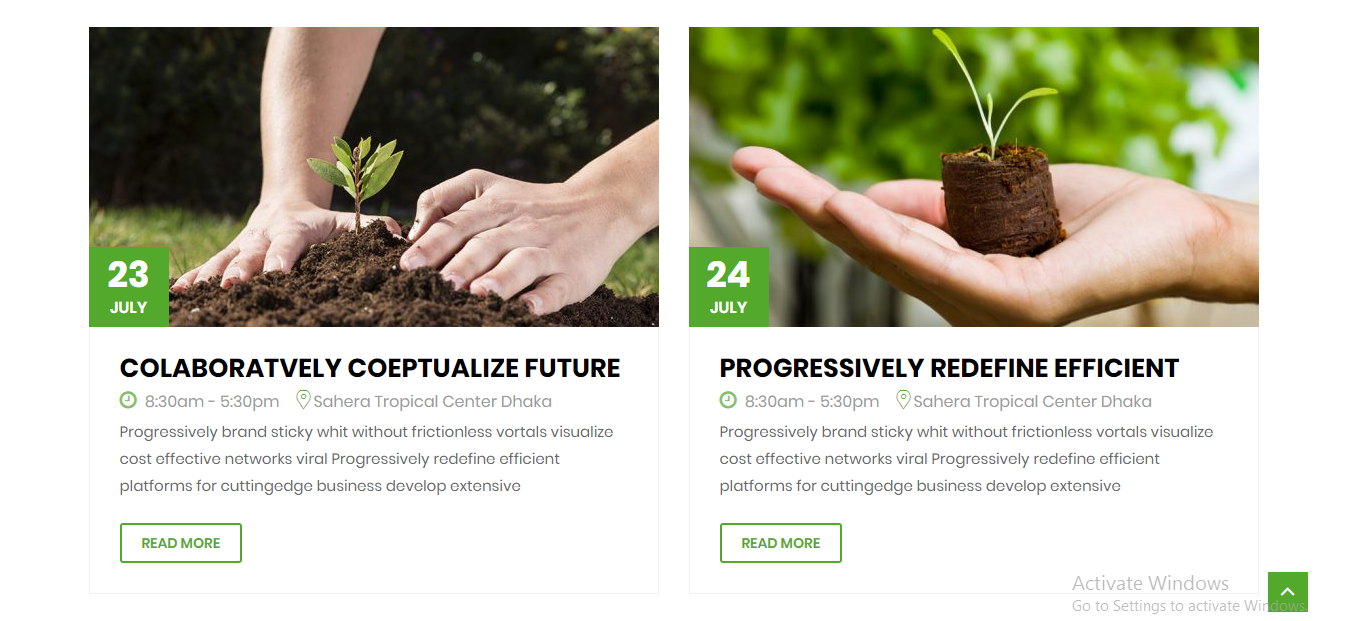
Now you can see the outlook looks below:
How to insert short-code in post
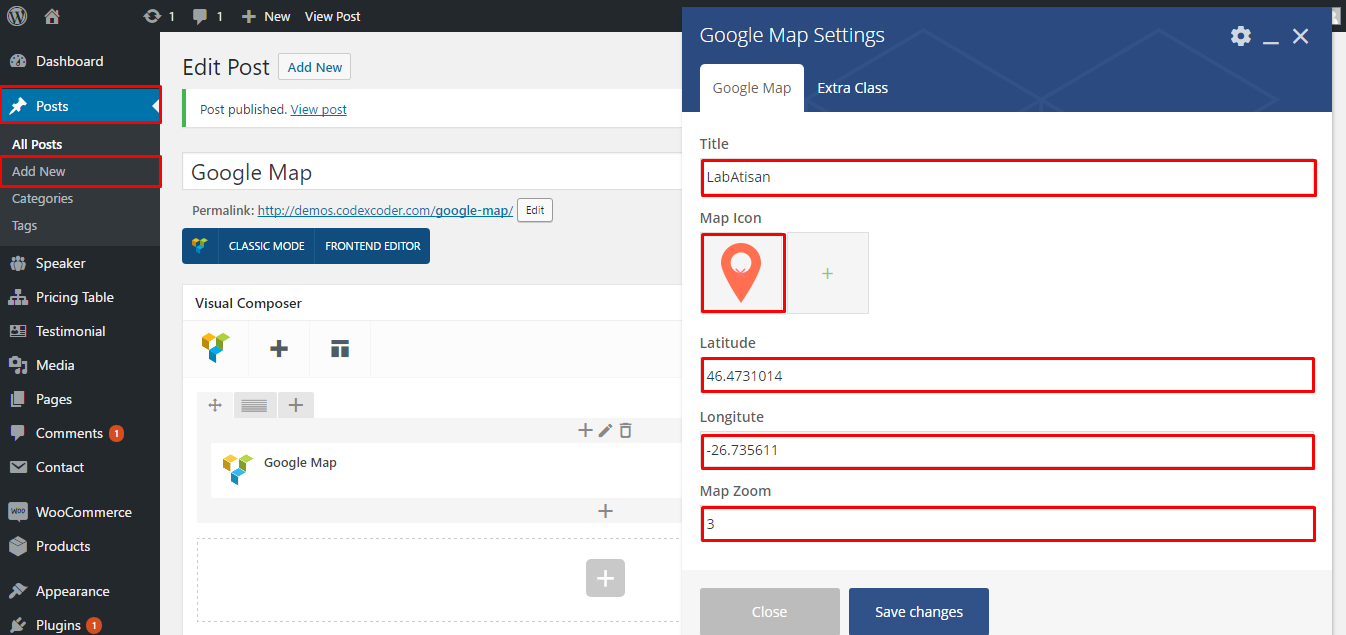
- At first you need to go to dashboard and select the posts option.
- Click on All posts and select a post to insert a shortcode in post
- Click on BACKEND EDITOR . Then click on Google Maps option and put the title. Also you can put there map height.
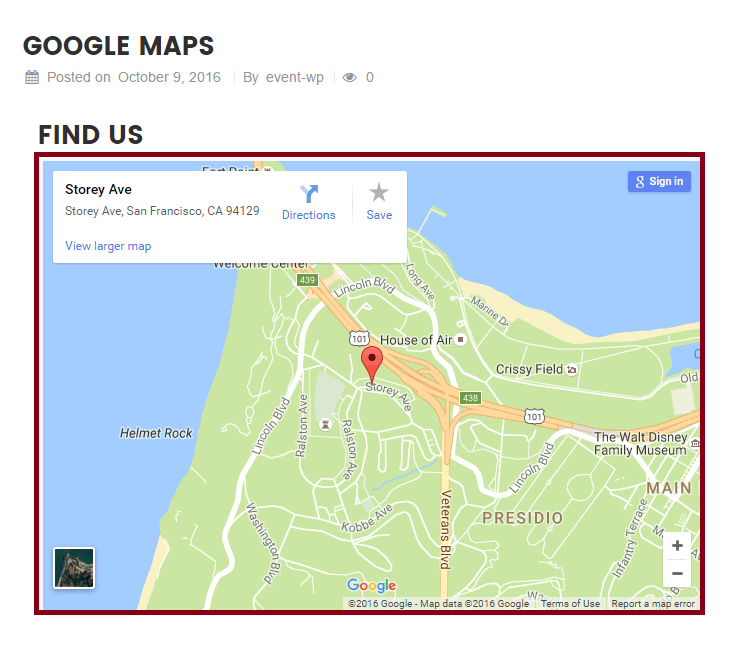
Finally you can see the screenshot below:
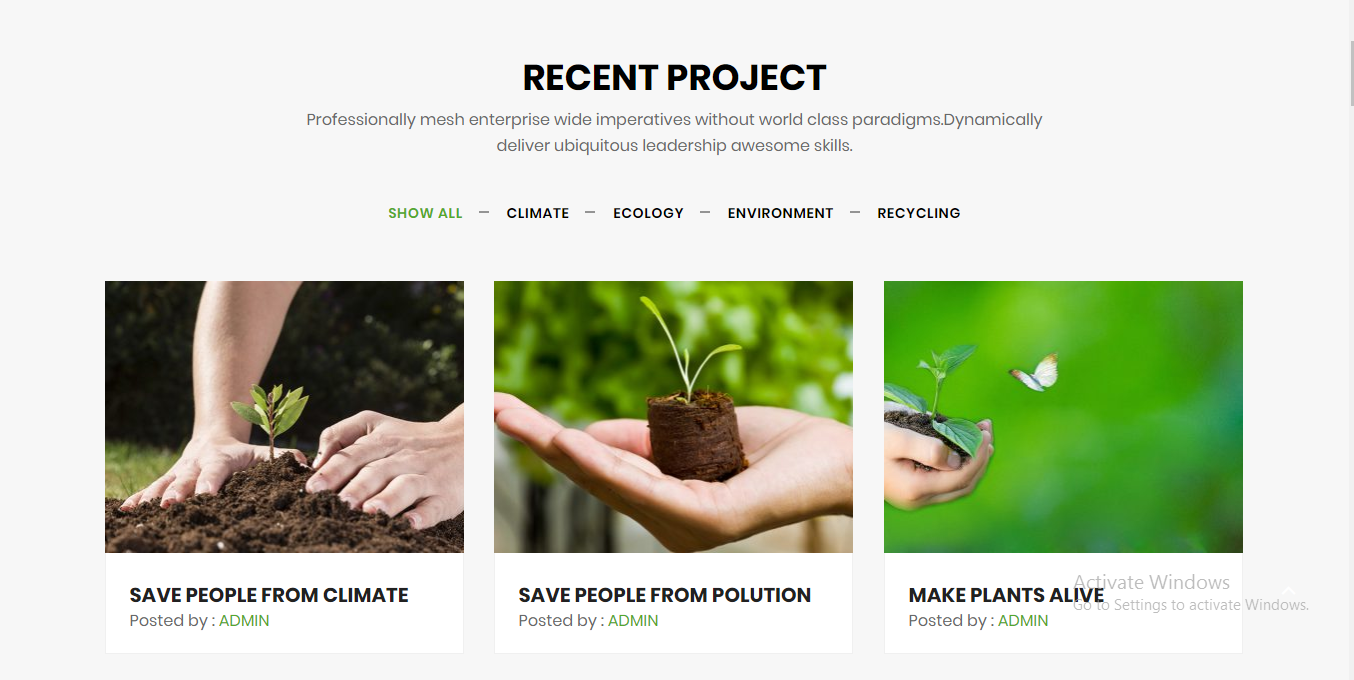
Custom Post Type Recent Project
- At first you need to go to dashboard and select the custom post Recent Project option.
- Click on Add New Project.
- Now put your Project’s title into First Filed as screenshot’s. Now put your project description into Description field . Now upload your project image intoFeatured Image field. Now select your project caterories into Category field. Now put your project Informations(Title and Details) into Project Informationsfield.
- At last click on Publish button.
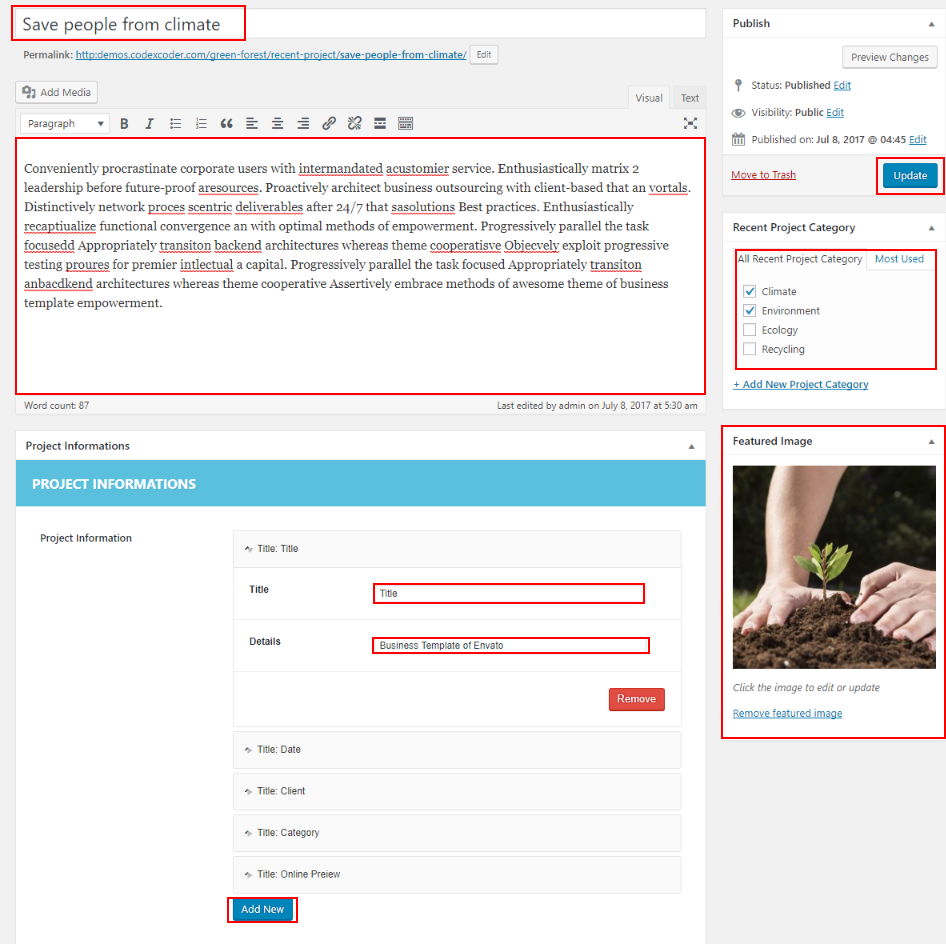
Finally you will able to see the screenshot like below:
Custom Post Type Gallery
- At first you need to go to dashboard and select the custom post Gallery option.
- Click on Add New Gallery.
- Now put your gallery title into First Filed as screenshot’s. Now select your Gallery Category into Gallery Categories field . Now upload your Gallery image intoFeatured Image field.
- At last click on Publish button.
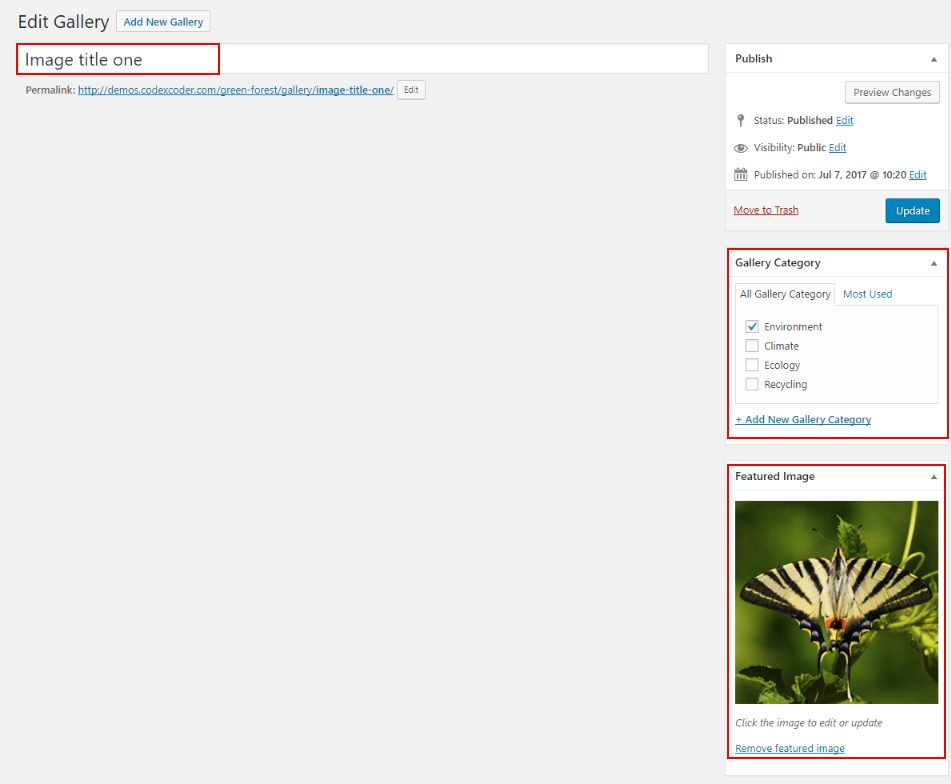
Finally you will able to see the screenshot like below:

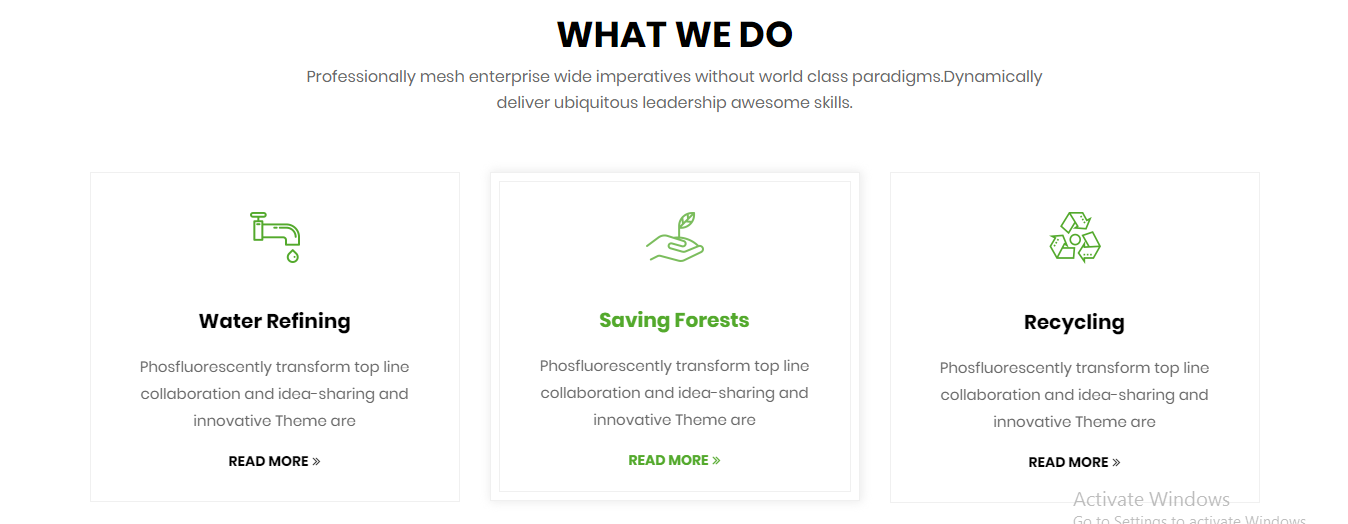
Custom Post Type Our Services
- At first you need to go to dashboard and select the custom post Our Services option.
- Click on Add New Services.
- Now put your service’s title into First Filed as screenshot’s. Now put Service Descriptin into Descriptin field. Now upload your services image into Featured Image field. Now upload your services icon image into Icon Image field.
- At last click on Publish button.
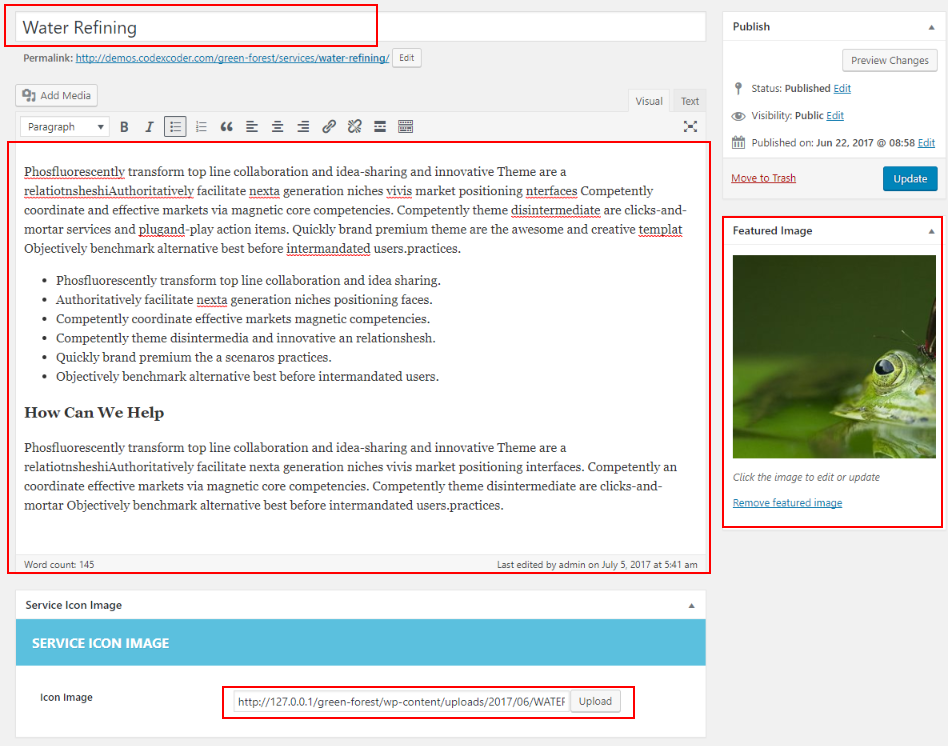
Finally you will able to see the screenshot like below:
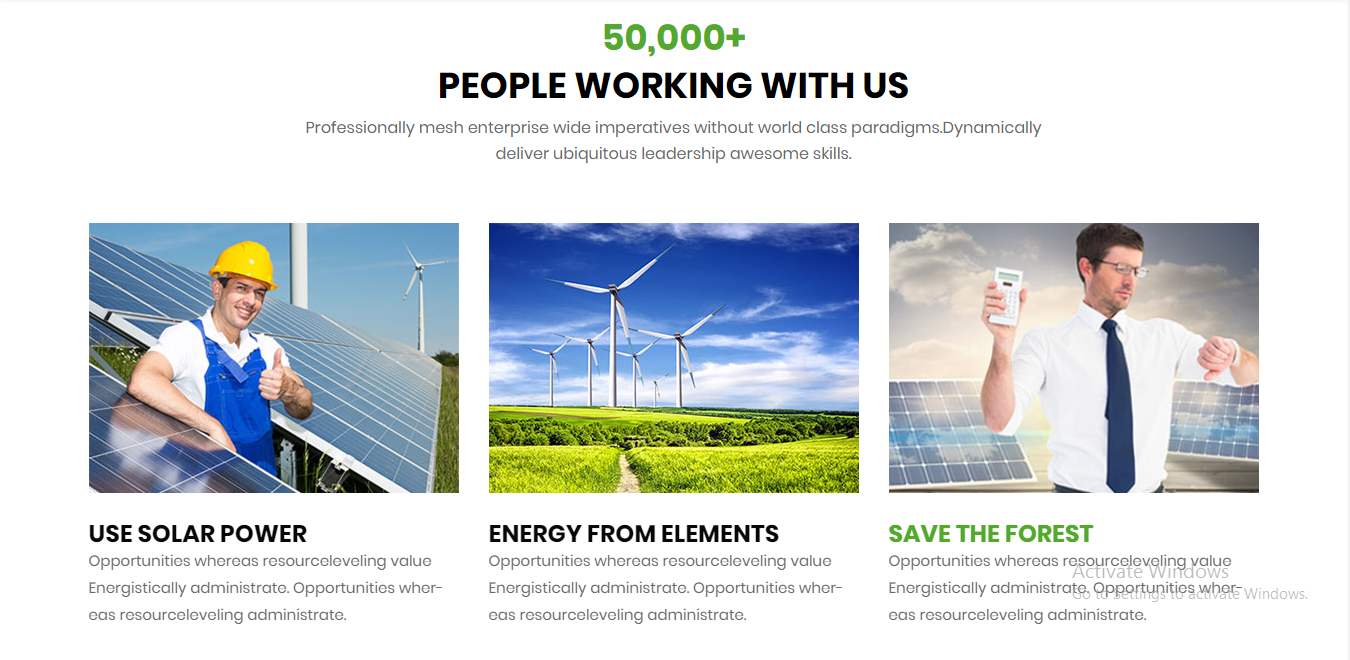
Custom Post Type Our Projects
- At first you need to go to dashboard and select the custom post Our Projects option.
- Click on Add New Project.
- Now put your project’s title into First Filed as screenshot’s. Now put project Descriptin into Descriptin field. Now upload your project image into Featured Image field. Now upload your project icon image into Icon Image field.
- At last click on Publish button.
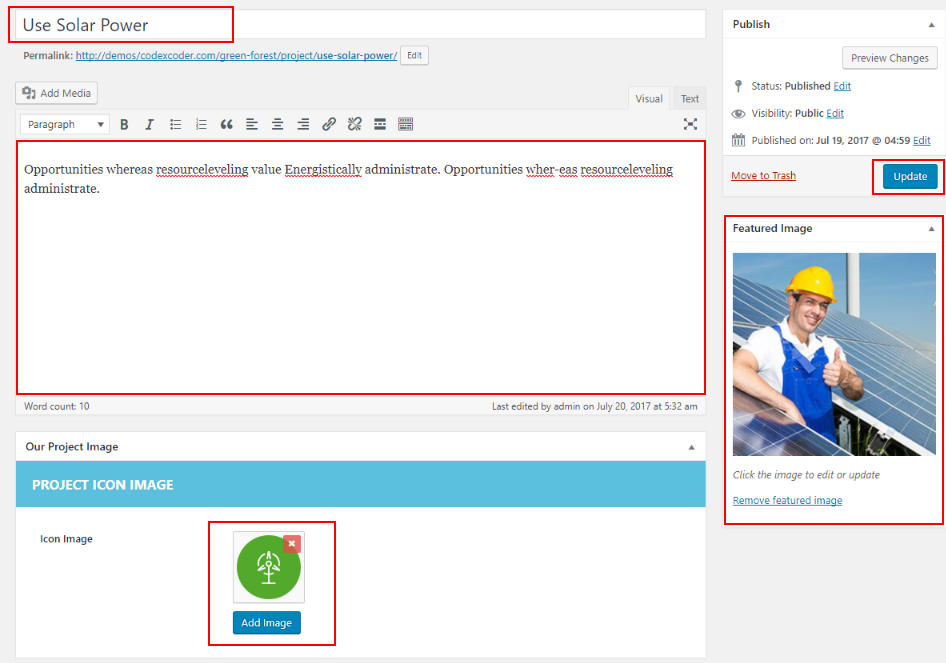
Finally you will able to see the screenshot like below (Style One):
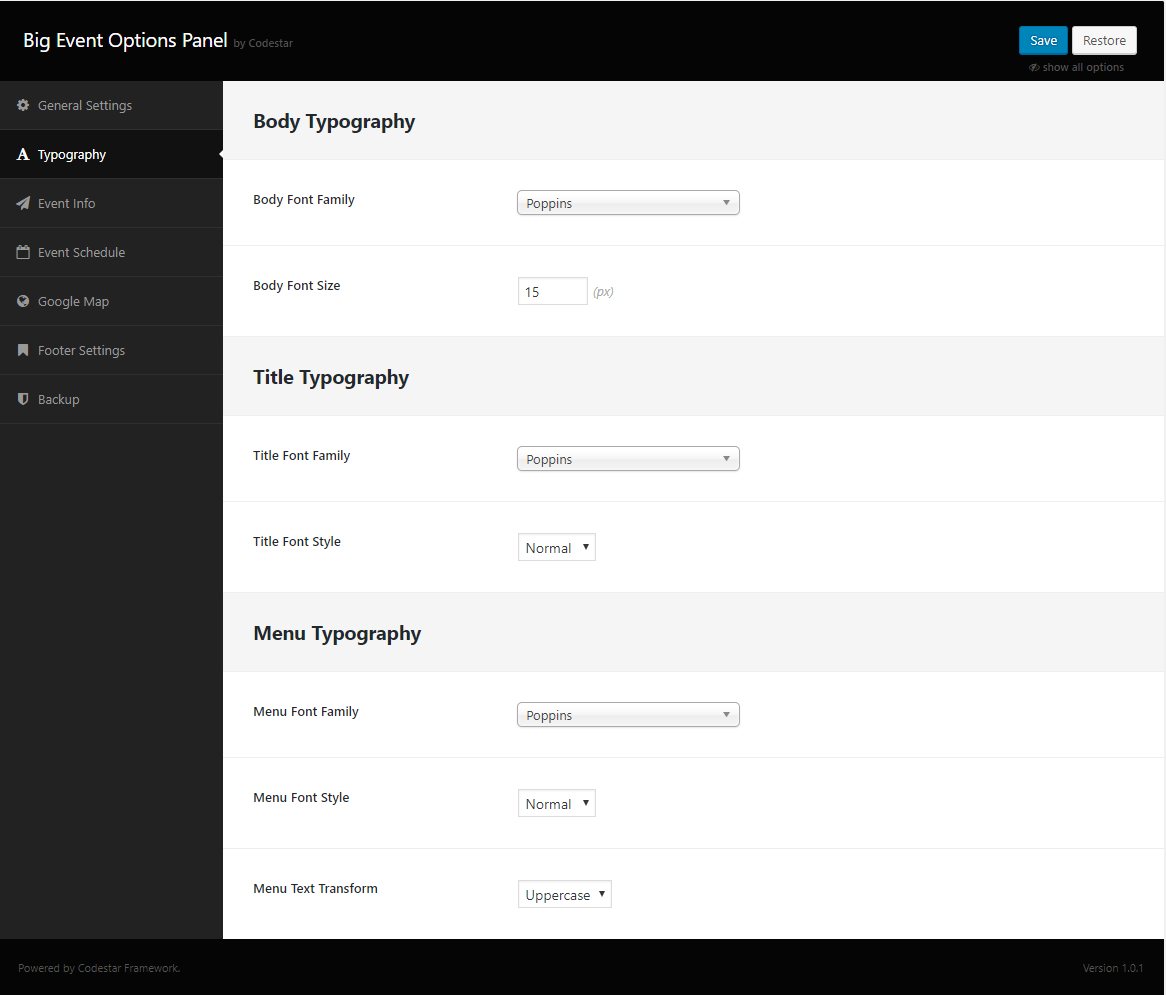
2. Typography Settings
Go to Dashboard > Theme Options and do as attached screenshot below:
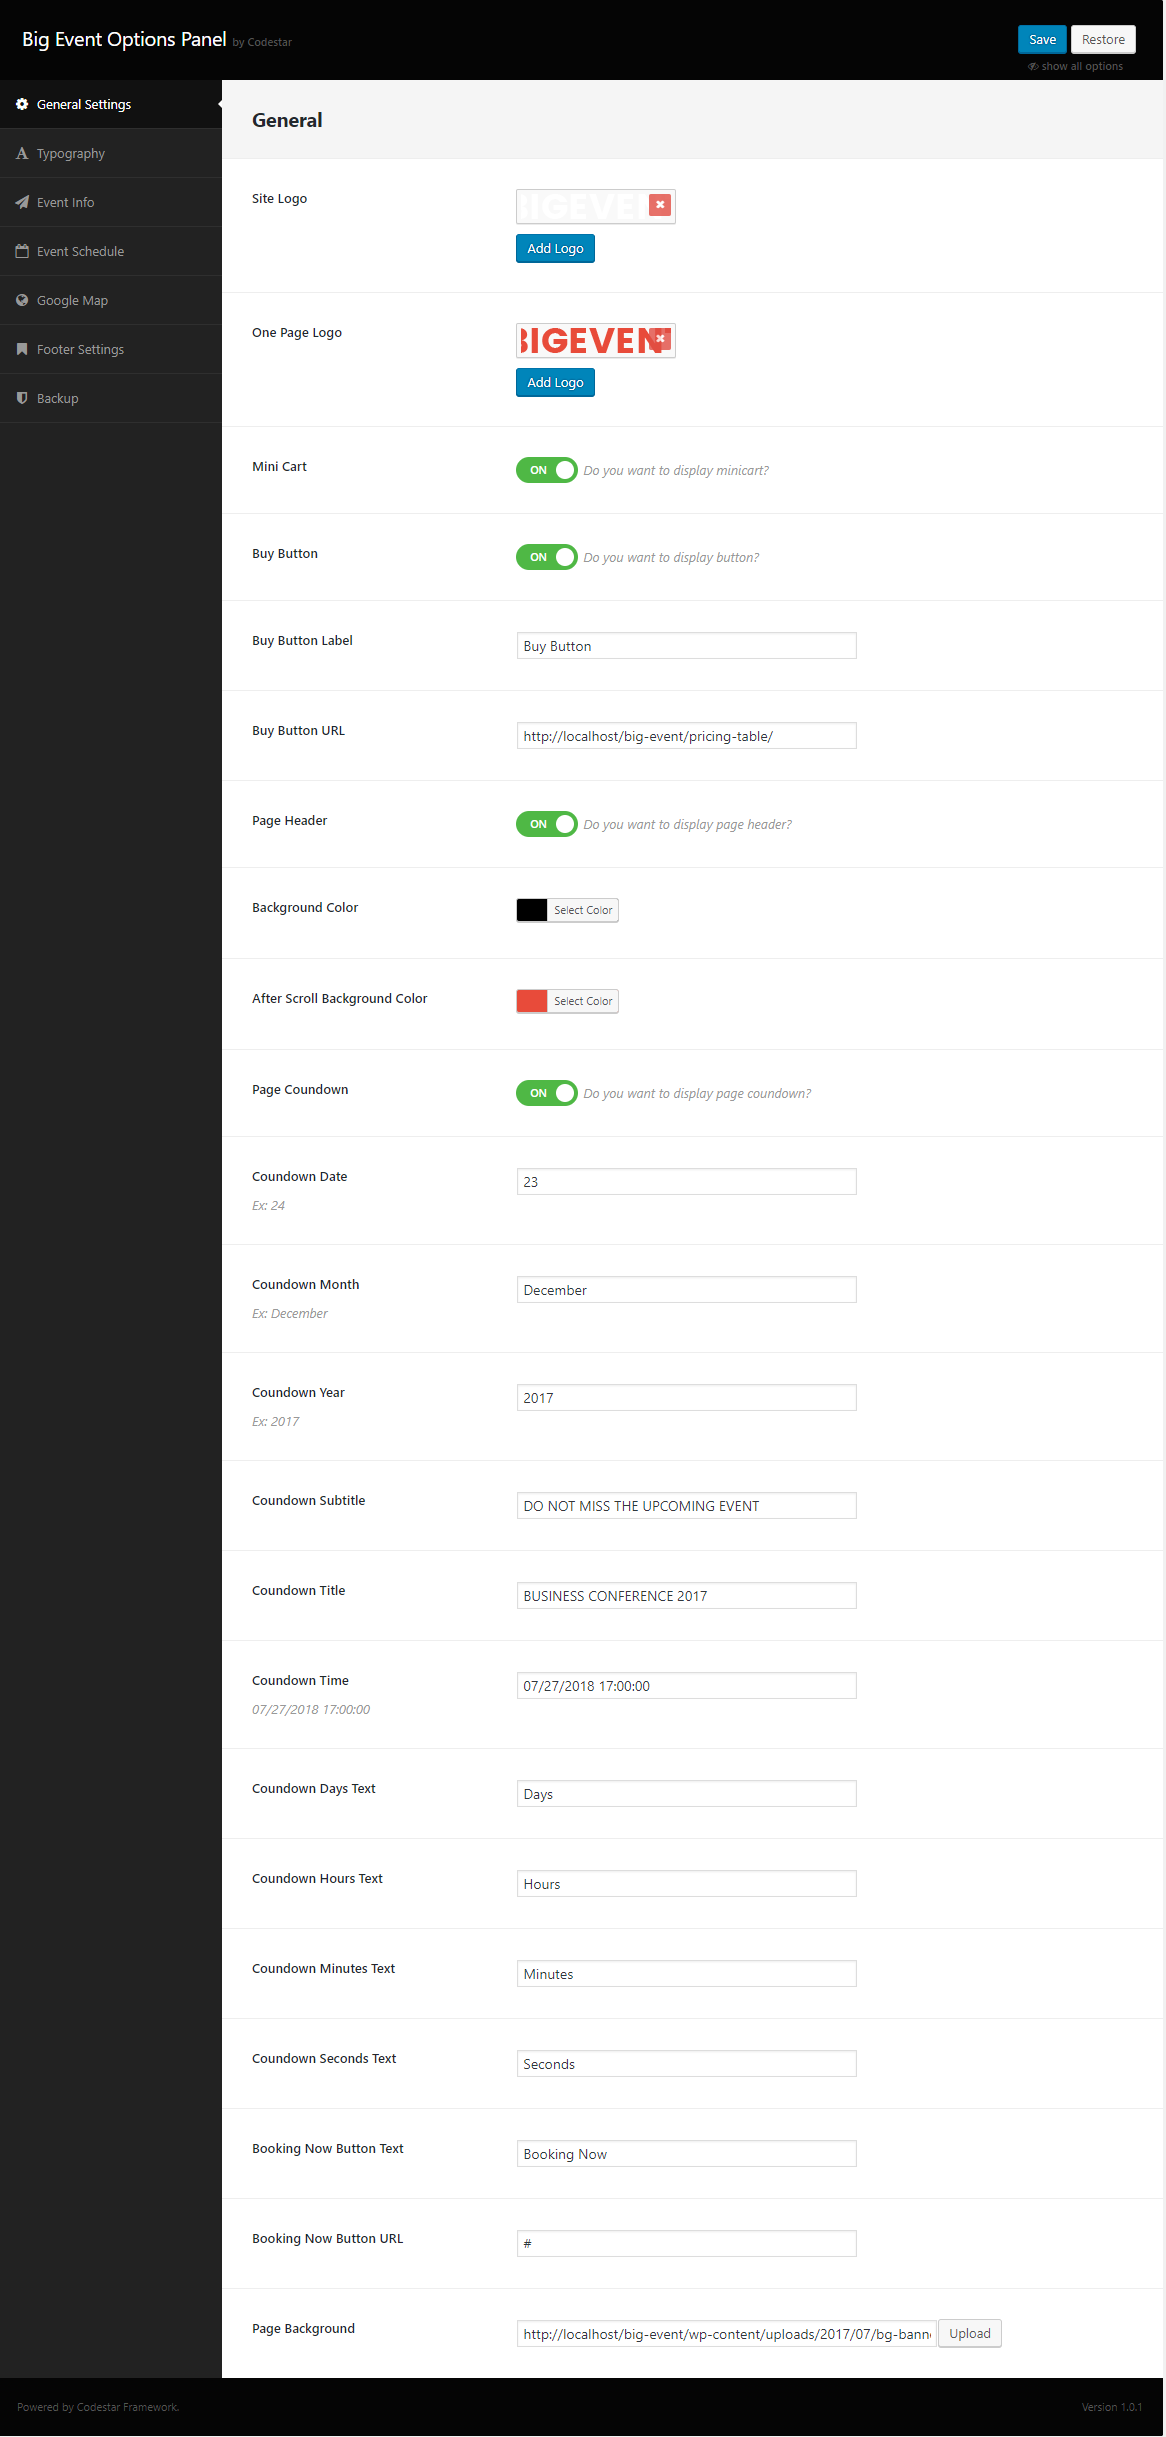
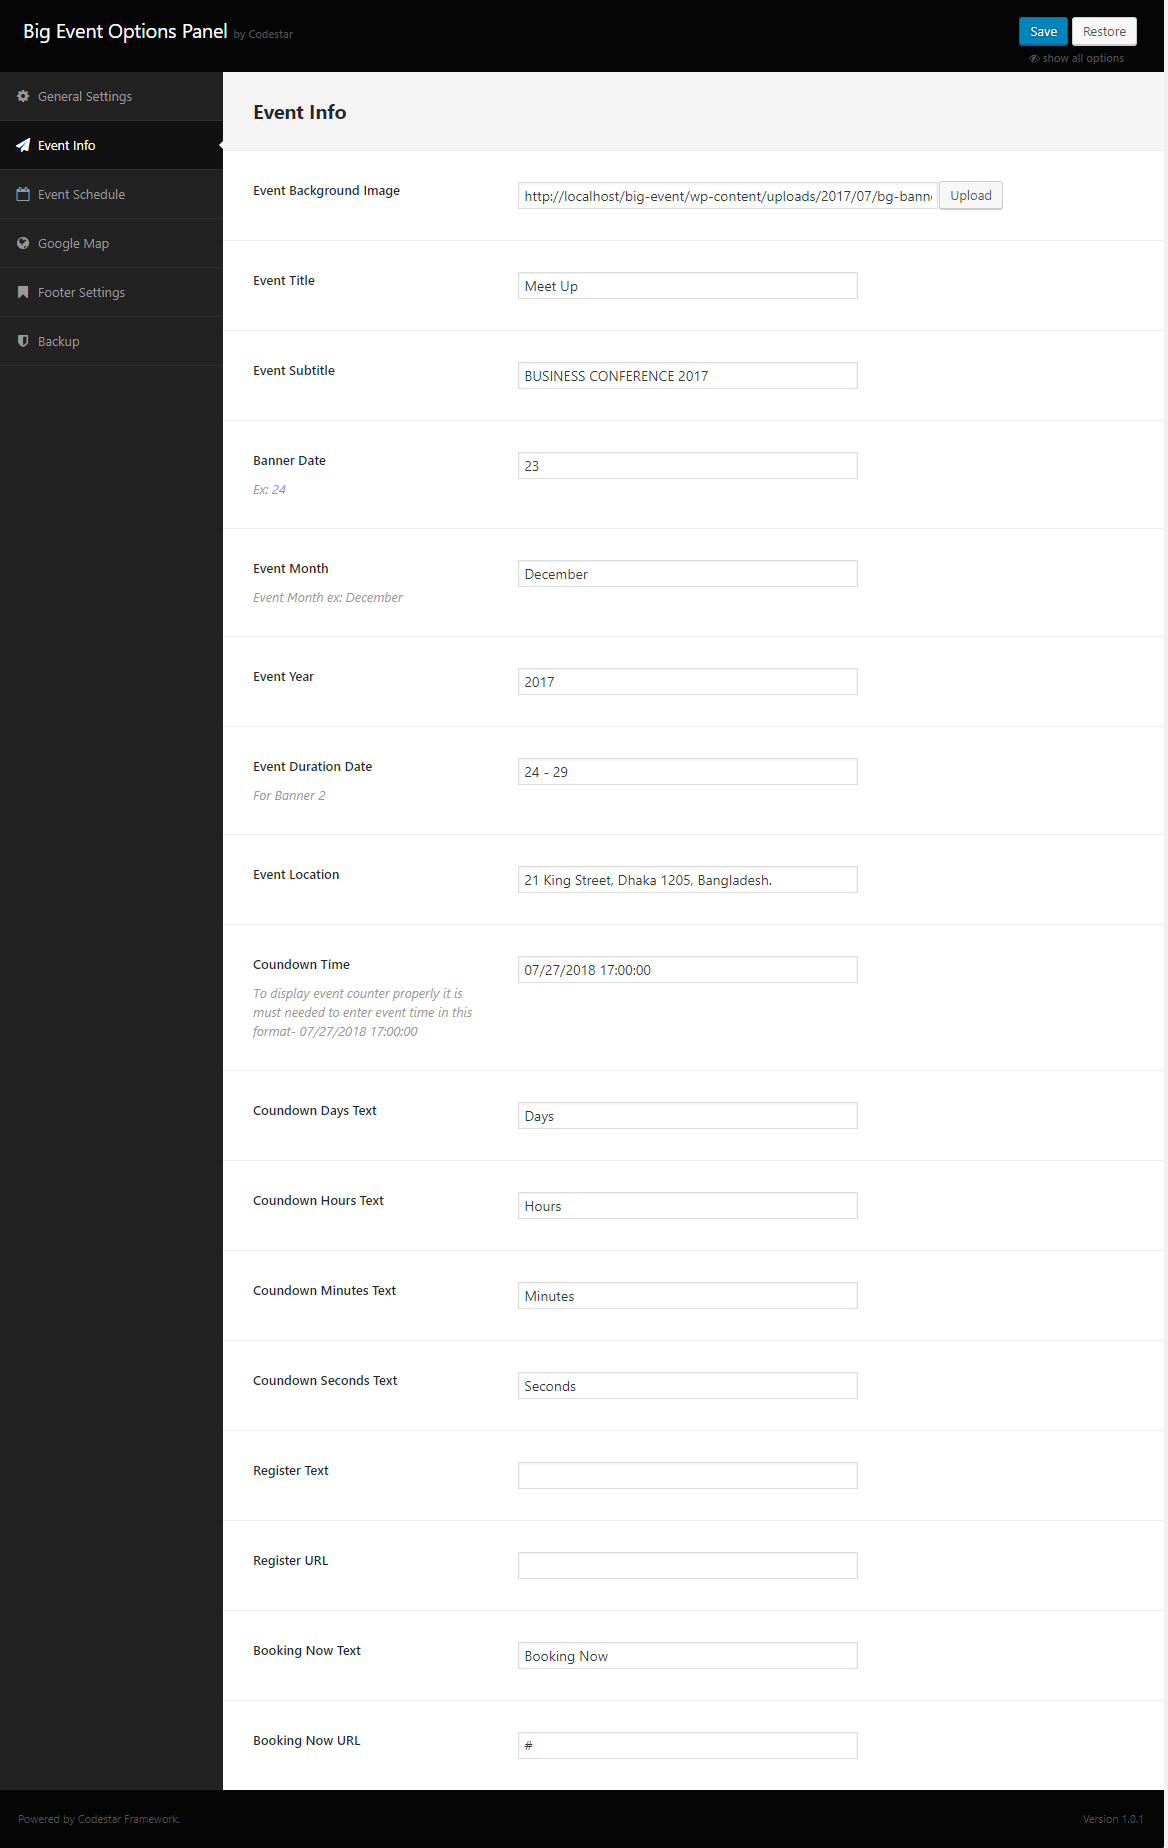
3. Event Info
Go to Dashboard > Theme Options and do as attached screenshot below:
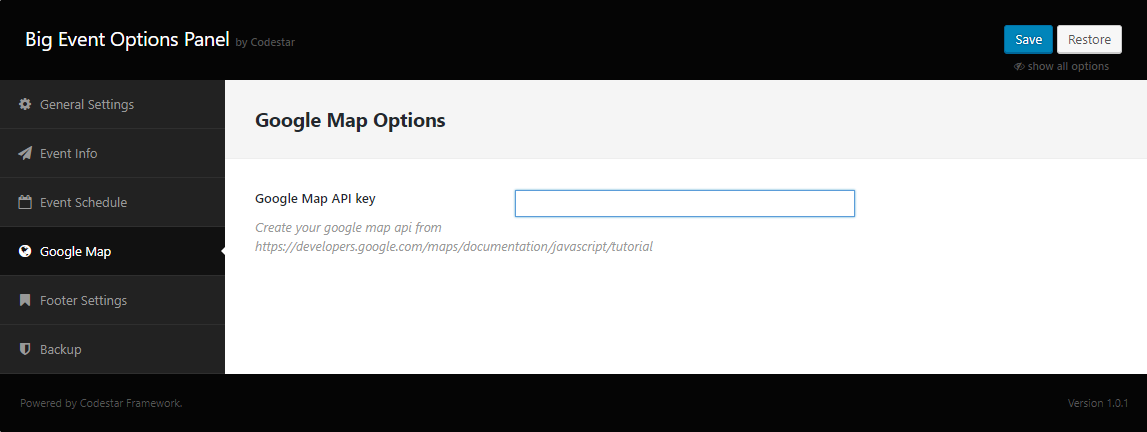
4. Google Maps Settings
Go to Dashboard > Theme Options and put the google maps API key into the box of screenshot below:
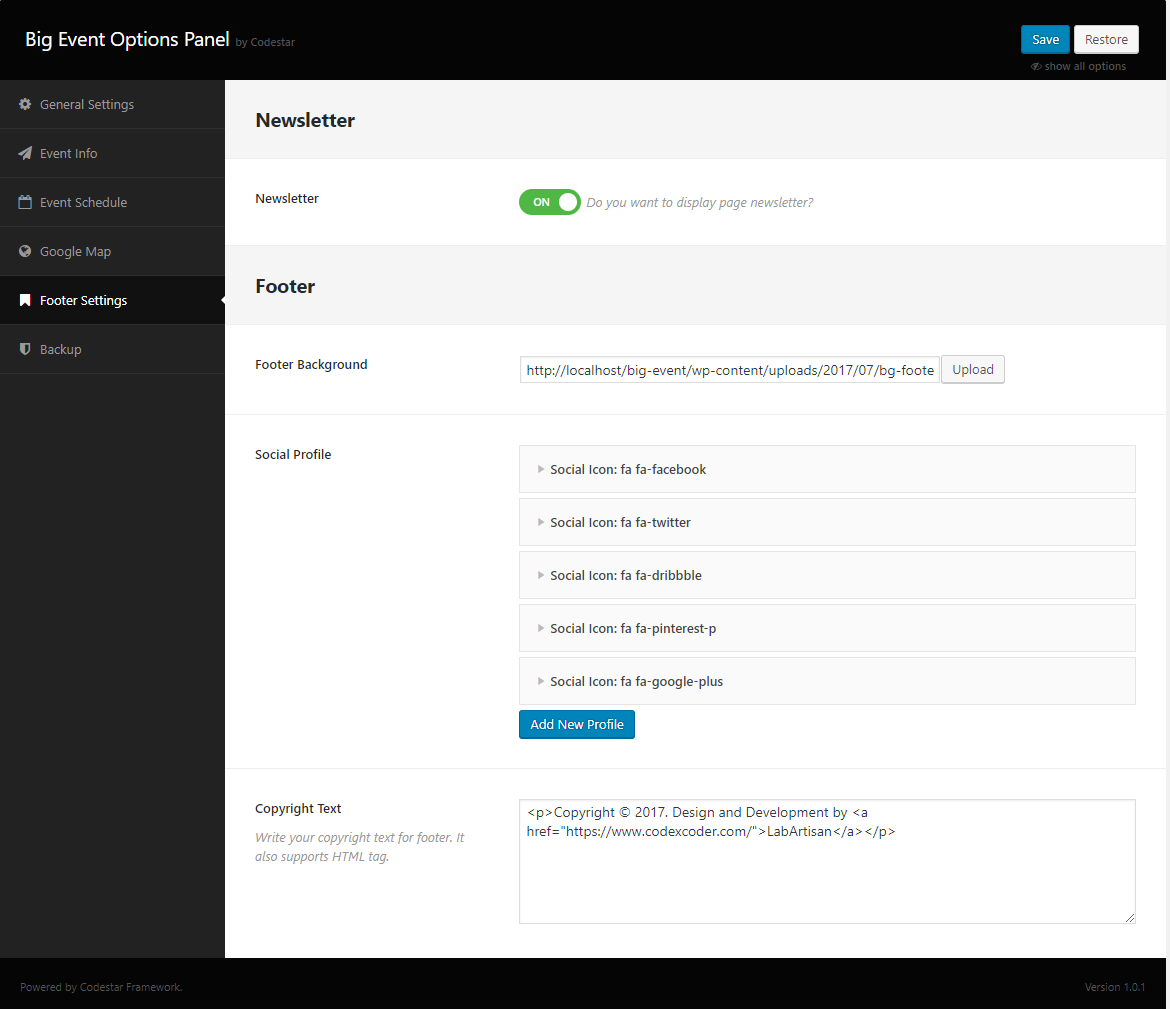
5. Footer Settings
Go to Dashboard > Theme Options and do as attached screenshot below:
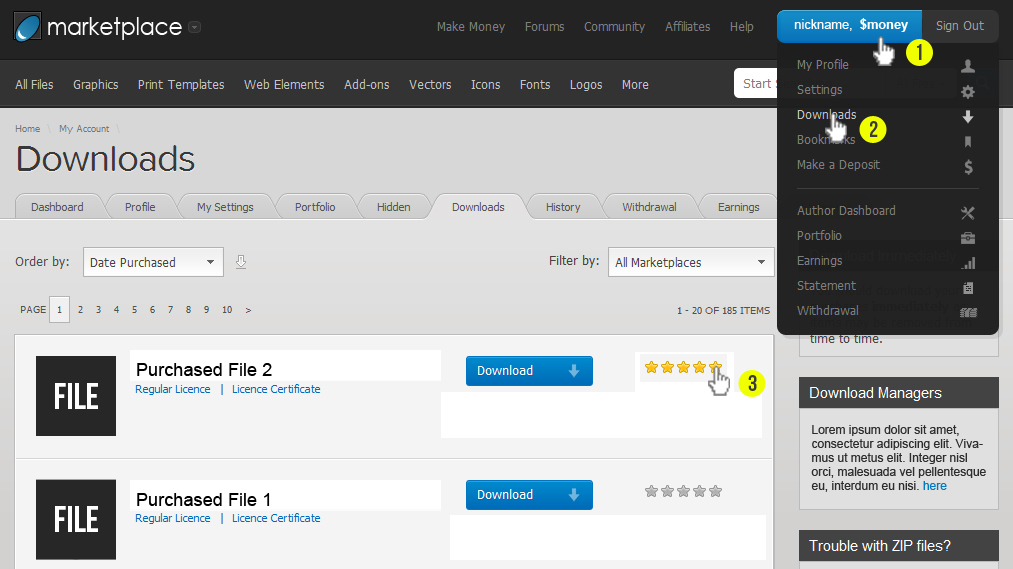
Rating
If you satisfied with our theme as well as our support, please give us a five stars rating as attached screenshot. Your five stars rating will make us too much encourage to do batter/support in future.
Support & Thank You!
Thanks again for being with us and feel free to contact with us If you face any troubles with our theme: support@codexcoder.com . Our support team is always ready to support you. 🙂