Thank you very much to purchase a premium theme of us. Feel Free to contact with us for any issue. You can write us here: support@codexcoder.com
Top-News
A Beautiful, Professional and News, Publishing, Newspaper, Magazine, Sports Magazine, Fashion Magazine, Technology Magazine, Health Magazine, Video Magazine and blog Theme site with clean, modern, user friendly, fast-loading, customizable, flexible, and functional WordPress theme.
- By: CodexCoder
- Email: support@codexcoder.com
Top-News Theme is a fully responsive WordPress theme suitable for News, Publishing, Newspaper, Magazine, Sports Magazine, Fashion Magazine, Technology Magazine, Health Magazine, Video Magazine and blog Theme's site with clean, modern, user friendly, fast-loading, customizable, flexible, and functional WordPress theme. It uses the best clean SEO practices, overall it's fast, simple, and easy to use. In addition, Top-News supports responsive Google Ads and AdSense. We offer a strong support and friendly help 24/7.
First Steps
- Documentation - That's where you
- Sample Data - Demon content and theme setting json for complate setup.
- Upload - This is where all Theme files are (zipped & unzipped format)
Theme Installation
- Log into your WordPress backend
- Navigate to Appearance > Themes
- Click Install Themes/Add Themes
- Click Upload/Upload Themes
- Now you just need to find the "top-news.zip" in the Upload folder and hit Install now.
- After Installed then click Active Now
See video about Uploading.
Theme Install From FTP
- Login to your FTP account and navigate to your WordPress Installation directory
- Navigate to the folder /wp-content/themes
- Upload the "TopNews" folder (not the .zip-file). This is the folder located inside the "Upload" folder in the zip-file you've downloaded from CodexCoder.
- Now log into your WordPress backend
- Navigate to Appearance > Themes
- Find the Theme and click Activate
Install & Setup Plugins
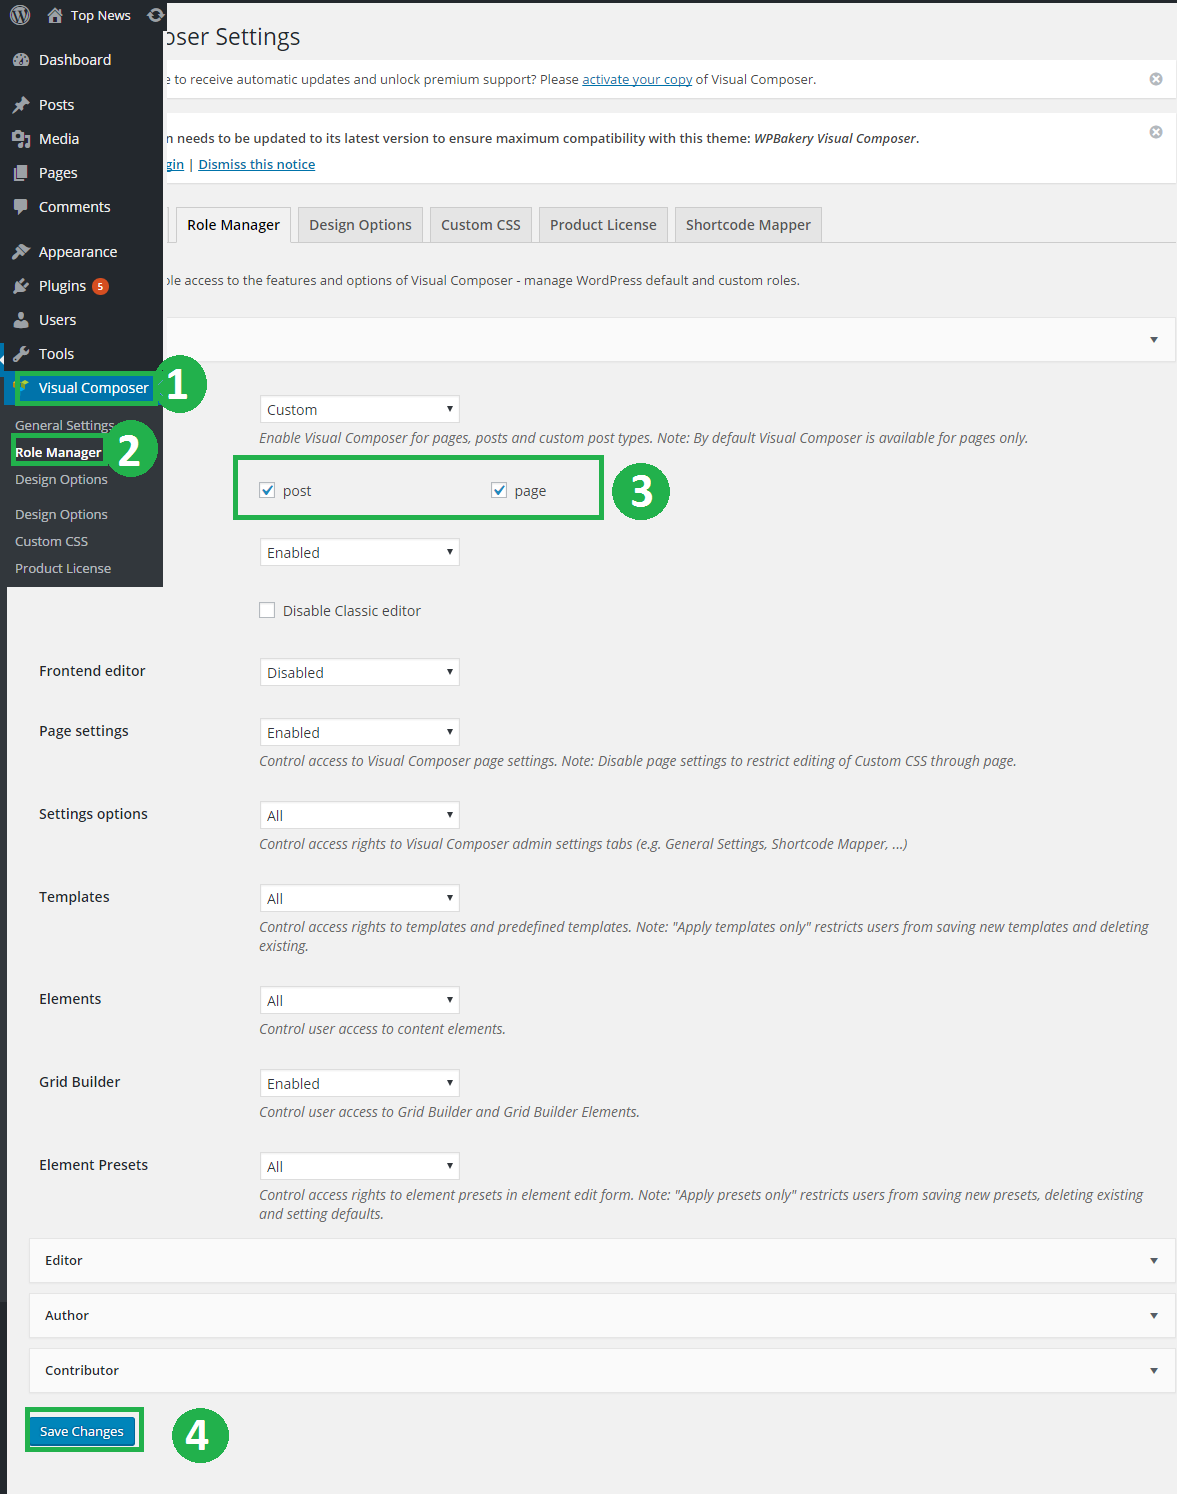
So at this stage you have probably noticed a warning, asking you to install recommended plugins. This is needed to get the Visual Composer. Installing that is very simple, you just need to click Begin installing plugins and you will be redirected to the plugin installation page where you can install Plugins.
See this image
You can install your all plugins following the instruction which we show below:
1. Go to Dashboard and click on Plugins .
2. Then click on Add New .
3. Type your plugins name into searchbox, Example: WP User Avatar .
4. Click on Install Now .
N.B. For WP User Avatar plugins: Click Here
![]()
- Go to dashboard and click on Users.
- Click on Add new .
- Fill all input field.
- Click on Add New users .
![]()
Importing Demo Content
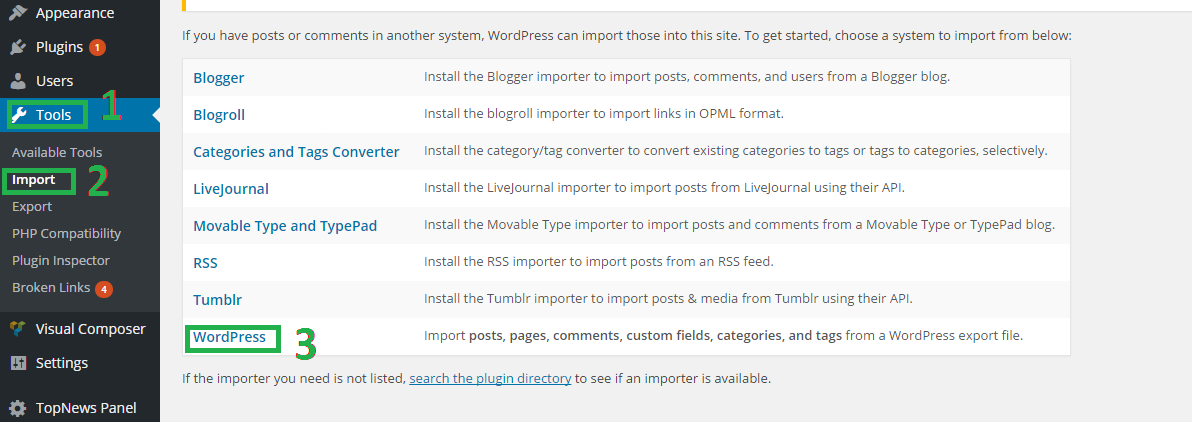
- Go to dashboard and click on Tools.
- Click on Import to begin the import process
- Then click on WordPress (Install) .
- Now click on Run Importer .
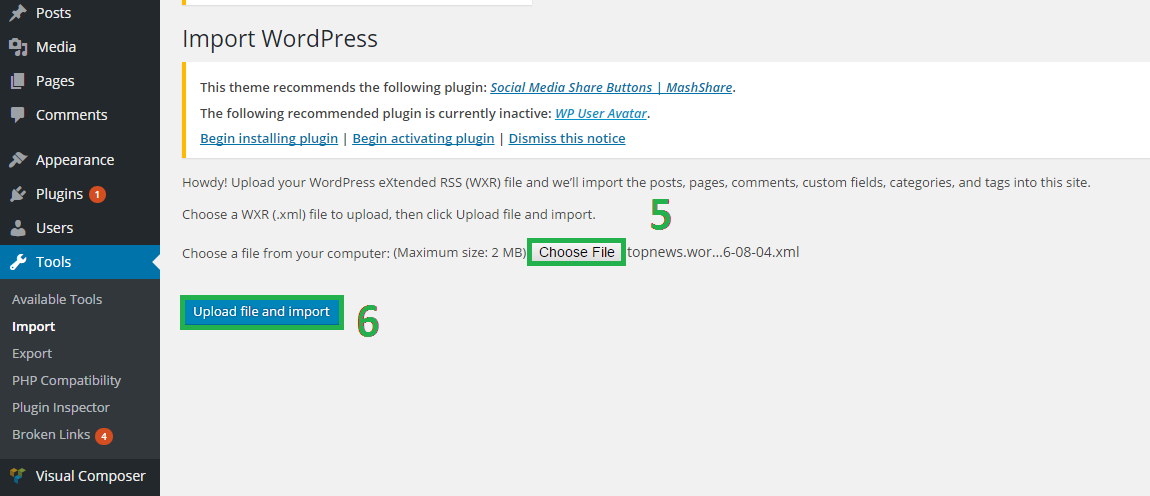
- After clicking on run importer you can able to see the Choose File button. Click on the button and choose your required demo data from Demo Data folder. Choose your expecting demo folder and import xml file.
- Now click on Upload file and import button.
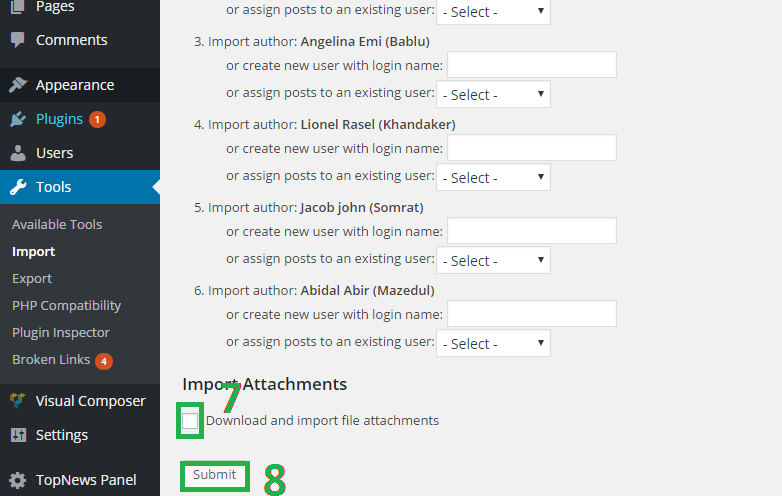
- Now you can see the screenshot below: Now put tick on Import Attachments option.
- And click on Submit button.
- Now you can see the screenshot below: Finally click on Have Fun and go back to your dashboard. Your demo will be imported.


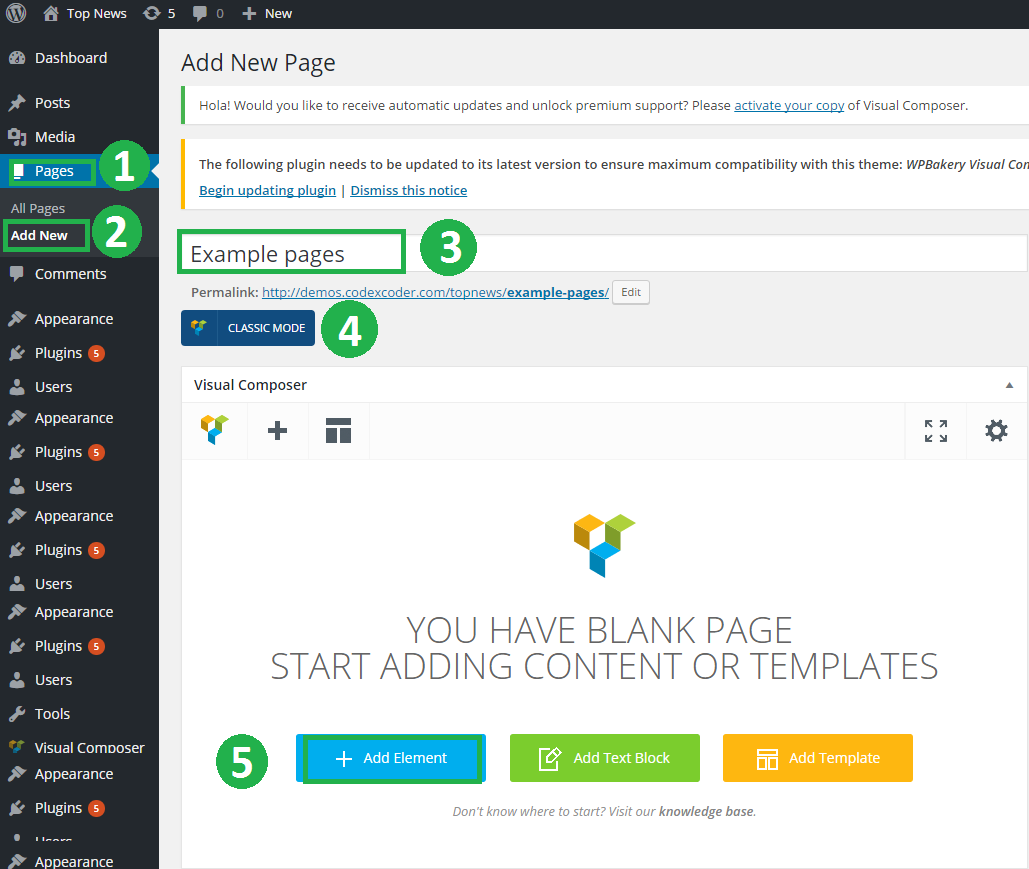
Home Page Setup
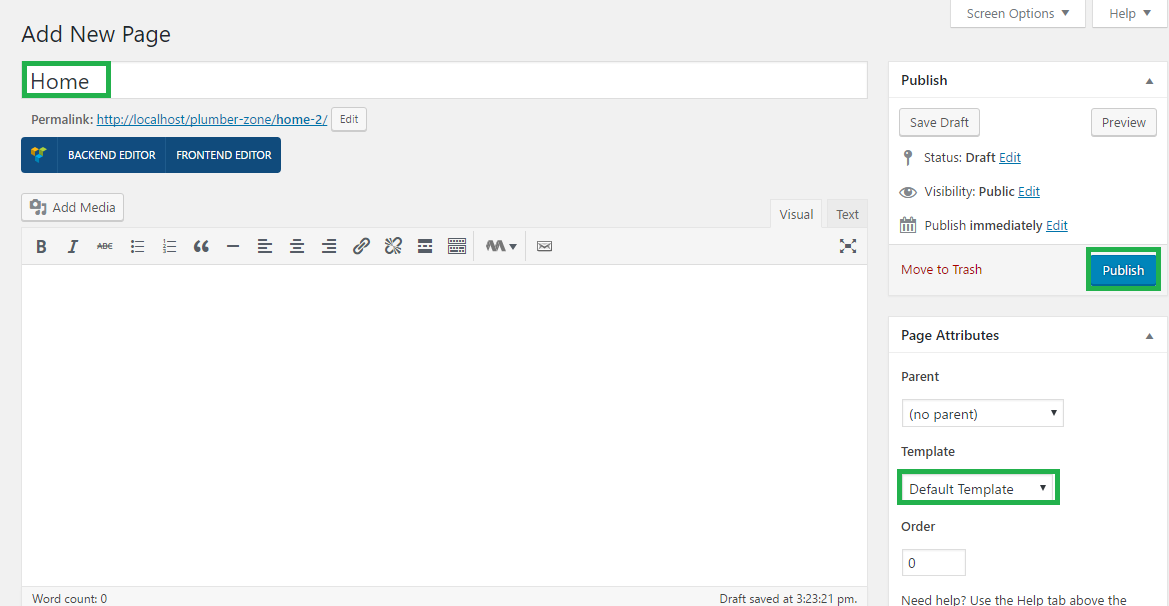
- Go to Dashboard and click on Pages
- Now click on Add new
- Write a title of your page into Title field.
- Now select the Default Template from Template option.
- Now click on Publish button.
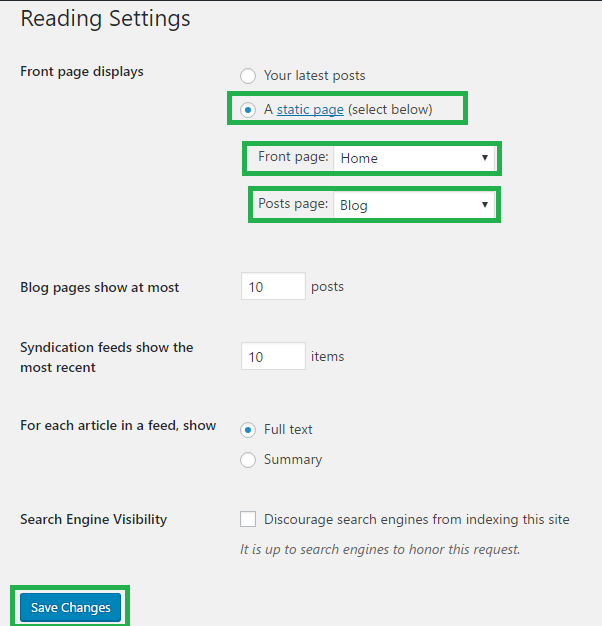
Now go to Dashboard and click on Settings > Reading. Please see the screenshot below and do as it.
Language Translations
All of our Themes are able to be translated into any language. The process of translating the theme is a user responsibility. The following instructions are given as guidance.
- Open wp-config.php and replace this:
define ('WPLANG', '');with this (subsitute the language string (bg_BG) with your own!):define ('WPLANG', 'bg_BG'); - Download and install POEDIT
- Connect to your site -> open your theme/languages directory
- Download the default.po file and open it with POEDIT.
- Translate file and save it as bg_BG (the file name must match with the string you inserted into wp-config.php)
- Two files will be generated after save. bg_BG.po and bg_BG.mo
- Upload the .mo and .po files into wp-content/themes/your-theme/languages folder
Important info, regarding translation in WordPress.
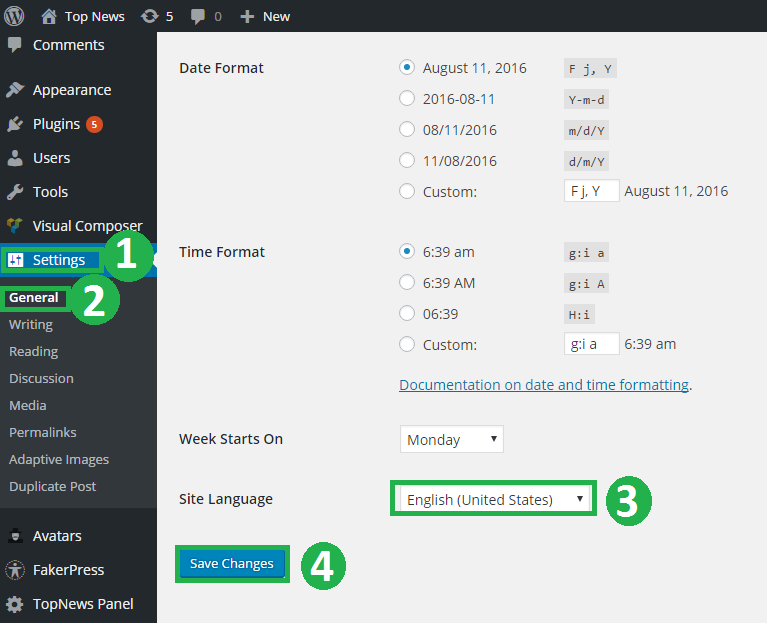
- Go to (WordPress Dashboard > Settings > General)
- Select your website langauge as shown in this screenshot:
Theme Navigation
Primary Menus
- Click on Appearence
- Click on Menus
- Click on create a new menu(Primary Menu)
- Write your menu name. Example: Main Menu.
- Click on Create Menu.
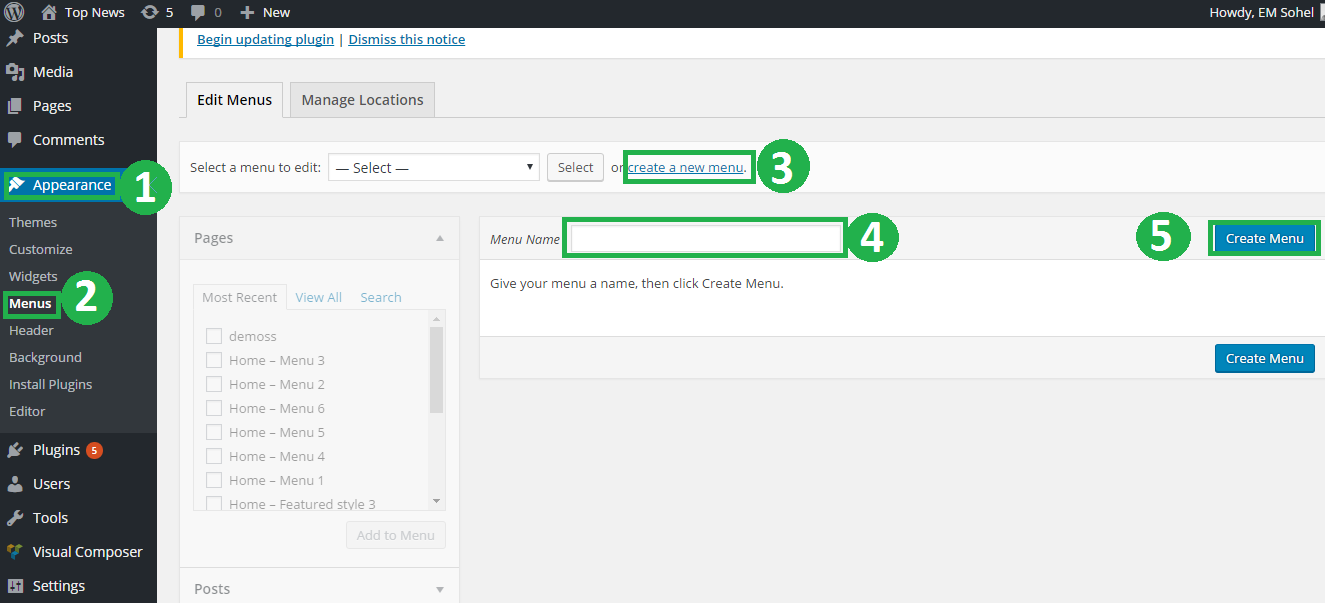
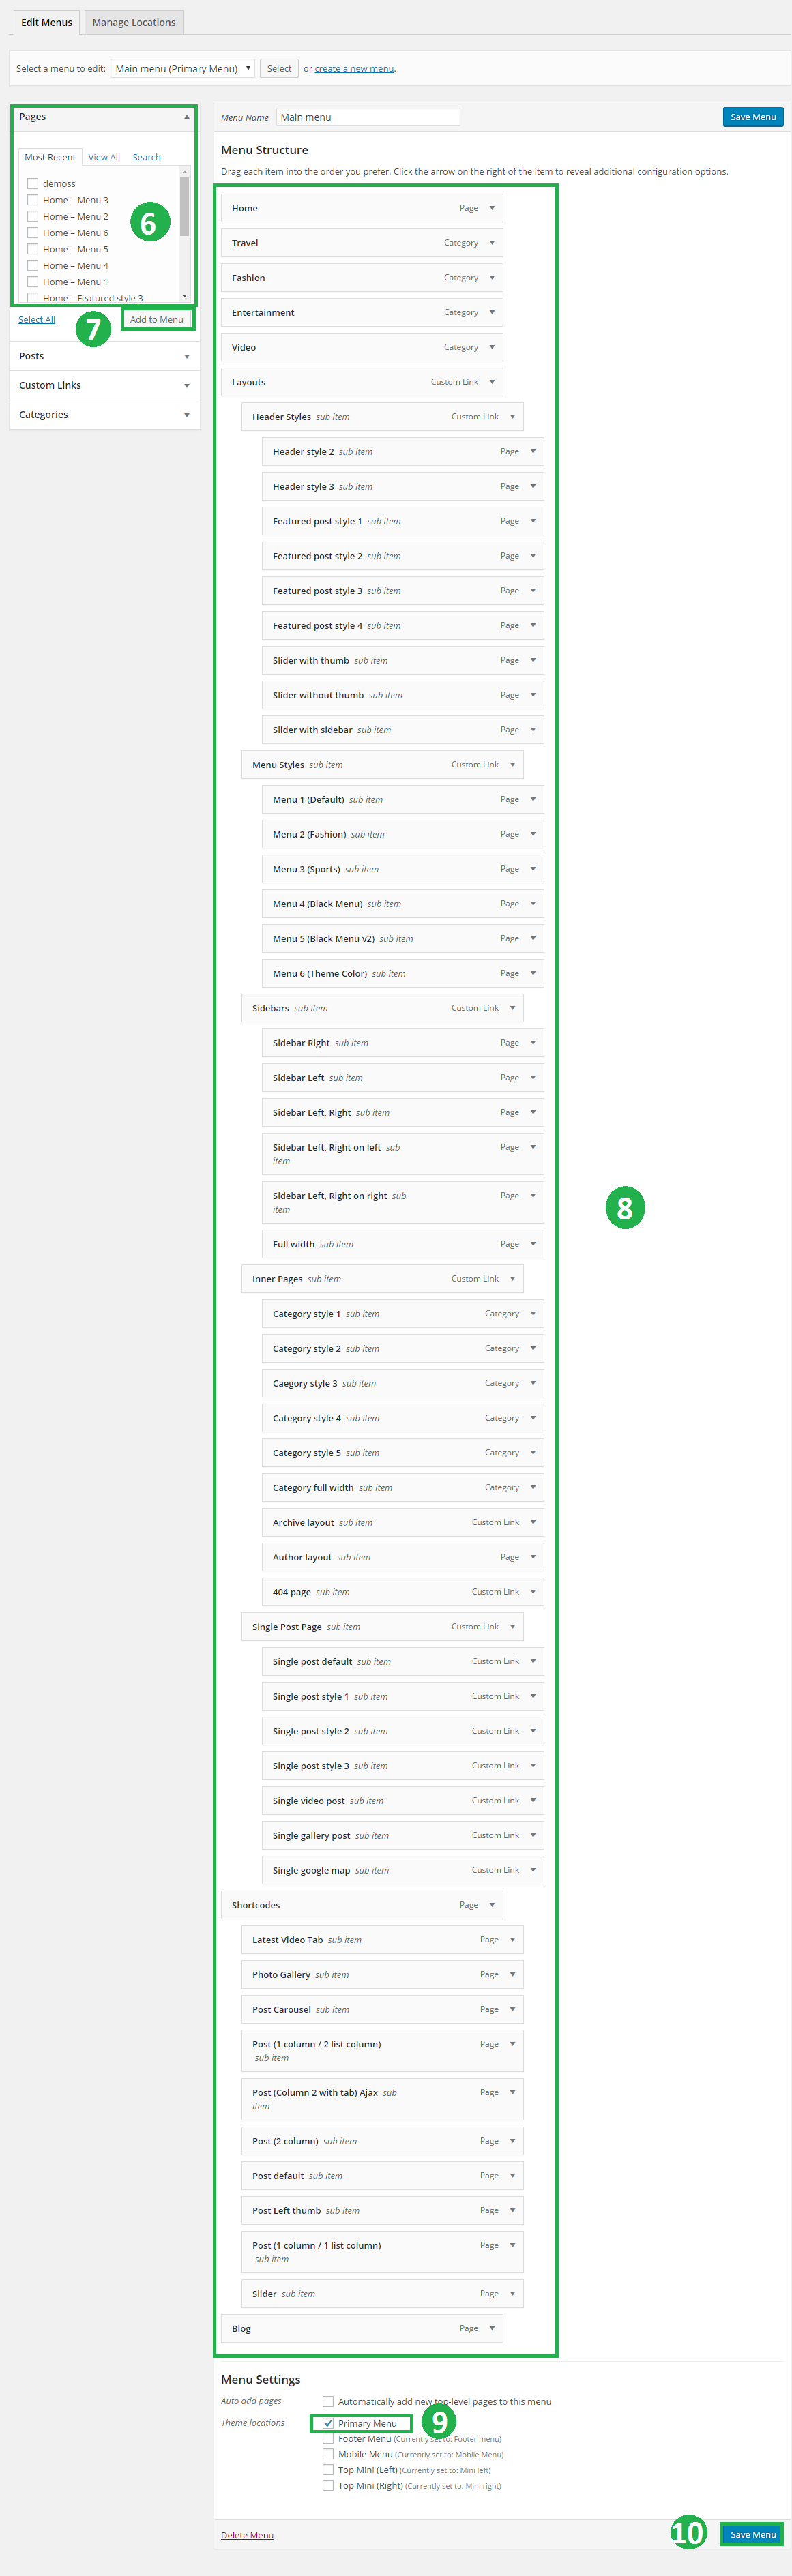
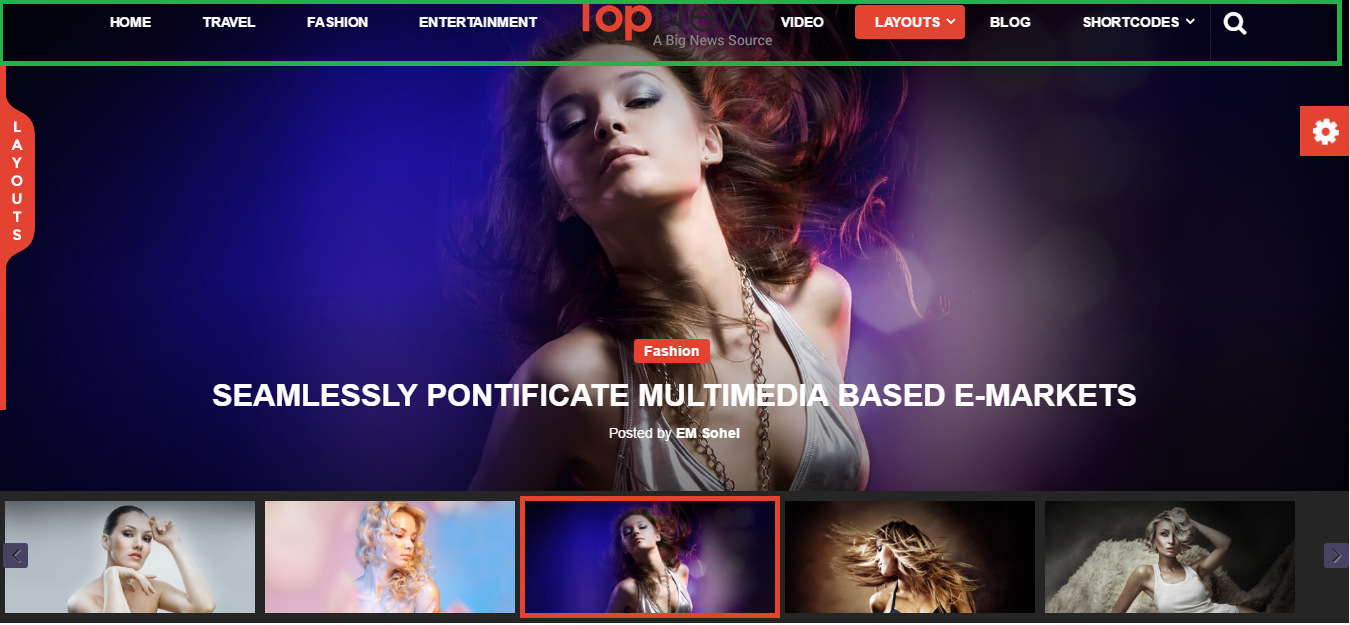
See the result below:
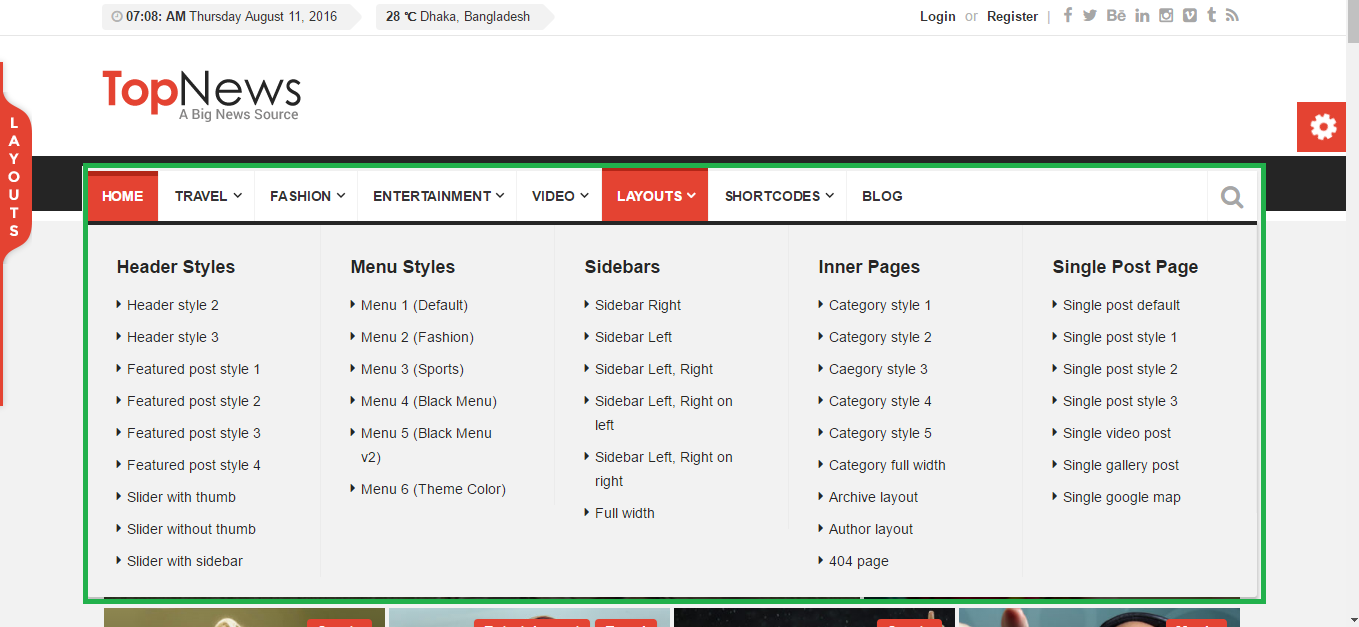
Now you can see all the menu style variation of this theme below:
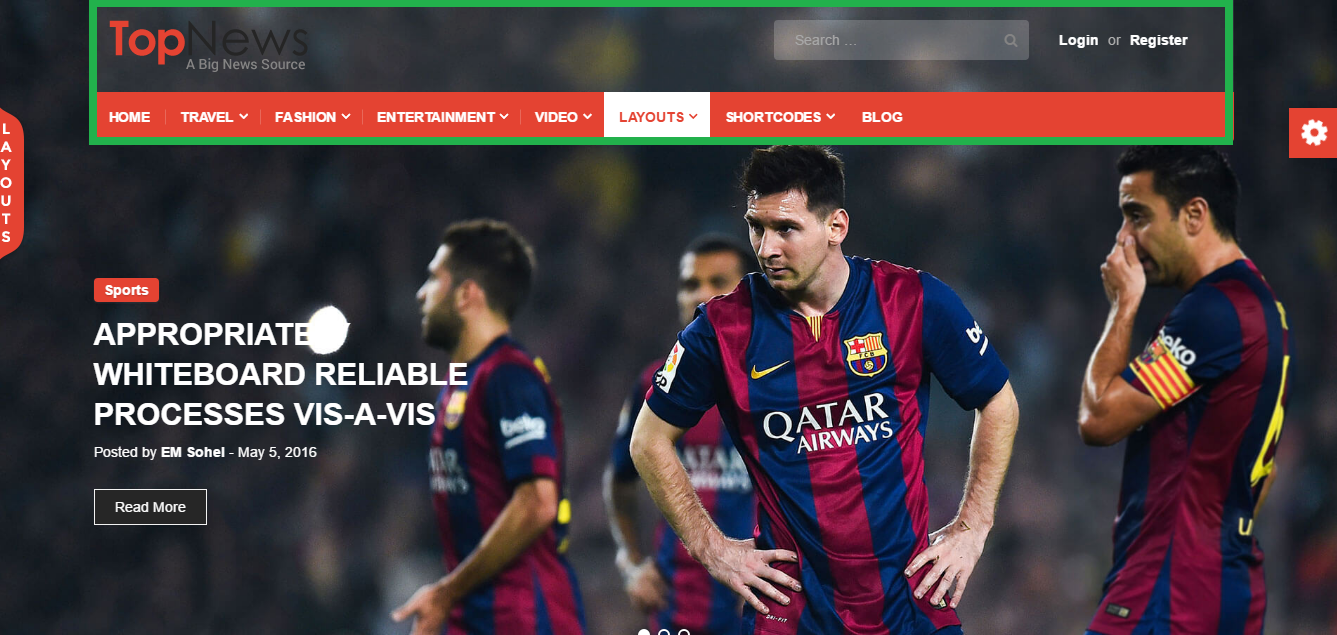
If you choose the Menu 1 (Default), you can see the result below:

If you choose the Menu 2 (Fashion), you can see the result below:
If you choose the Menu 3 (Sports), you can see the result below:
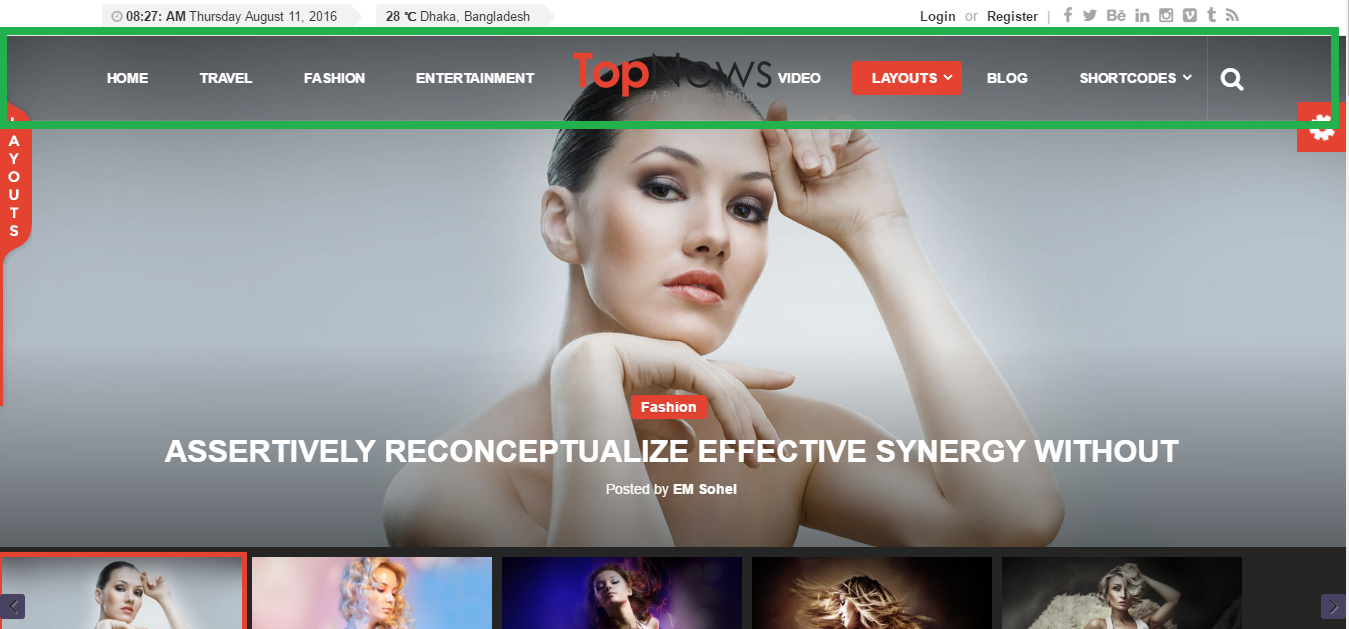
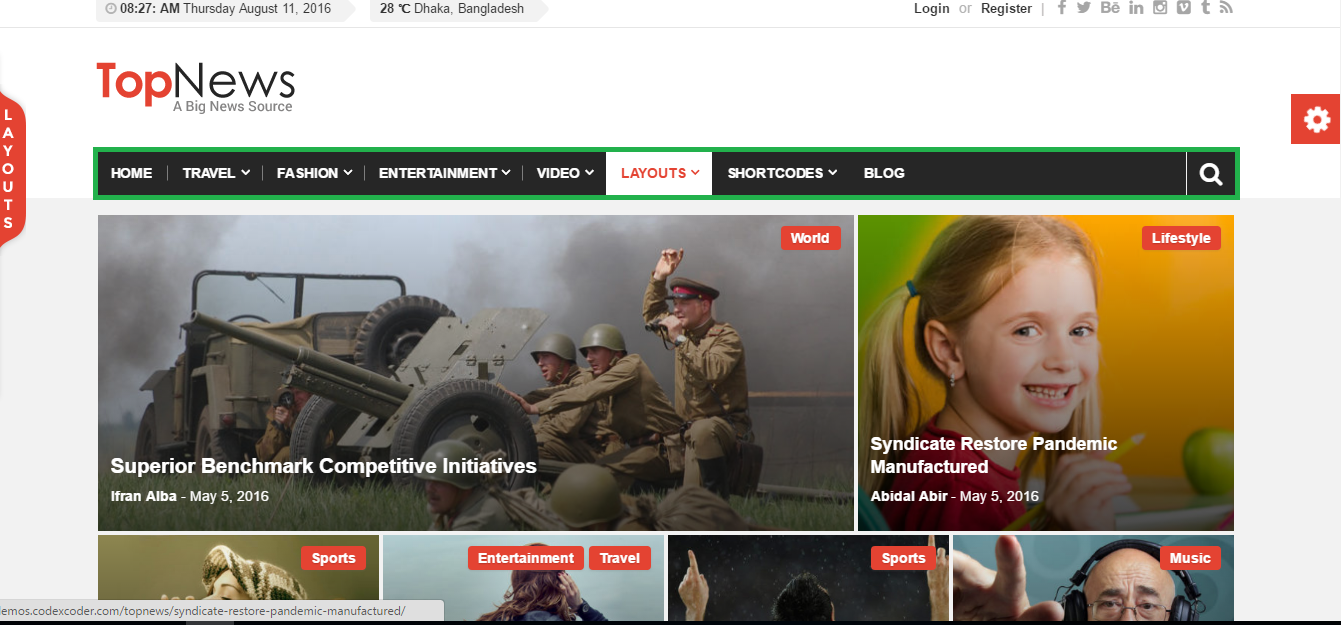
If you choose the Menu 4 (Black Menu), you can see the result below:
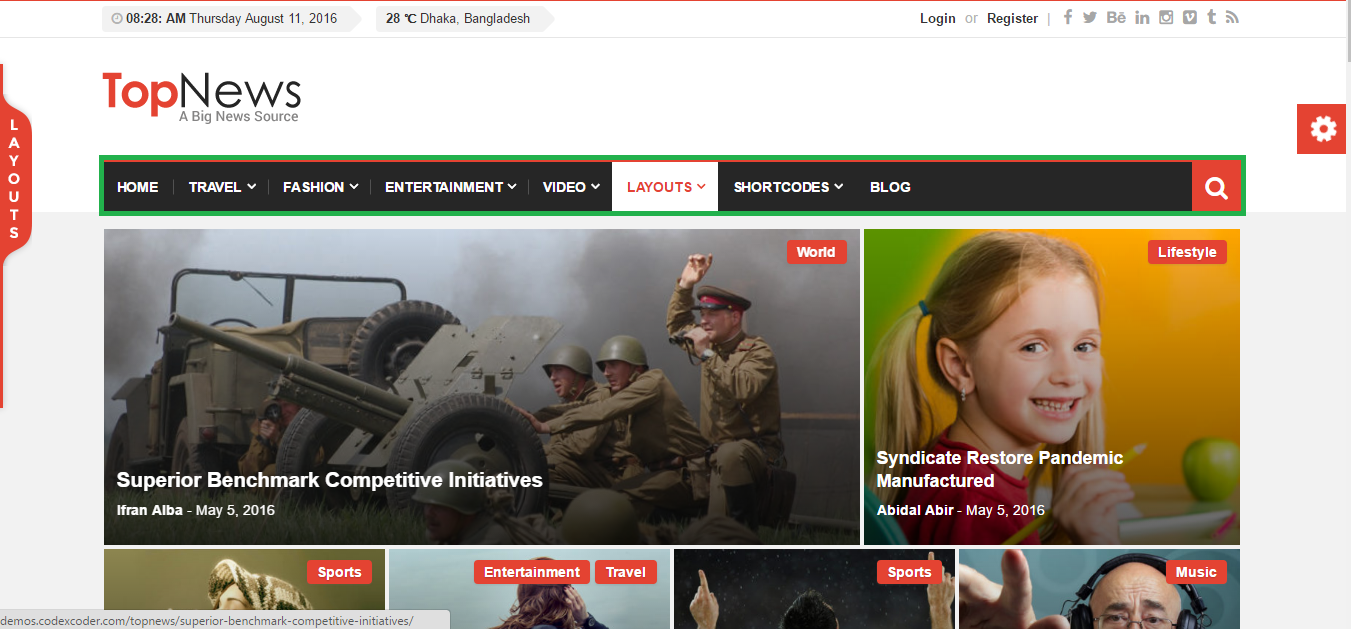
If you choose the Menu 5 (Black Menu v2), you can see the result below:
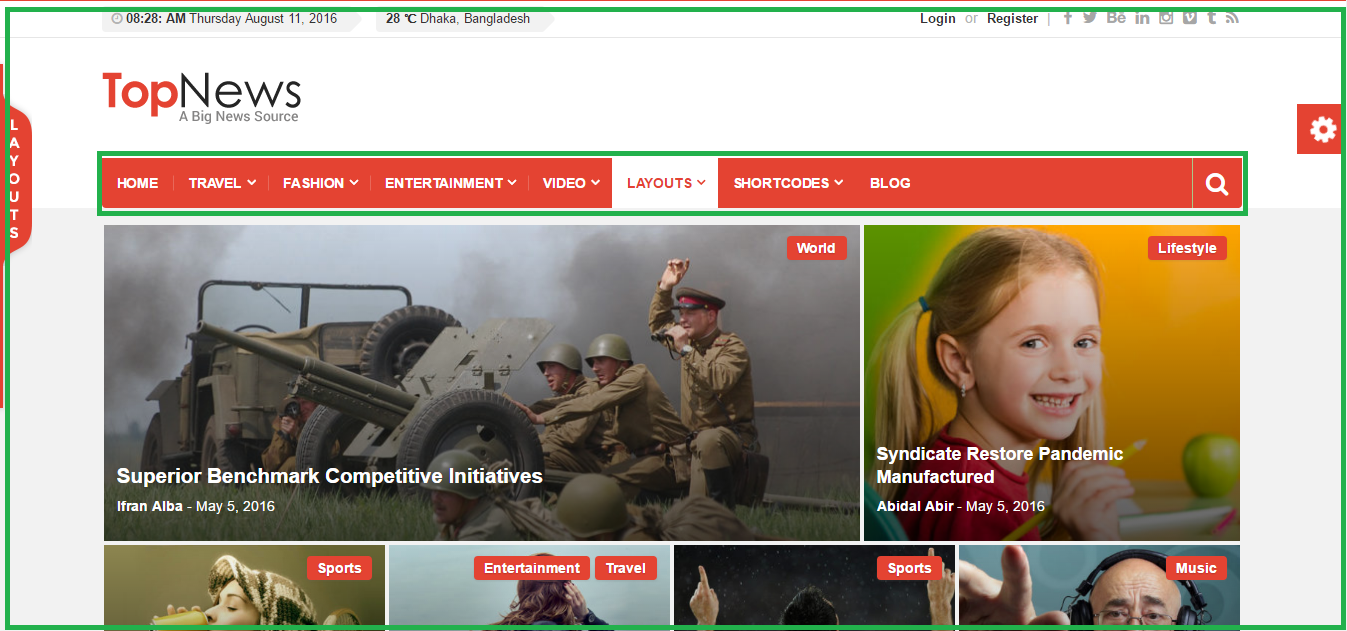
If you choose the Menu 6 (Theme Menu), you can see the result below:
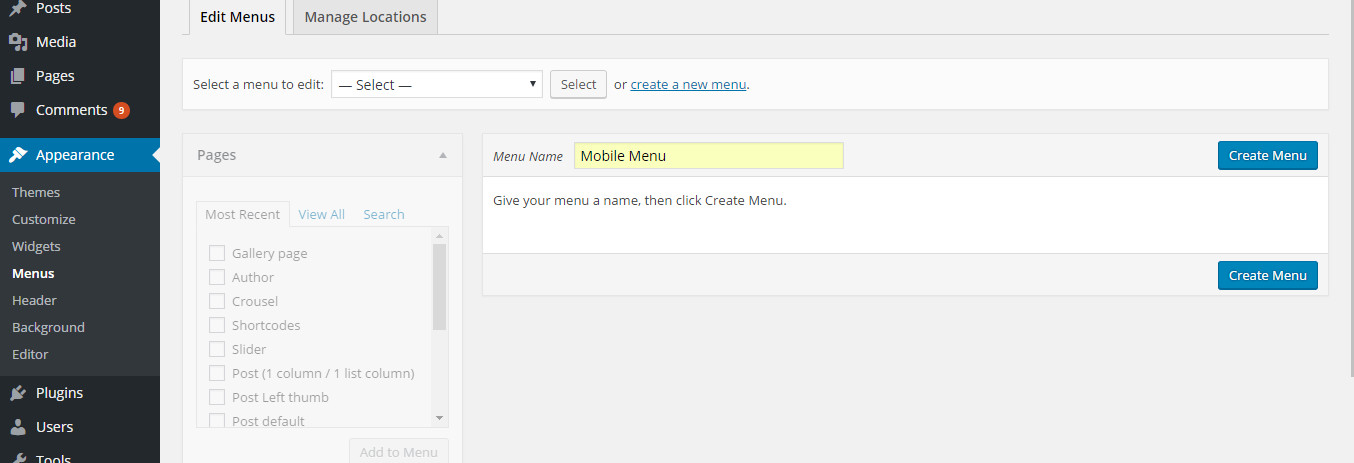
Mobile Menus
- For your Mobile menu first you click on Appearence
- Then click on create a new menu(Mobile Menu)
- Select your expecting page or.
- Select your expecting link or select category post.
- Now your can decorate your footer menu by drugging with your cursor pointer up > down.
- Finally save your moblie menu.

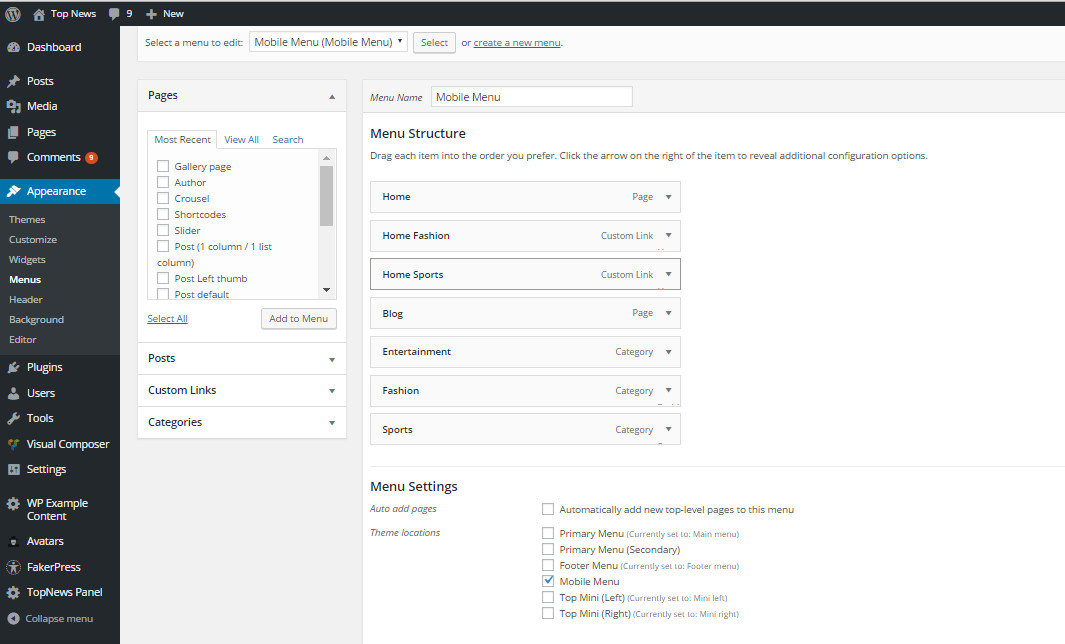
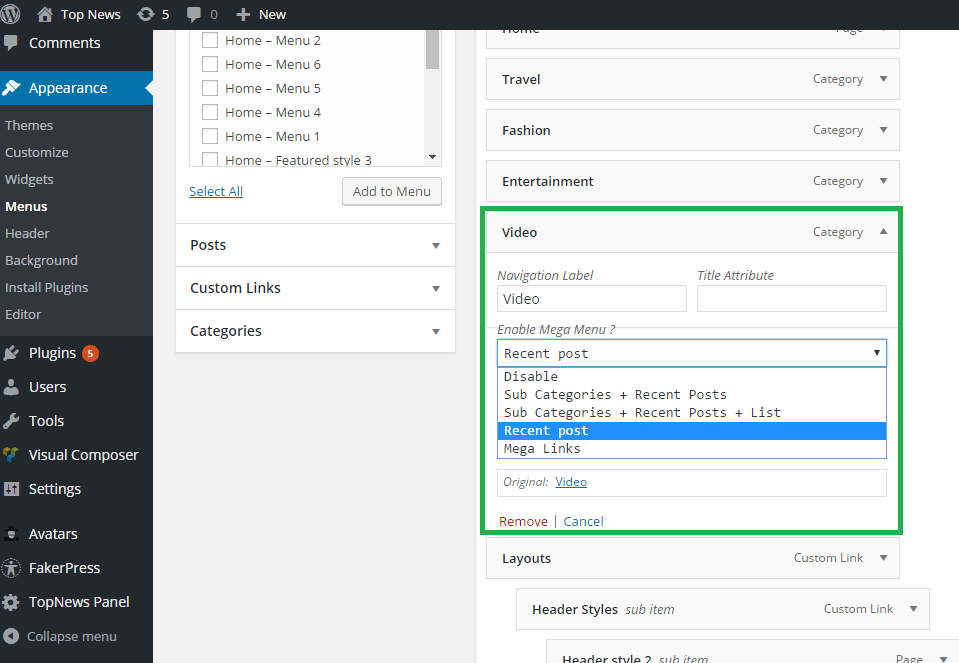
Working from backend you can see this outlook.

Top Left and Right Menus
- For your Mobile menu first you click on Appearence
- Then click on create a new menu(Top Left Menu)
- Then click on create a new menu(Top Right Menu)
- Select your expecting page or.
- Select your expecting link or select category post.
- Now your can decorate your footer menu by drugging with your cursor pointer up > down.
- Finally save your top left and top right menu.
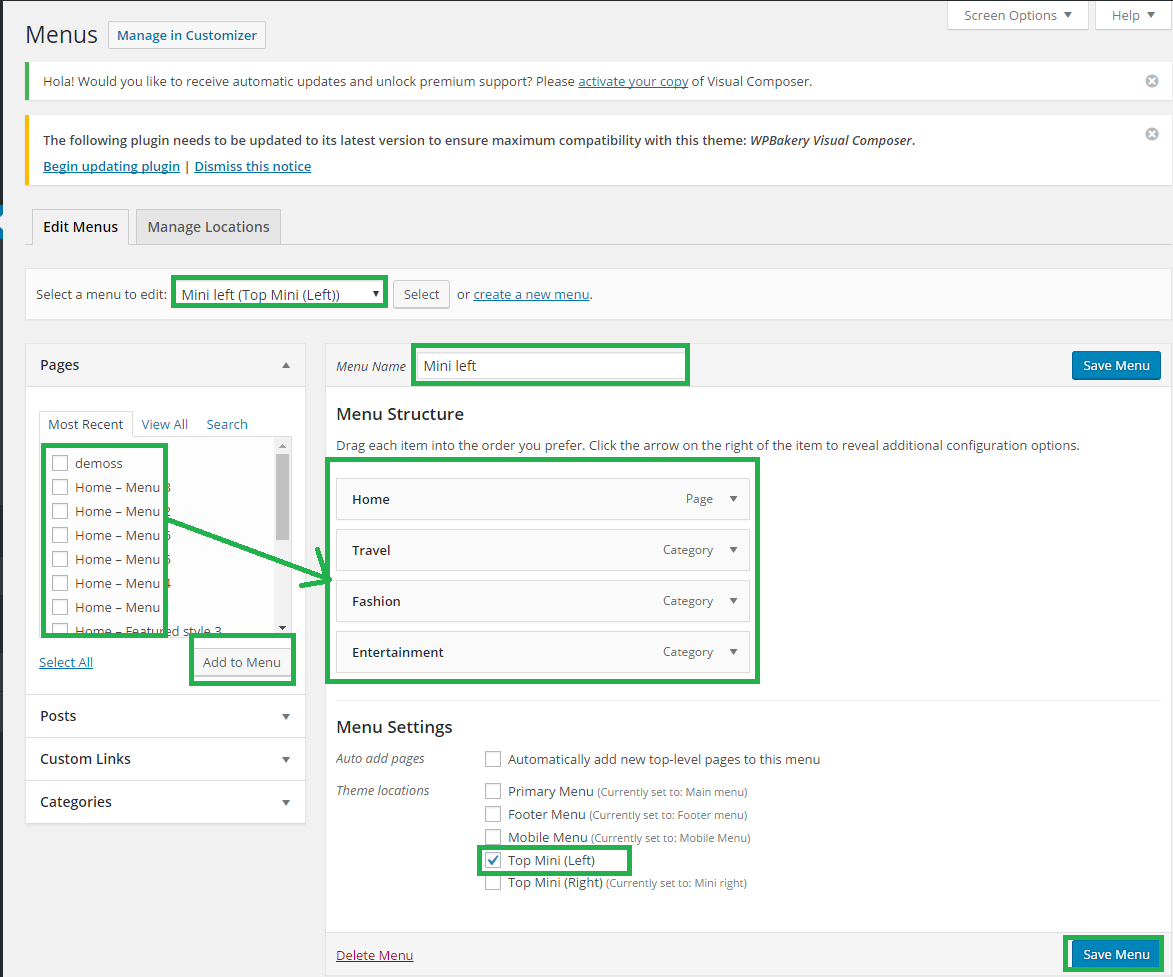
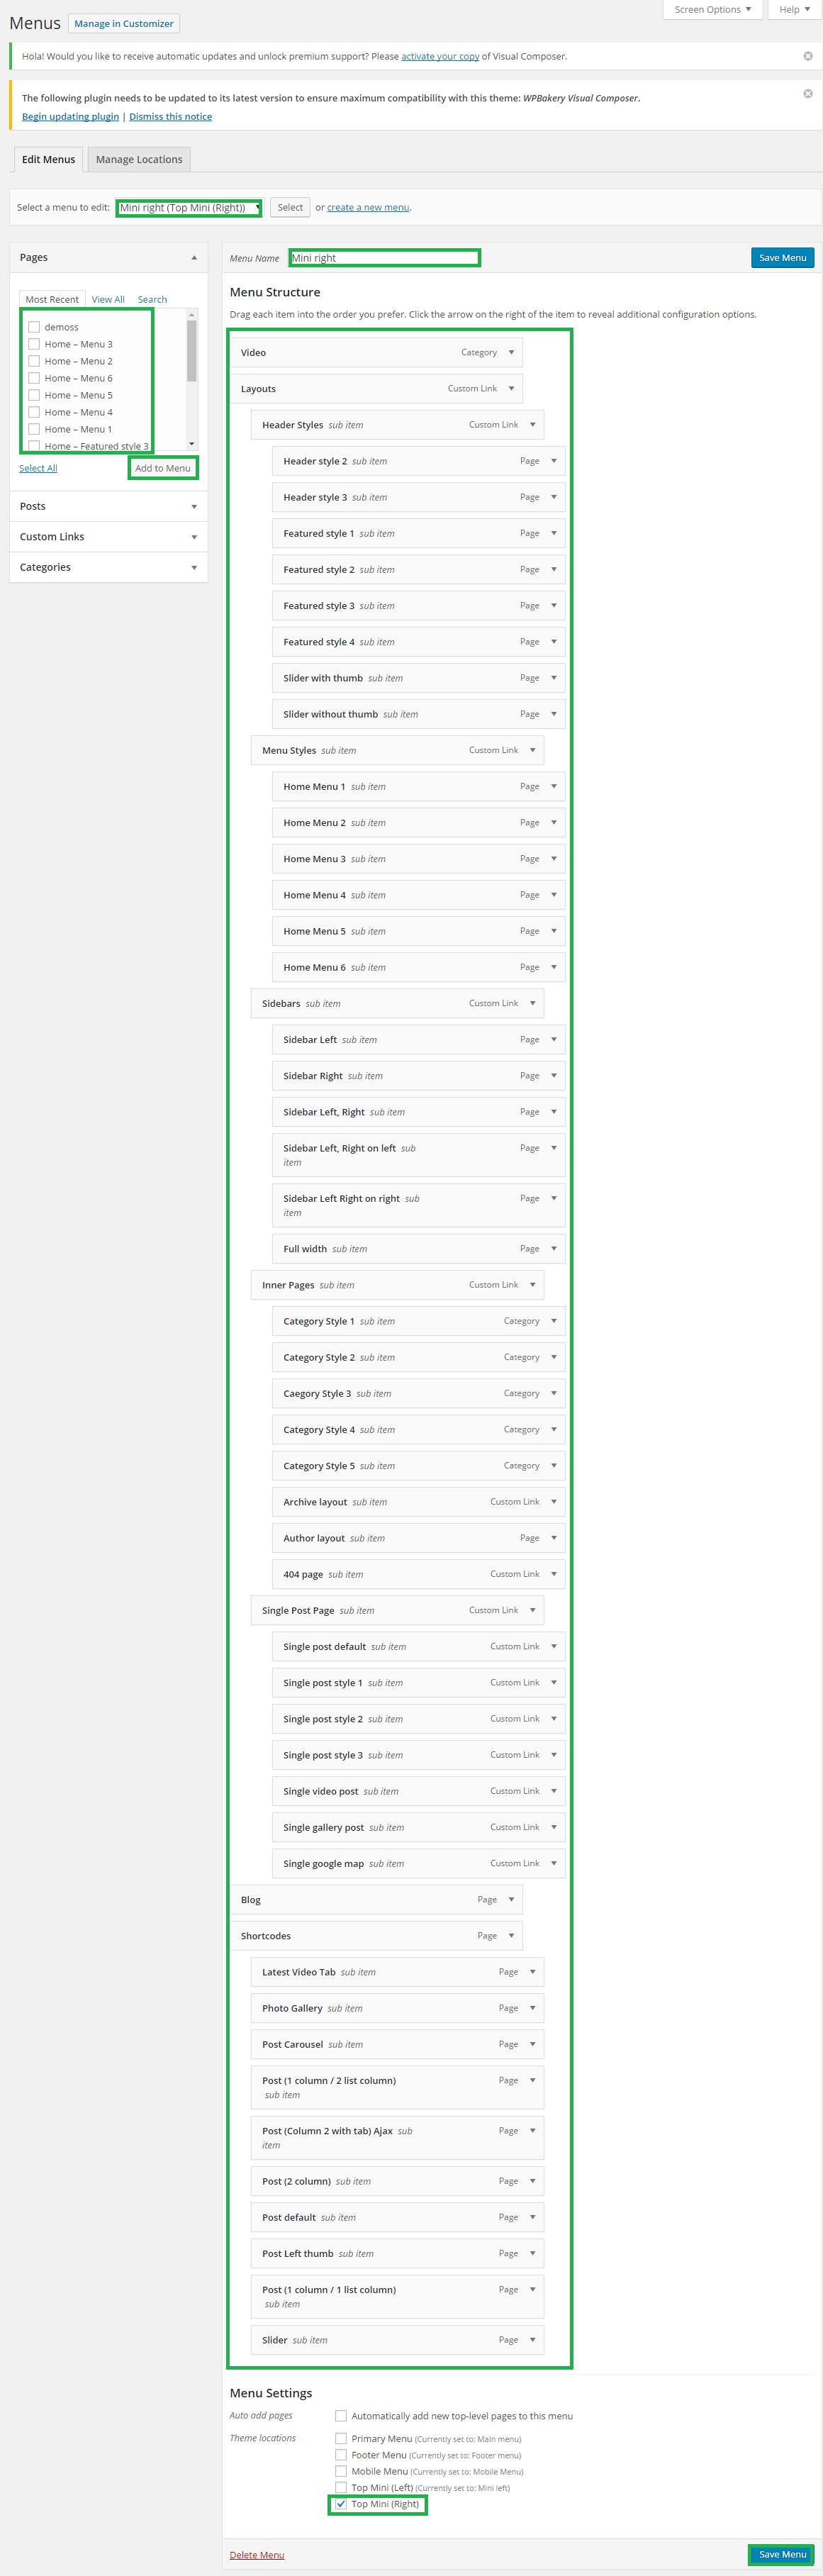
Working from backend you can see this outlook.
Page Builder

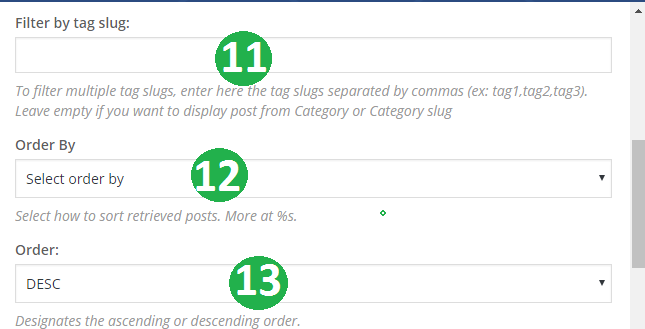
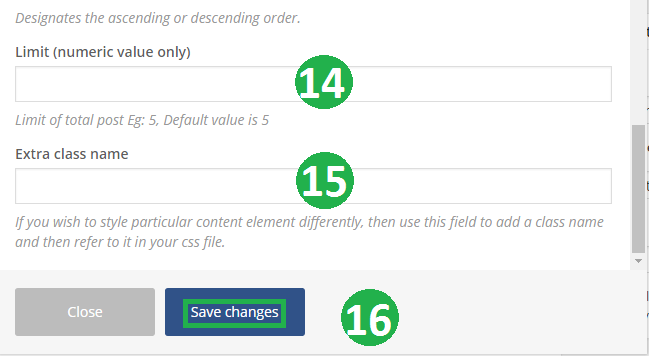
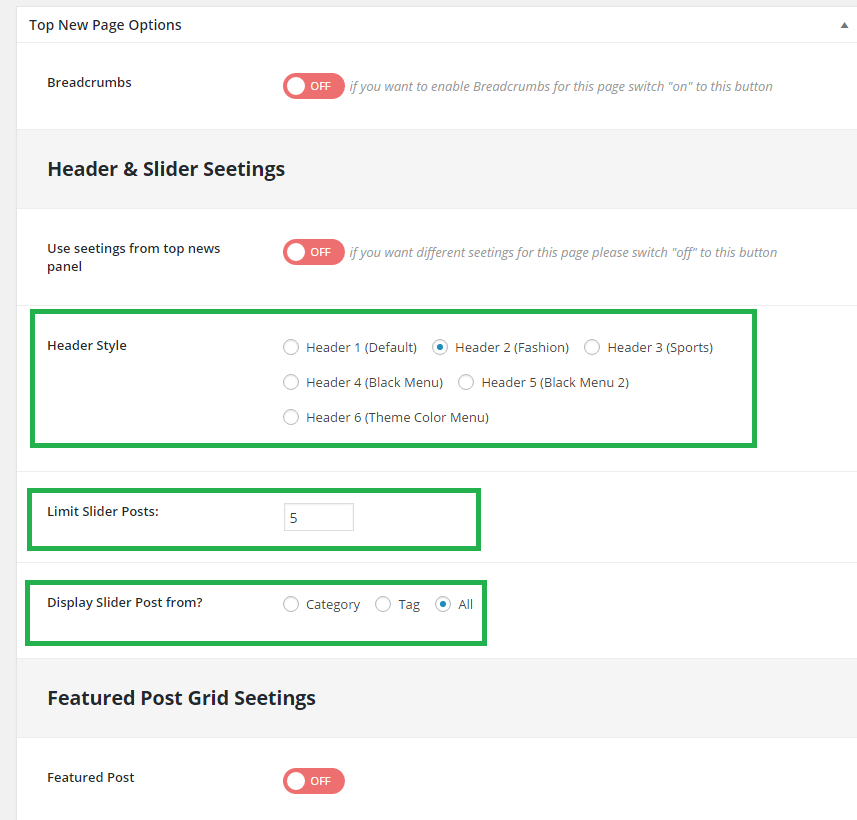
Header Style: you can choose your page header style from this option. Without this you can limit your slider post from Limit Slider Posts option. Also you can show post from category, tag or both using Display Slider Post from option
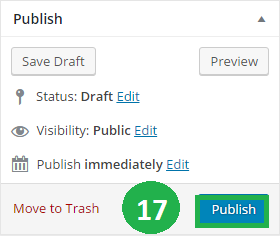
17.Click on Publish button.
Now you can see the outlook looks below:
Author Page
- At first you need to go dashboard and click on Pages.
- Then click on Add new .
- Type the title into Title area .
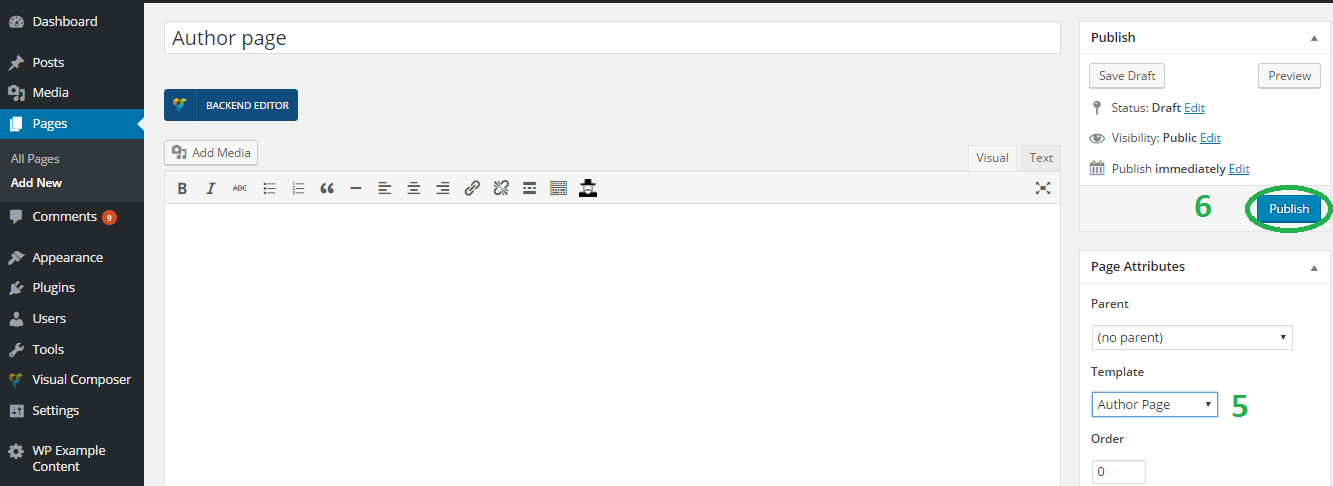
- Select the template from Template option.
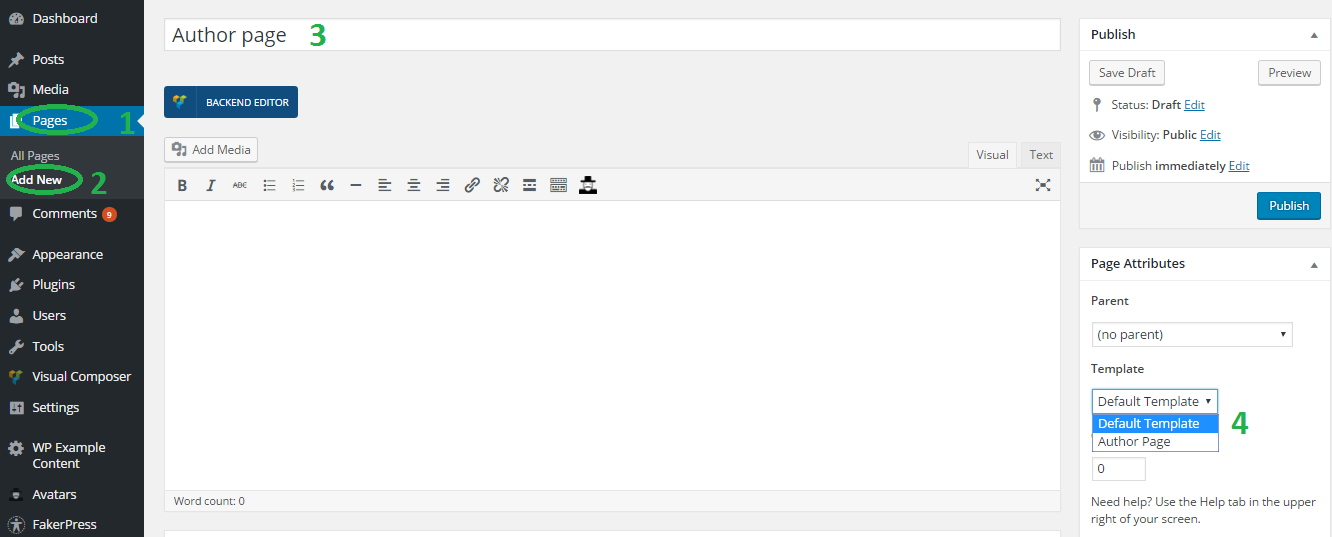
- Select the template from template option as Author Page.
- Then click on Publish button.
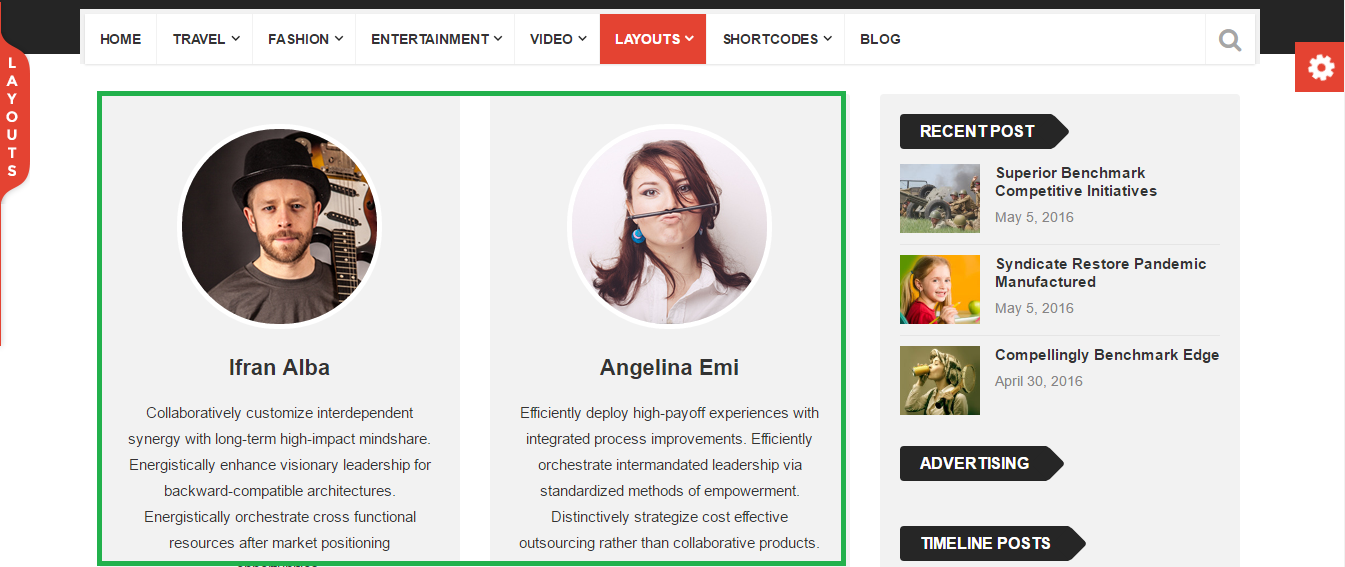
Finally, you can see the outlook like below:
Viralpress Settings
- At first you need to go dashboard and click on Viralpress.
- Then click on Settings .
- Now click on Install Categories & Menu.
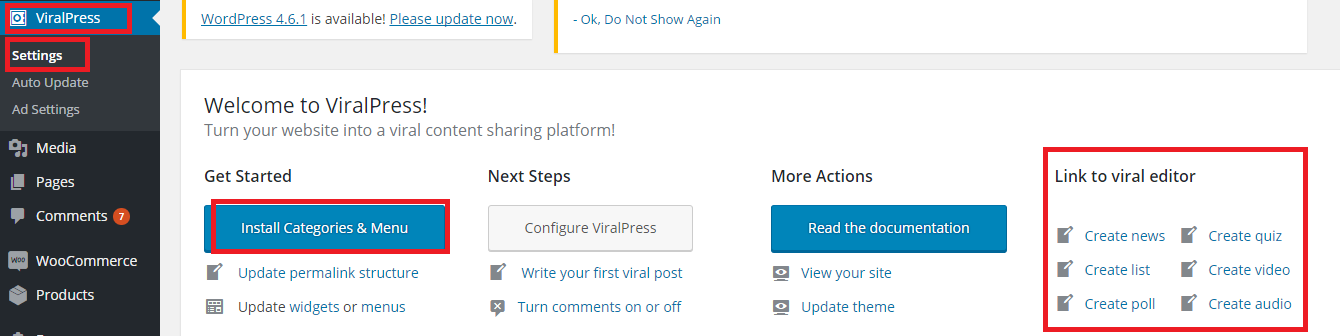
Now you can see the marking menu name which autometic will create by clicking Install Categories & Menu option.
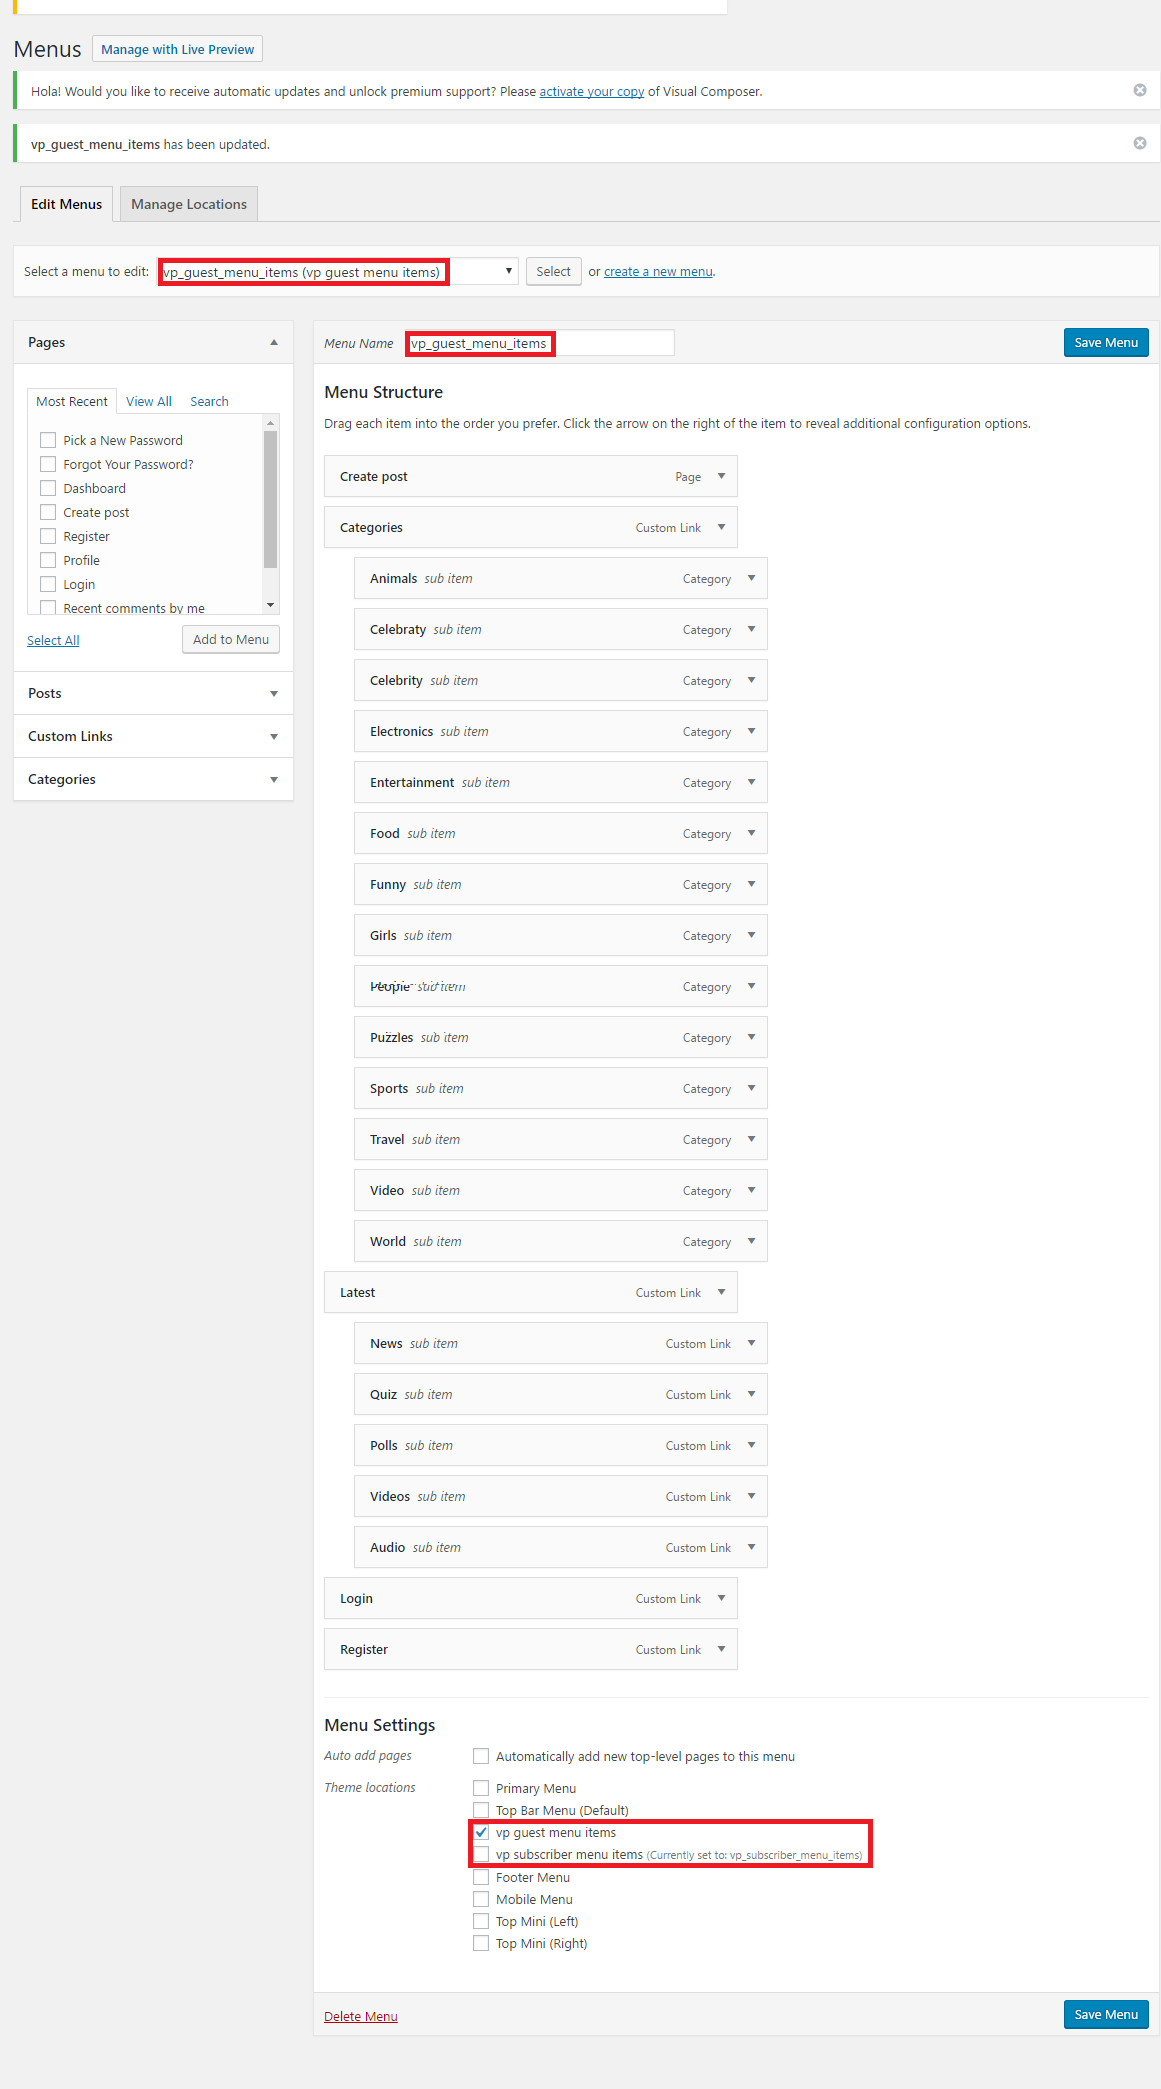
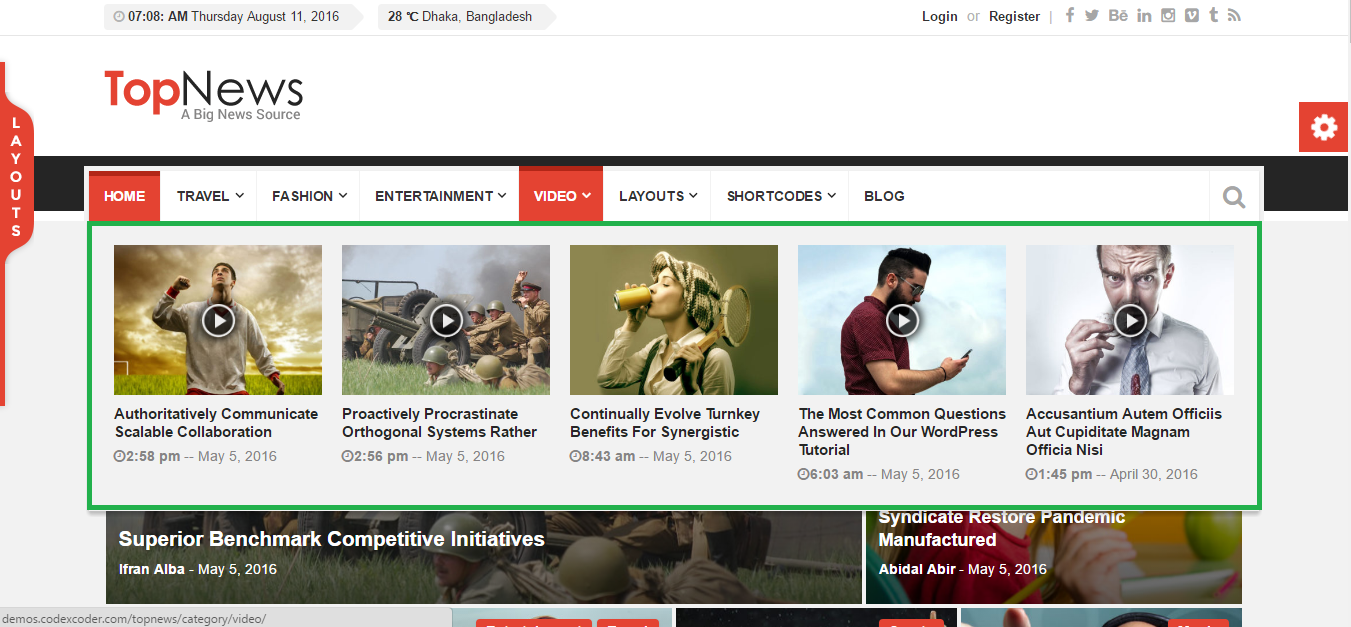
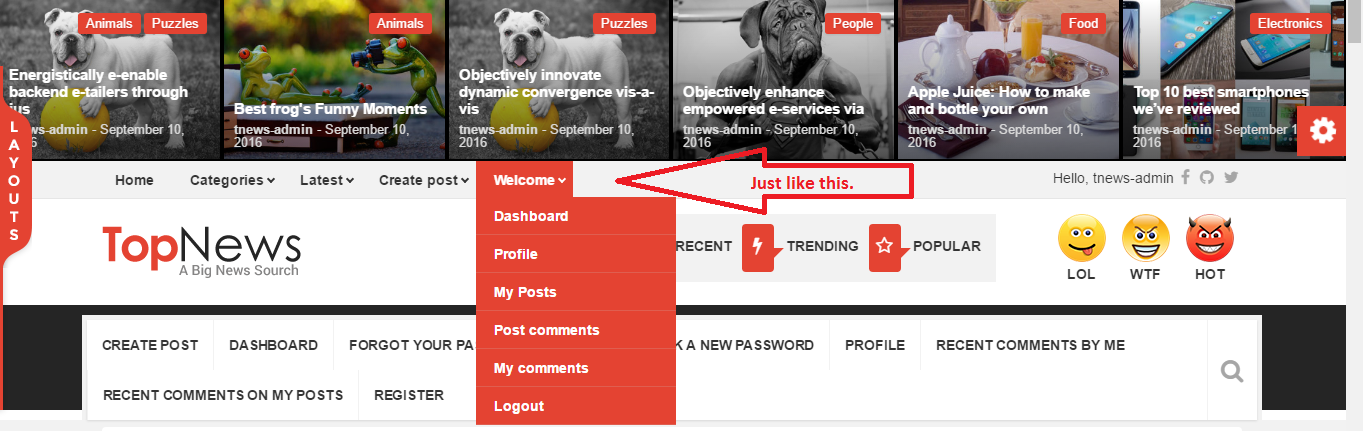
If you choose your Viral and Buzz from here and choose menu for vp guest menu items , you can see the menu style like screenshot below:
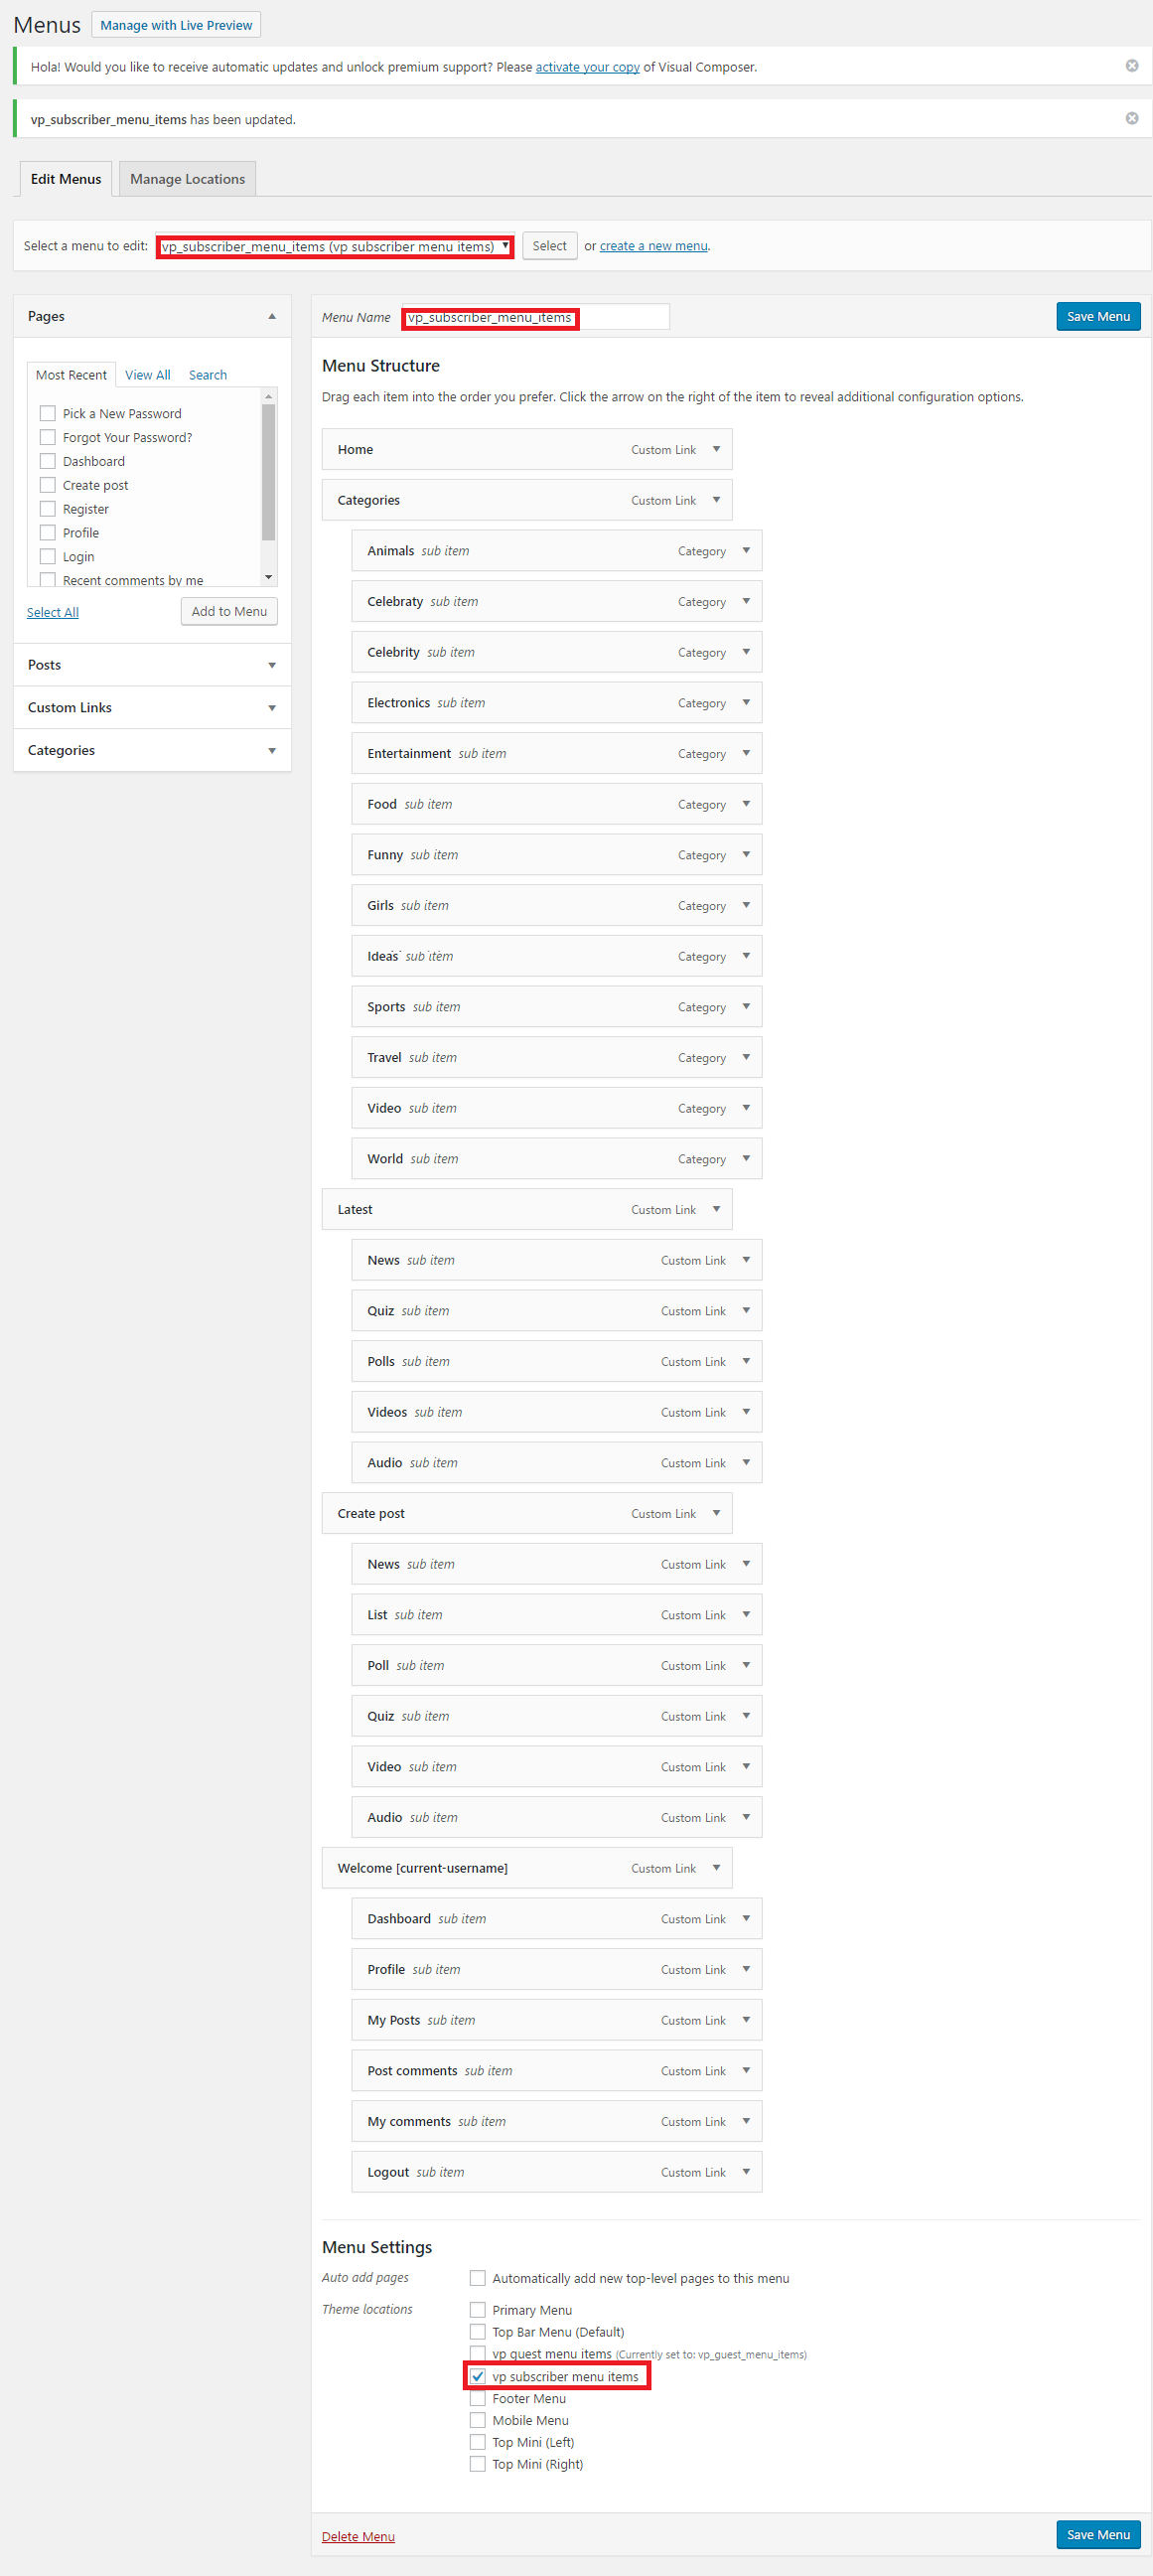
If your are logged in or you choose vp subscriber menu items option, your menu structure will like below:
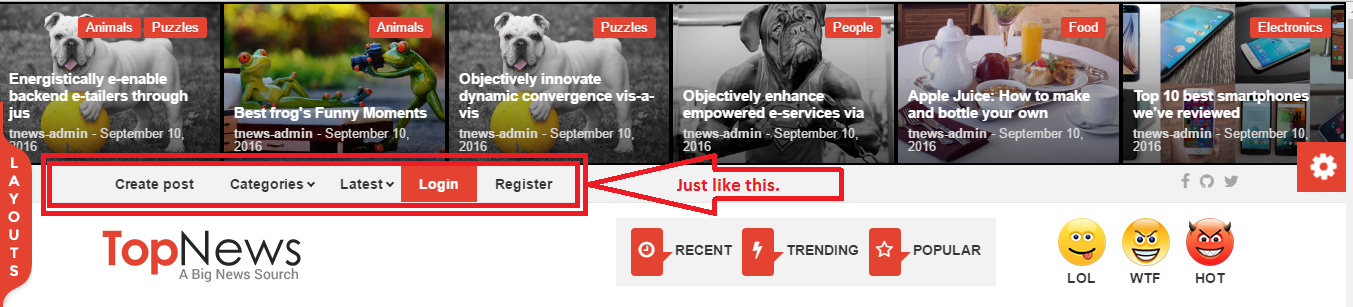
Finally, your menu look like below:
Viral & Buzz
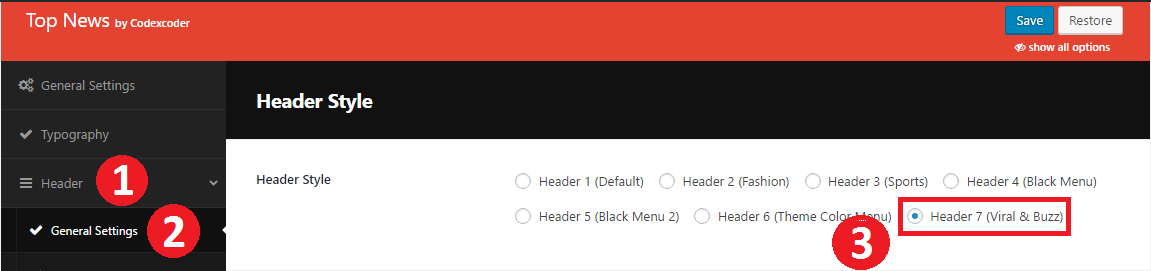
At first you need to go dashboard and click on TopNews Panel.
- Then click on Header option.
- Click on General Settings option.
- Then select Header 7 (Viral & Buzz) option.
Creating viral & Buzz quick menu click on Viral & Buzz Settings.
- Then click on Header option.
- Click onViral & Buzz Settings option.
- At first write your menu name into Write Name option.
- Then put your menu url into Menu URL option.
- If you want to use an icon, please choose an icon from Add Icon option. and if you want to remove an icon from Remove Icon option.
If you choose a menu style from Menu Style options. Example: Default.

You can see menu below:

Or, If you choose Black Menu options from menu style

You can see menu below:

Or, If you choose Black Menu 2 options from menu style

You can see menu below:

Or, If you choose Theme Color Menu options from menu style

You can see menu below:

Now if you click on Top Area options. You will get the top area options. From there you will able to choose 3 style of your top area style. Example: if you choose the Style 3 (Top Bar Menu) you will able to set here your top bar menu's background color using Top Bar 3 Background Color option. Without this you can put there Top Bar 3 Font Color from this option. You can also here show Temperature form Temperature with Location option and you can show here date and time using Date option.
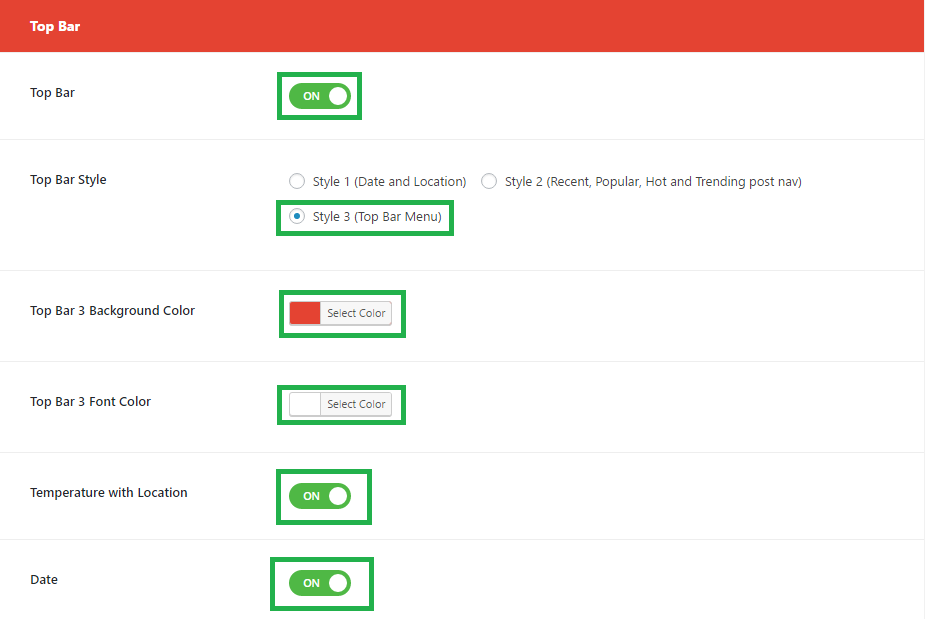
Finally you can see the screenshot below:

Here you will able to see the Quick Menu options.
Without this you can add a quick menu using Add New option or if you want to remove a quick menu using Remove option.

Finally, you can able to see this below:

Creating viral & Buzz quick menu click on Viral & Buzz Settings.
- Then click on Header option.
- Click onViral & Buzz Settings option.
- At first write your menu name into Write Name option.
- Then put your menu url into Menu URL option.
- If you want to use an icon, please choose an icon from Upload Icon option. and if you want to remove an icon from Remove Icon option.
Here you will able to see the Reaction Menu options.
Without this you can add a quick menu using Add New option or if you want to remove a quick menu using Remove option.
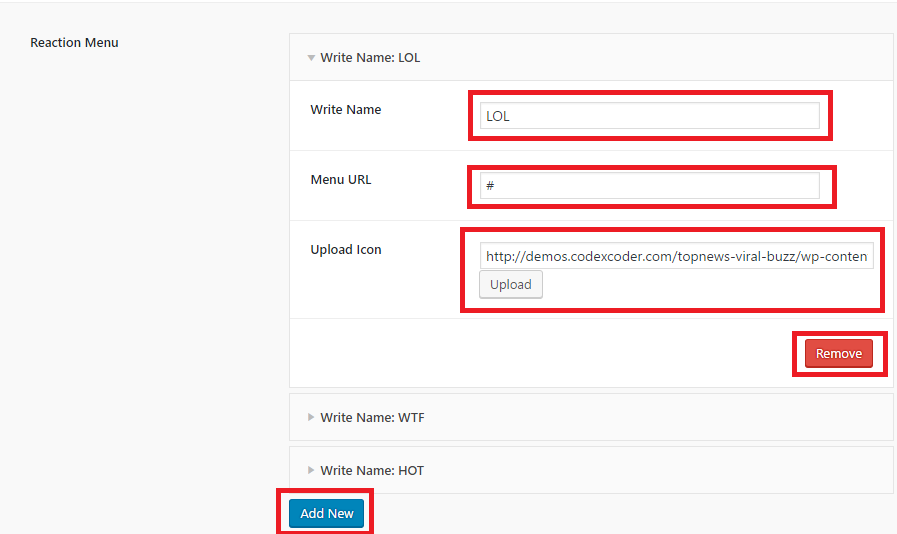
Finally, you can able to see this below:
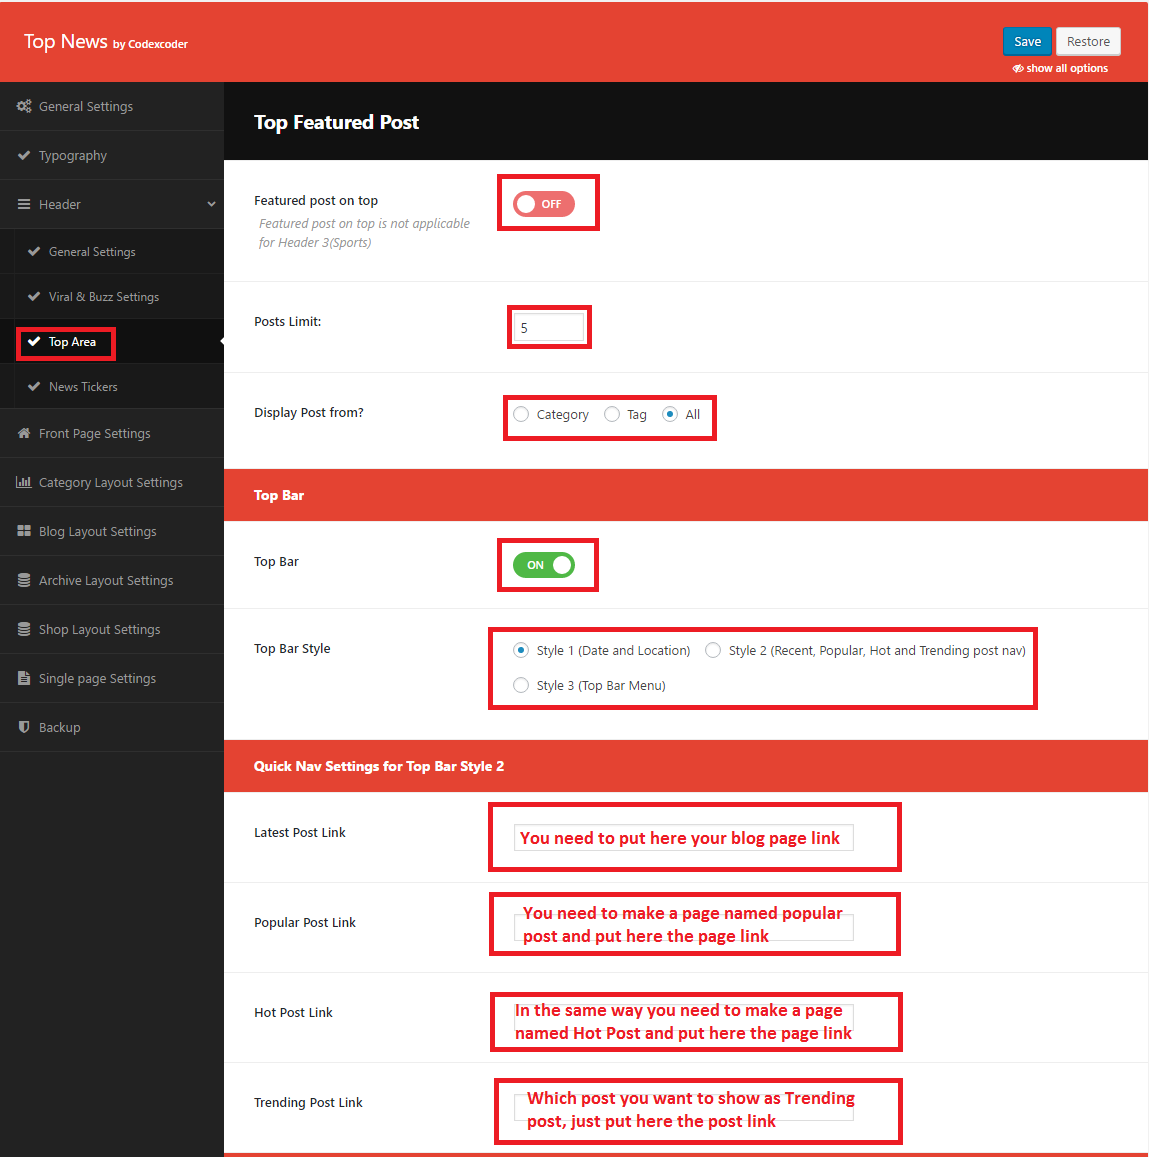
Decorate viral & Buzz pages top area you need to click on Top Area.
- If you want to see the post on top area, use the switch On/Off option.
- From here you can control your post limit using Posts Limit option.
- Also you can show your post from Category , Tags or from All area (category & tags).
- Without this if you want to show the top area, you can use On/Off switch to show or hide.
- If you want to use Topbar Style 2, you need to put your post link into Latest Post Link, Popular Post Link, Hot Post Link, Trending Post Link options.
Here you will able to see the Top Featured Post options.
Add New option or if you want to remove a quick menu using Remove option.
Finally, you can able to see this below:

How to create a viral & buzz post
- At first go to dashboard and click on Pages.
- Then click on Add new .
- Type the title into Title area .Example: Creating Post
- Now put this shortcode [viralpress_user_create_entry] .
- Finally, click on Publish .
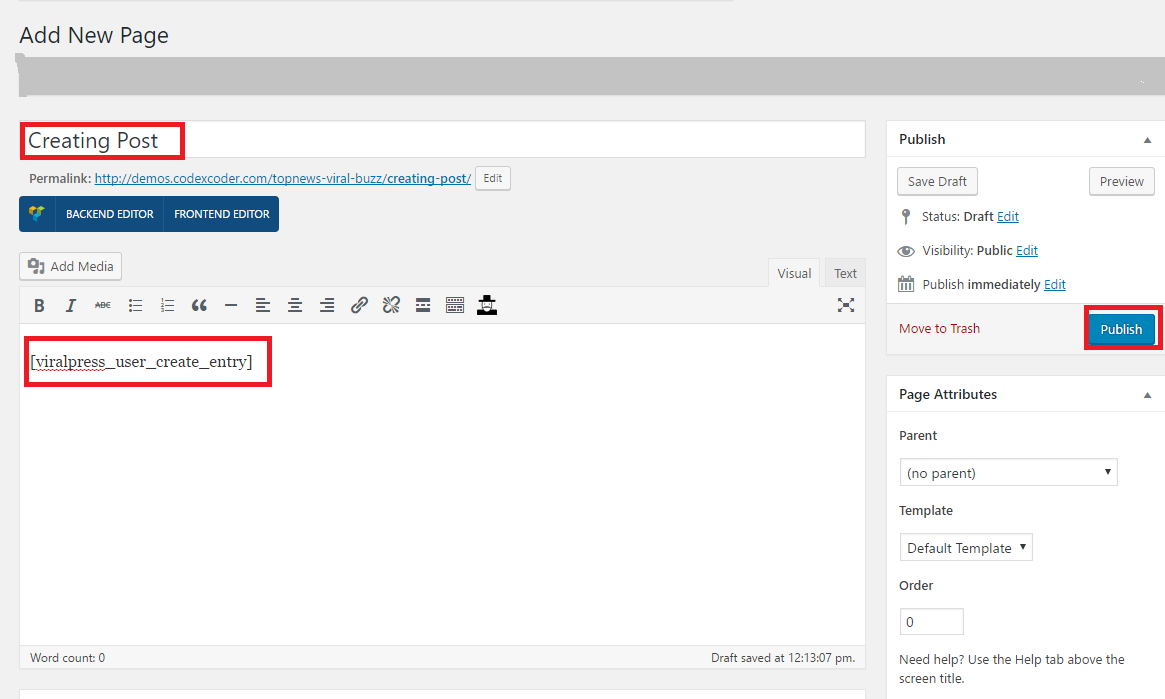
Now you can see the outlook of your post below:

Finally, fill all blanks as screenshot:

Filling all requirements, you can see this result below:

How to change Author Avatar?
The theme uses Gravatar to display users avatars . to craete or change your Gravatar :
If you have never setup a Gravatar account:
- Register / login to Gravatar. Upon registering, use the SAME email address that is associated with your WordPress User Profile.
- Upload your photo and associate it with that specific email address.
If you already registered at gravatar.com, follow these steps:
- Click on "My Gravatars" .
- click on "Add a New Email" .
- Then, you'll need to click on "Add a New Image" .
- Upload an image .
- Then select the email address, and then select your image from bottom. Now it's associated with that email address. Click Save .
- It will take about 5-10 minutes to propagate on the internet, and then will appear on site.
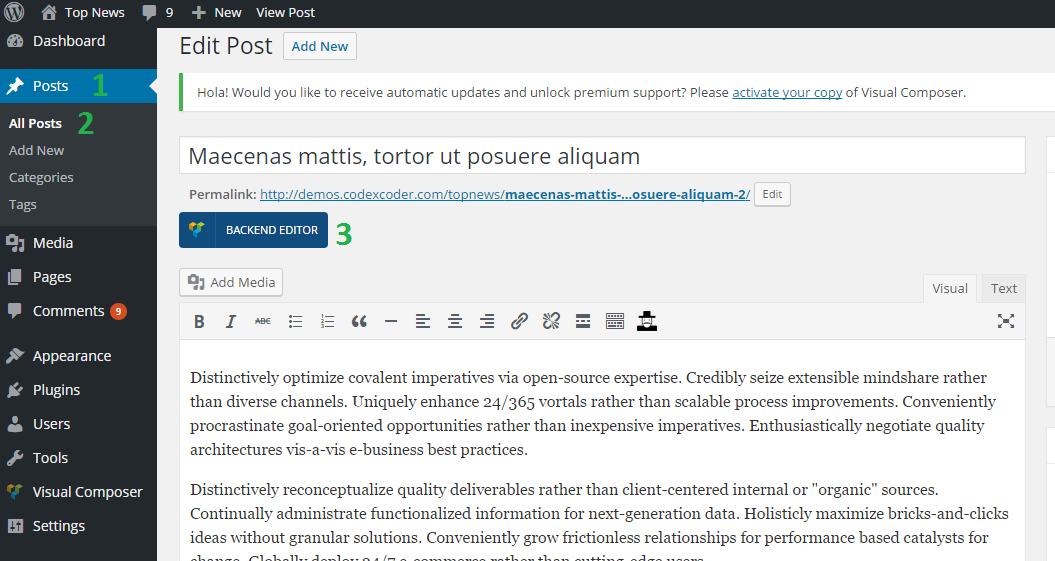
How to insert post in shortcode
- At first you need to go to dashboard and select the posts option.
- Click on All posts and select a post to insert a shortcode in post
- Click on BACKEND EDITOR .
4. Then go down the page and click on (+) symbol
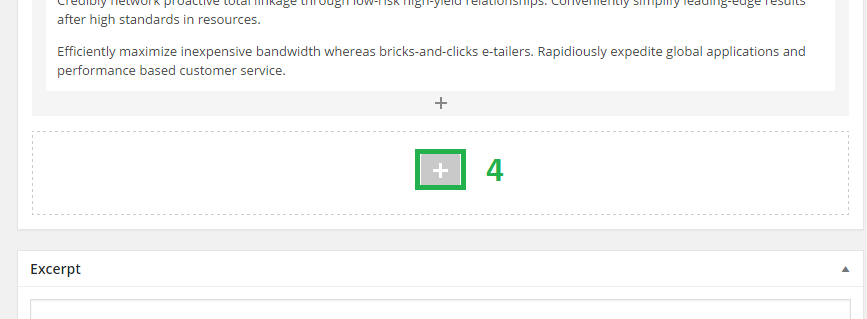
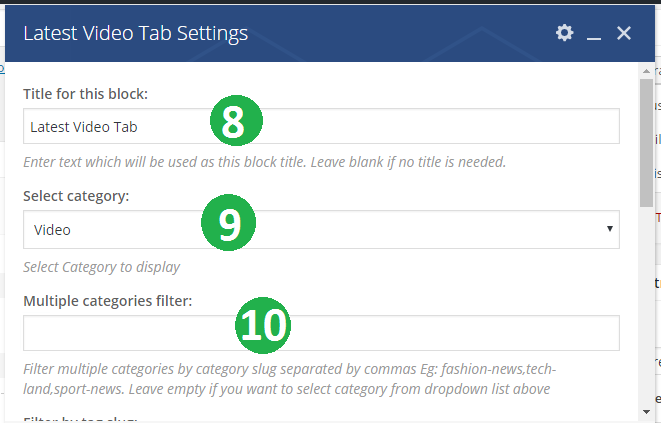
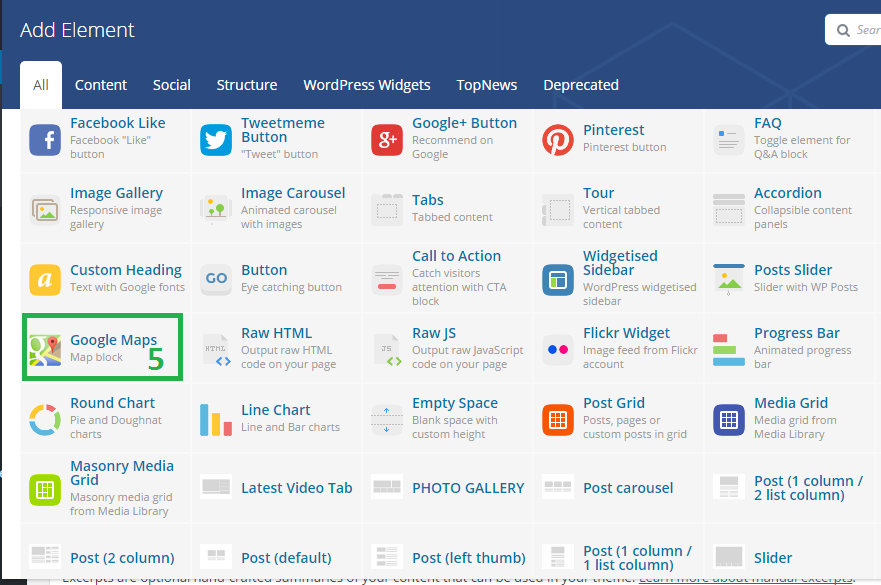
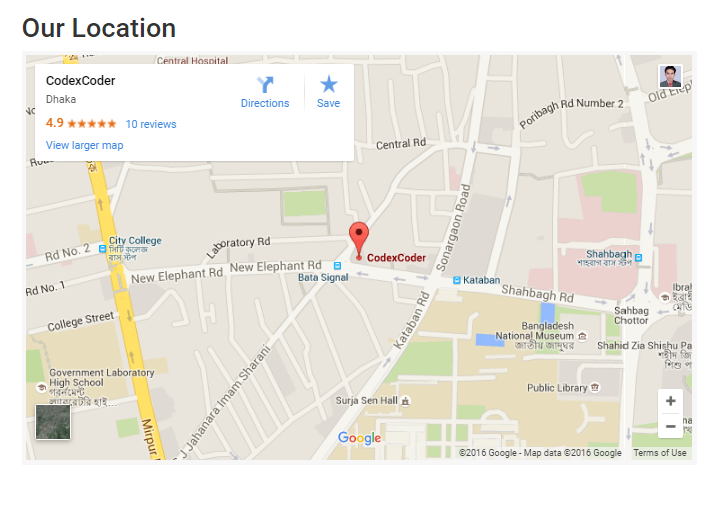
5. Select an element from All Element from here. Example: Google Maps and click on this element.
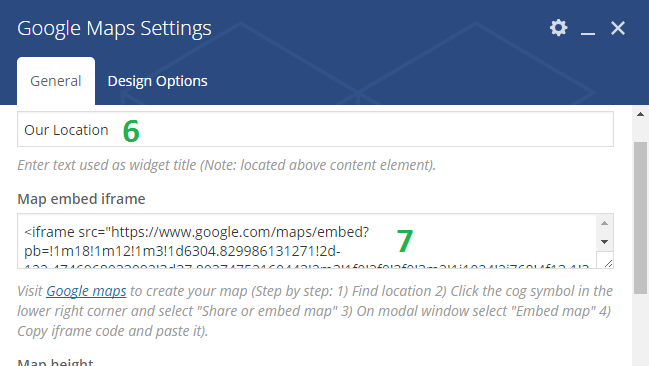
6. Write your element title from here. Example: Our Location
7. Put your google map loction code here.
8. Select your maps height from here.
9. You can also put an extra class here.
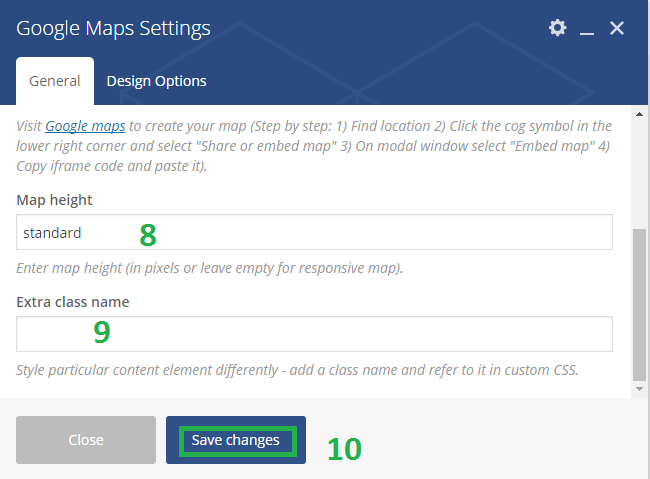
10. Finally you can see the outlook from browser.
Theme Options
If you want to change the general options of the theme, go to your WordPress Admin Area to TopNews Setup menu. Here you have a tabbed Navigation where you can change a lot of Options of your new Theme. There have lot's of option for TopNews Theme.
- General Settings
- Typography
- Header
- Homepage Setting
- Category Layout Setting
- Blog Layout Setting
- Archive Layout Setting
- Single Page Setting
- Backup
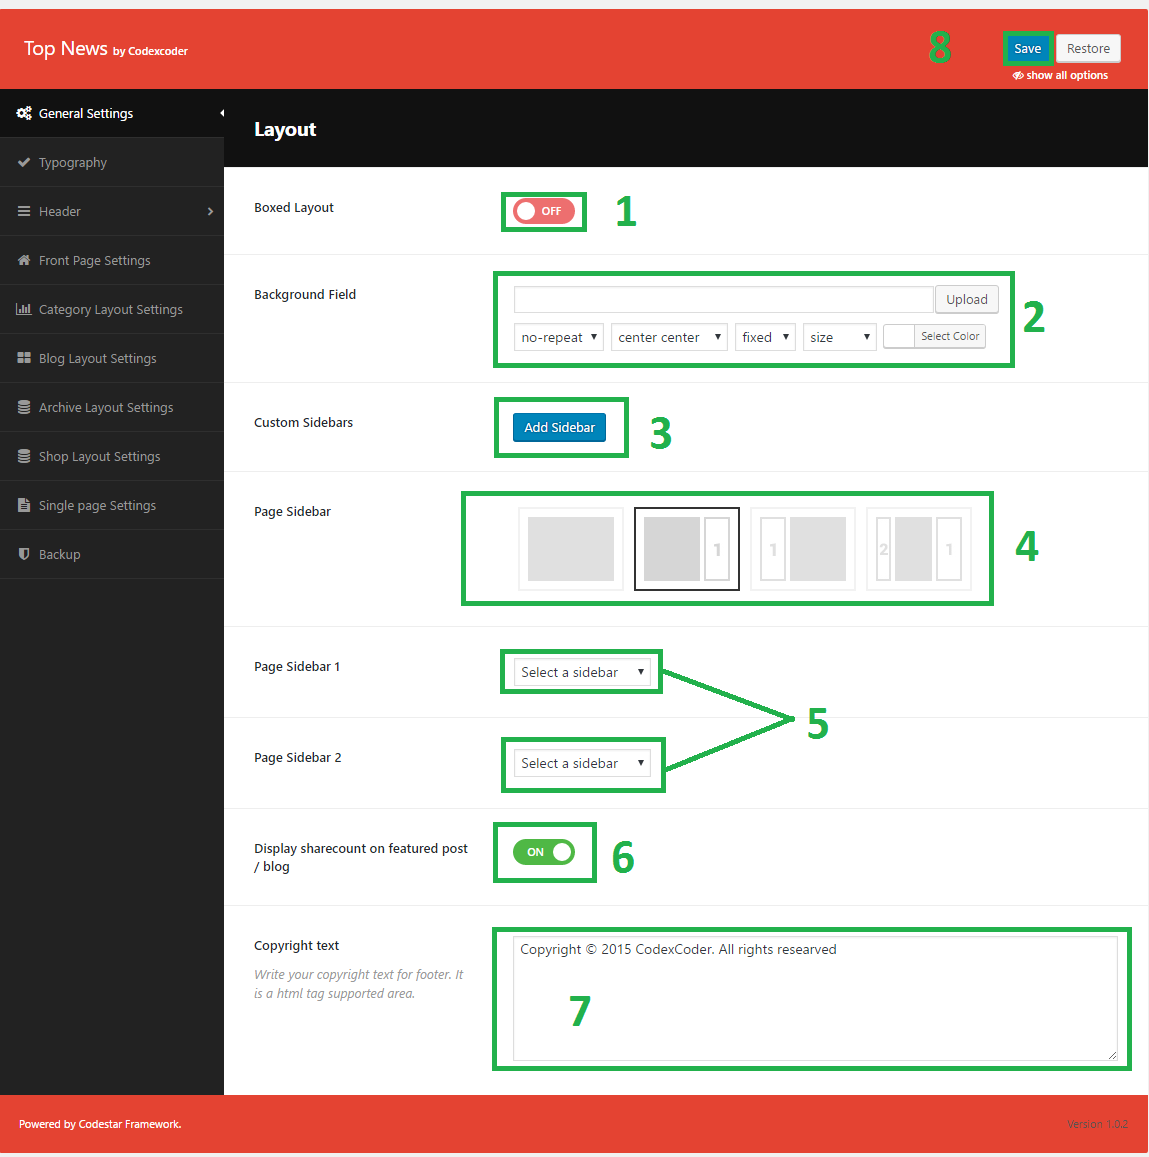
General Settings
Go to Theme Option > General Settings. Here they are:
- Boxed/Fullwidth layout choose from Boxed Layout option, .
- Put your background image from Background Field option.
- Use custom sidebar from Custom Sidebars option.
- Sideabr layout choose from Page Sidebar option.
- Choose sidebar from Sidebar 1/ Sidebar 2 option.
- If you want to show sharecounter on your feature post or blog post, you can use the switch named Display sharecount on featured post / blog option.
- From here you can show your copyright text using Copyright Text input area.
- Finally click on Save button.
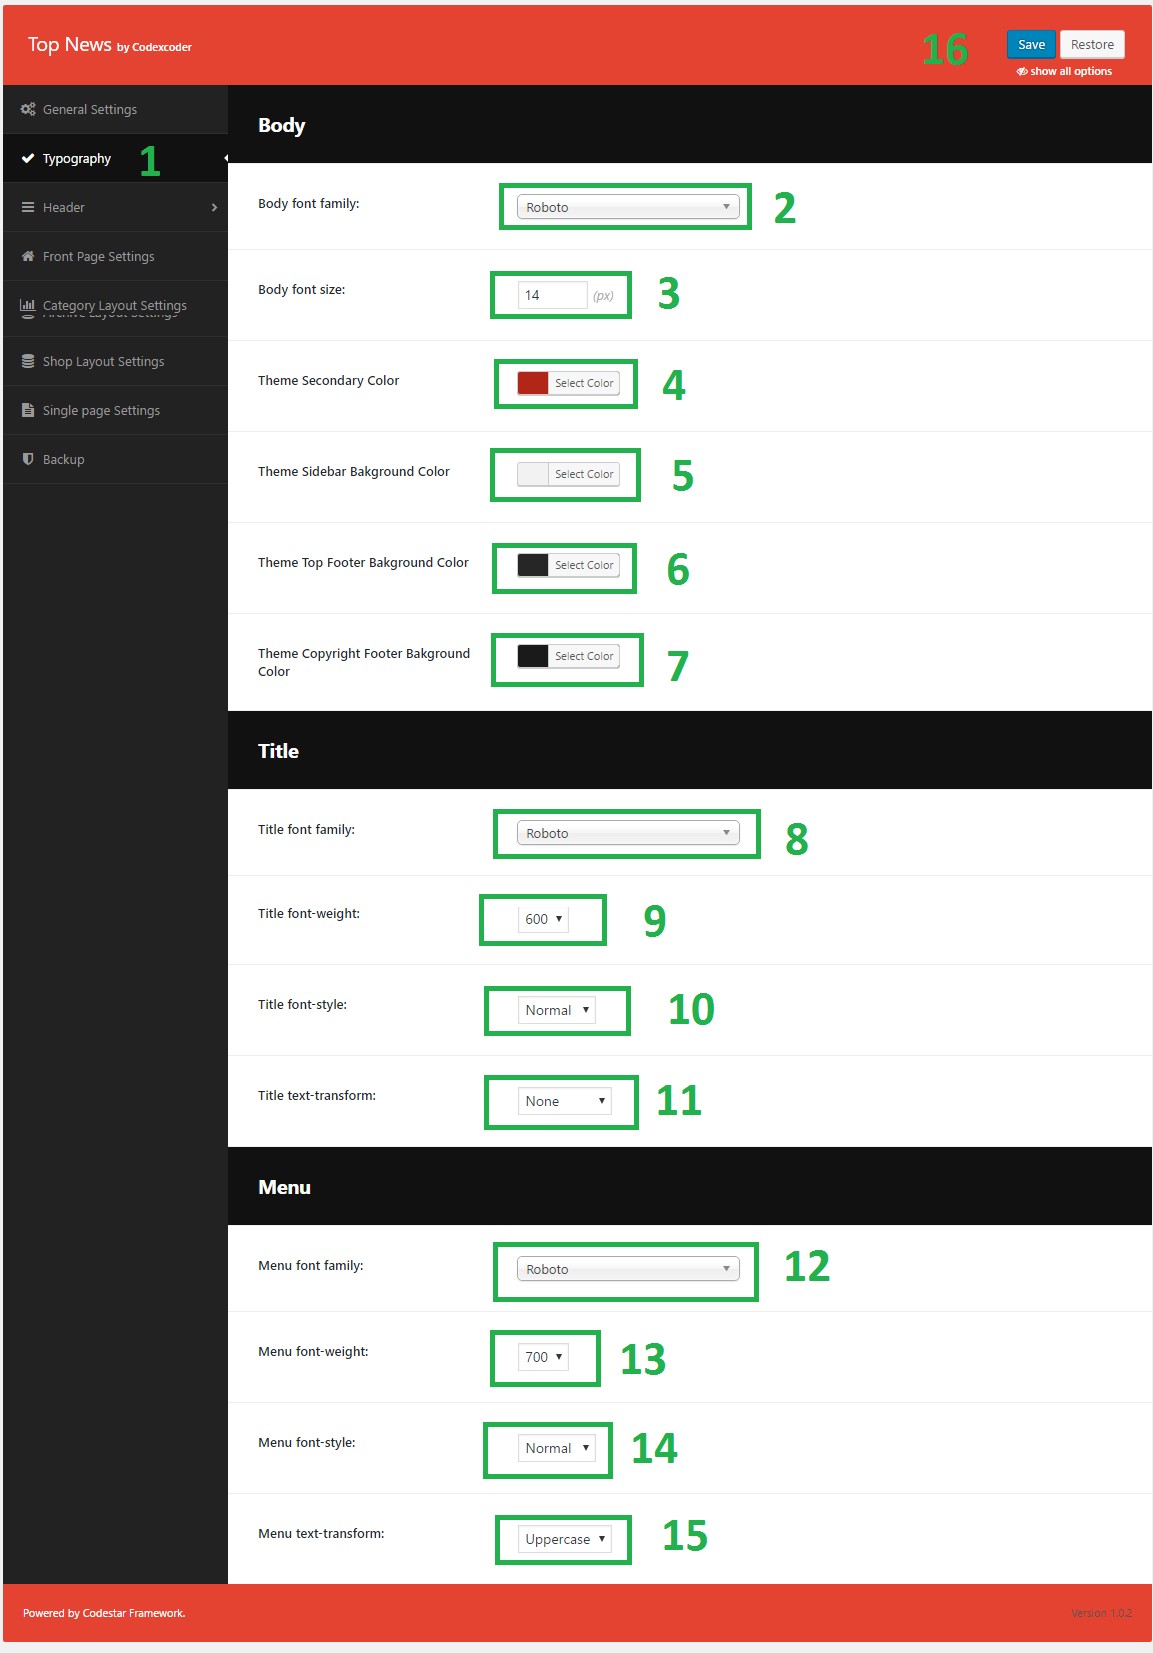
Typography
Go to Theme Option > Typography.
- Click on Typography
- Body Font Family : Use unlimited google font.
- Body Font Size : Put font size.
- Theme Color : Change your theme color.
- From Theme Sidebar Bakground Color you can change your sidebar background color.
- Theme Top Footer Bakground Color: you can put your top footer background color from here.
- Theme Copyright Footer Bakground Color: Using this option, you can put here Theme Copyright Footer Background Color.
- Title font family : Theme all title will take this font family.
- Title font family style : Theme all title will take this font family style.
- Title text-transform : Theme all title will take this text transform.
- Title color : Theme all title will take this color.
- Menu font family : Menu will take this font family.
- Menu font weight : Menu will take this font weight.
- Menu font style : Menu will take this font style.
- Menu text-transform : Menu will take this text transform .
- Finally, click on Save button to save. .
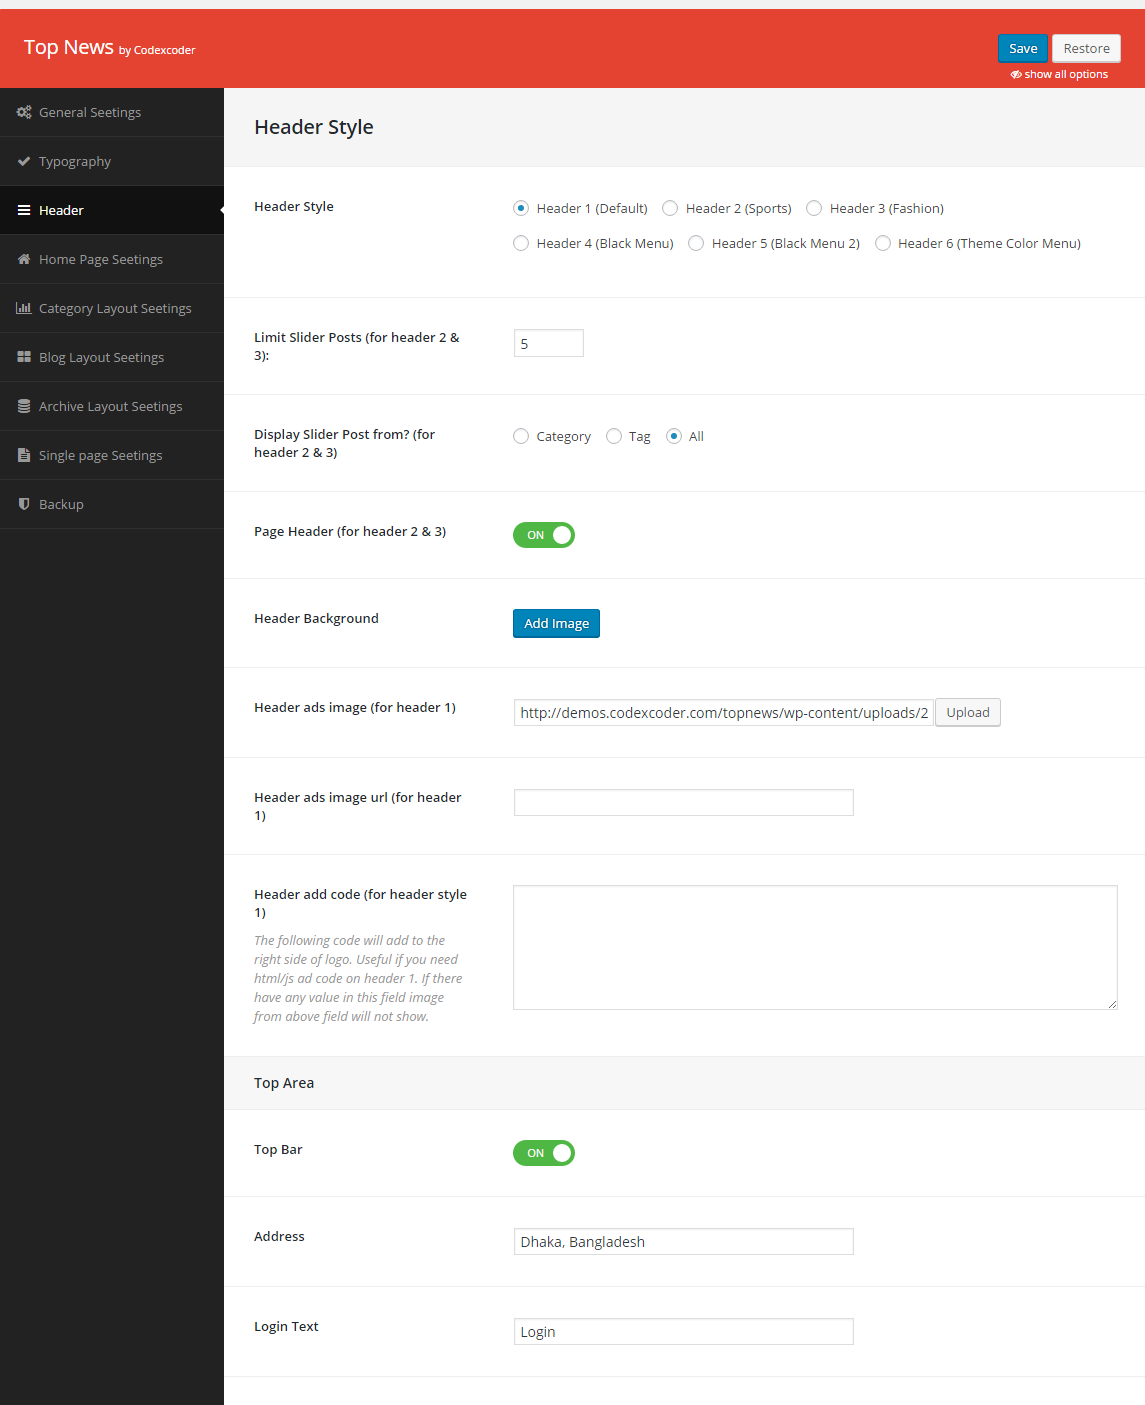
Header
Go to Theme Option > Header.
- Click on Header
- From Header Style option, you you can able to stylist you header as your choice. Here we add six more styles.
- You can able to limit you slider posts from Limit Slider Posts options.
- From Display Slider Posts From? options you can choice your targetting format from Category, Tag or Both..
- You can also able to on/off your page header using Page Header On/Off options.
- If you want to use a header background image, simply use the Header Background options.
- As header area contain a header ads so you can upload a header ads image from Header ads image options. N.B it is available only for header style 1.
- From Header ads code options you can put your header ads codes here.
- From Top Bar option you can able to show/hide top bar.
- In Address option you can put your address here.
- In Login Text option, you can put here your login text as your choice.
- Finally, click on Save button .
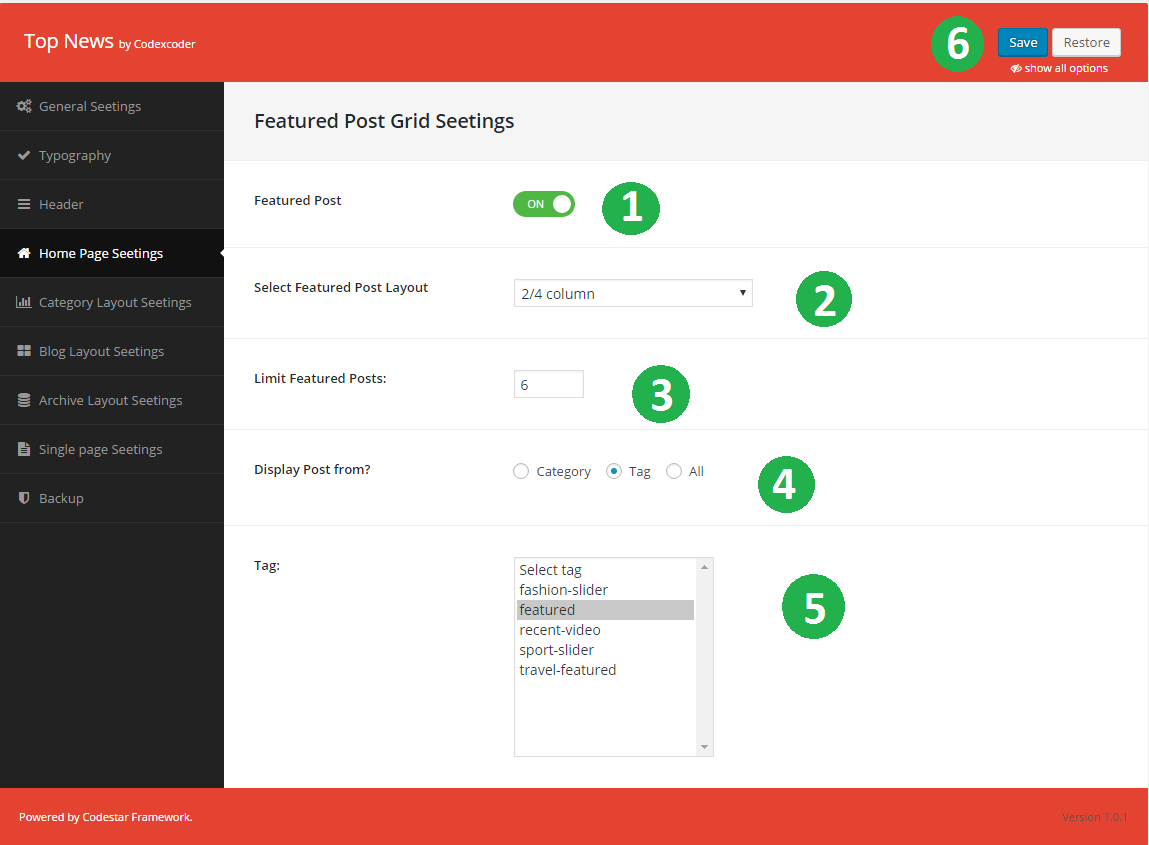
Homepage Settings
Go to Theme Option > Homepage Settings.
- You can control your feature post on/off from here. Just turn the switch as your demand.
- You can control your feature post layout from here. Just choose your requirements.
- You can also control your feature post limit from here.
- You can get your post from category, tag or from both to use this radio button.
- Also you can select your tags from select option from mentioned post.
- Finally, click on Save button .
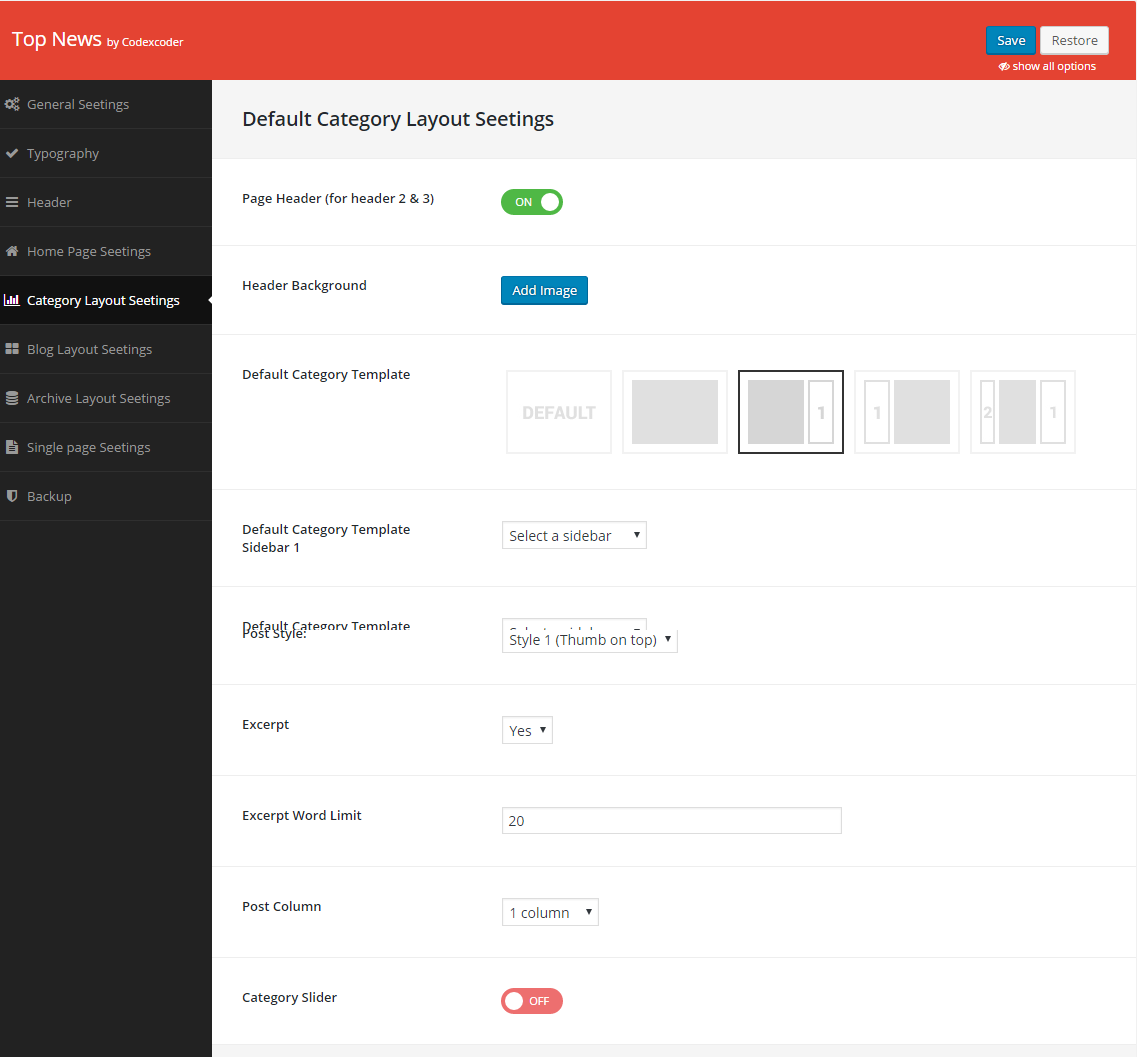
Category Layout Settings
Go to Theme Option > Category Layout Settings.
- You can on/off your page header for header style 2 and 3.
- You can add an image as a header background by clicking add image button.
- You can choose default category template from here as well as with one sidebar or more.
- You can also select the category template sidebar 1.
- You can able to choose sidebar 2 too.
- Also you can choose your post style.
- From Excerpt option you can able to keep excerpt show or hide.
- From Excerpt Word Limit option you can able to keep excerpt word limit.
- You also select post column quantity from Post Column option.
- Without this you can able to on/off category slider from Category Slider option.
- Finally click on Save button.
And this way you can able to do maintain your all categories post from backend.
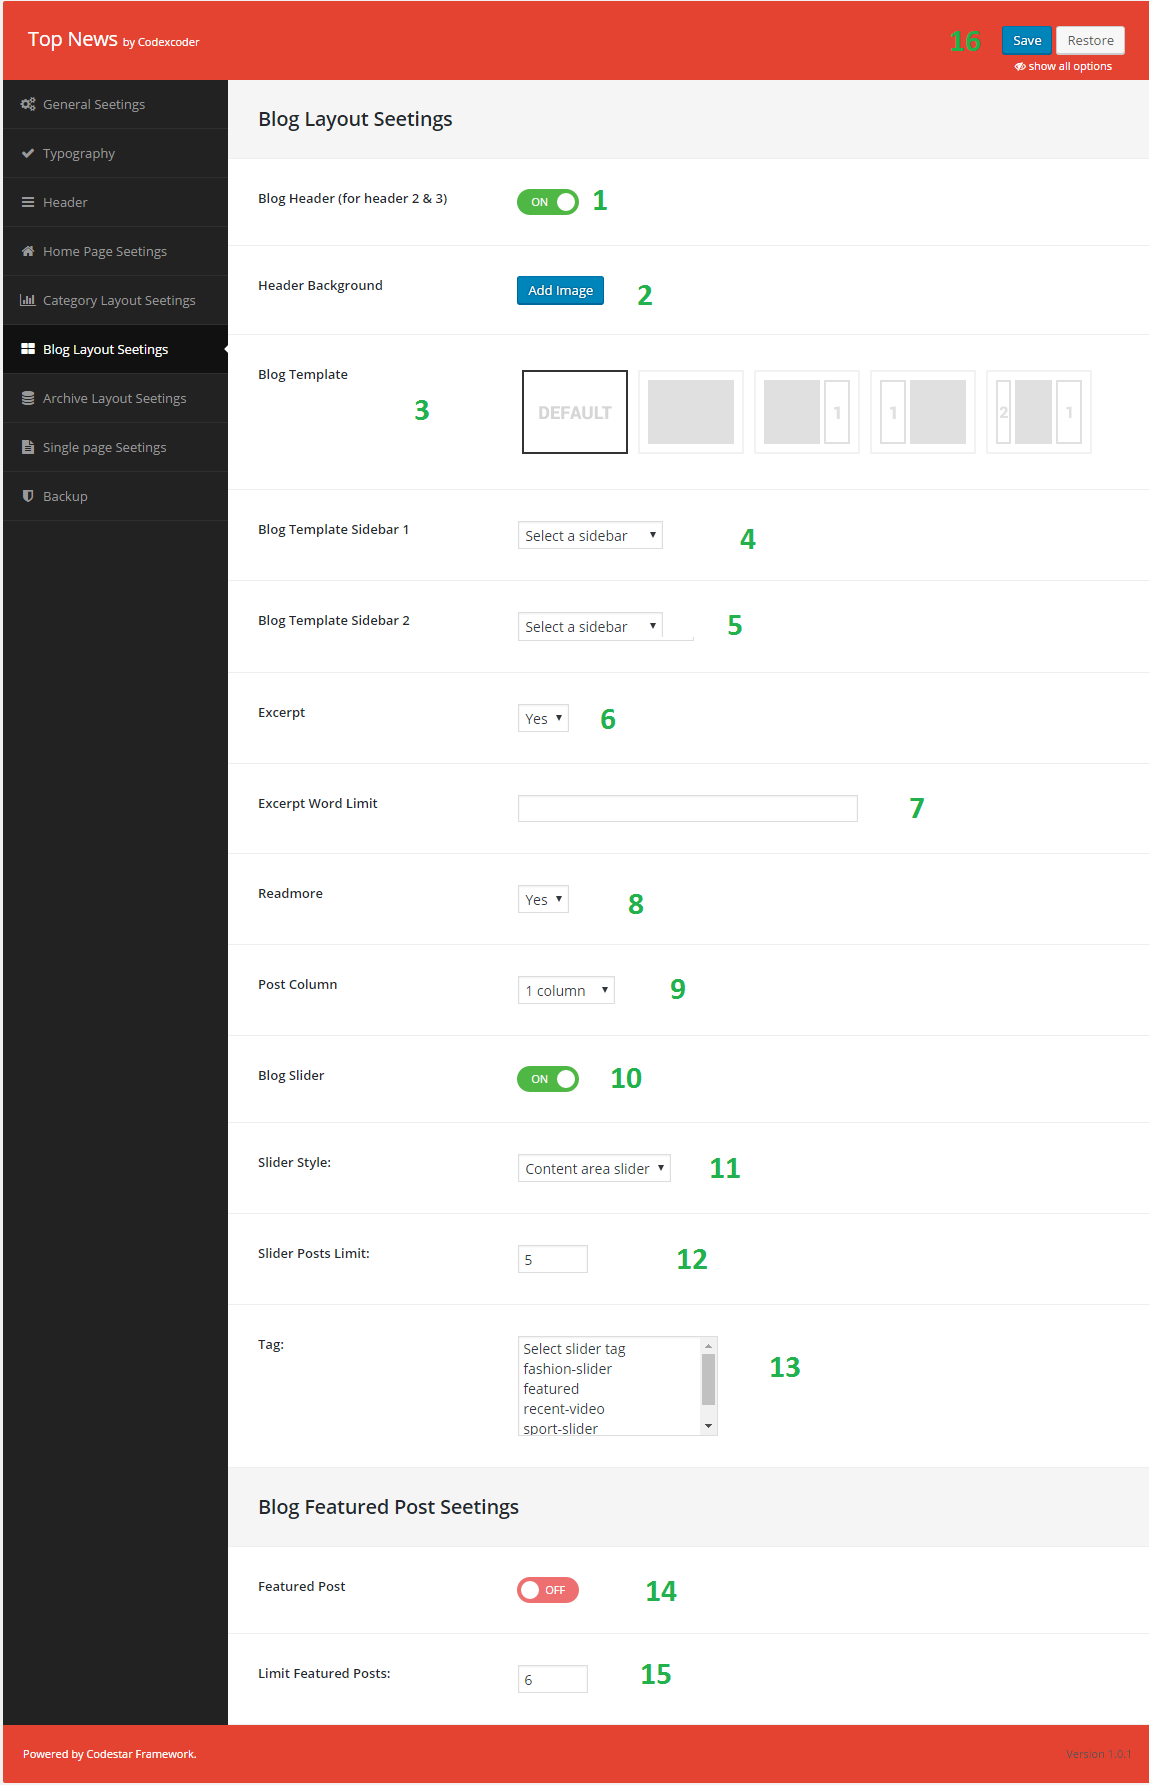
Blog Layout Settings
Go to Theme Option > Blog Layout Settings.
- You can on/off your blog header for header style 2 and 3.
- You can add an image as a blog header background by clicking add image button.
- You can choose default blog template from here as well as with one sidebar or more.
- You can also select the Blog template sidebar 1.
- You can able to choose Blog template sidebar 2 too.
- Finally you can choose your post style.
- You can control your excerpt to select from yes/no options.
- You can also control your readmore to select from yes/no options.
- You can choose your post column from here.
- You can able to blog slider on/off from here.
- You can also able to change the slider style use selecting option.
- Not only that you can able to limit your posts from here.
- As well as you can select tag from where you can show the sliders.
- Without those you can able to show feature post from Feature Post option.
- From Limit Feature Post option you can handle your features post quantity.
- Finally click on Save button.
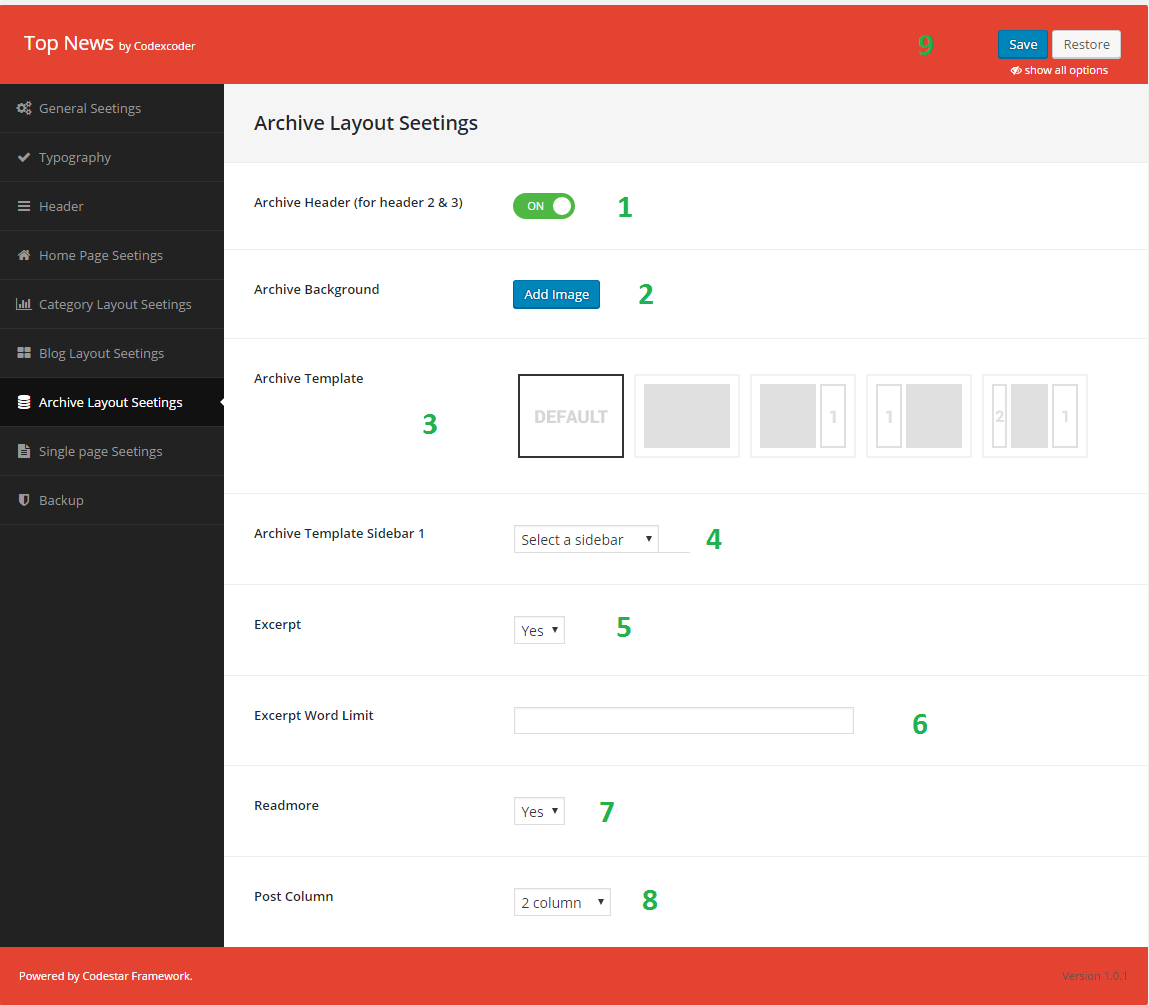
Archive Layout Settings
Go to Theme Option > Archive Layout Settings.
- You can on/off your archive header for header style 2 and 3.
- You can add an image as a archive header background by clicking add image button.
- You can choose default archive template from here as well as with one sidebar or more.
- You can also select the archive template sidebar 1.
- You can able to choose archive template sidebar 2 too.
- Finally you can choose your post style.
- You can control your excerpt to select from yes/no options.
- You can also control your readmore to select from yes/no options.
- You can choose your post column from here.
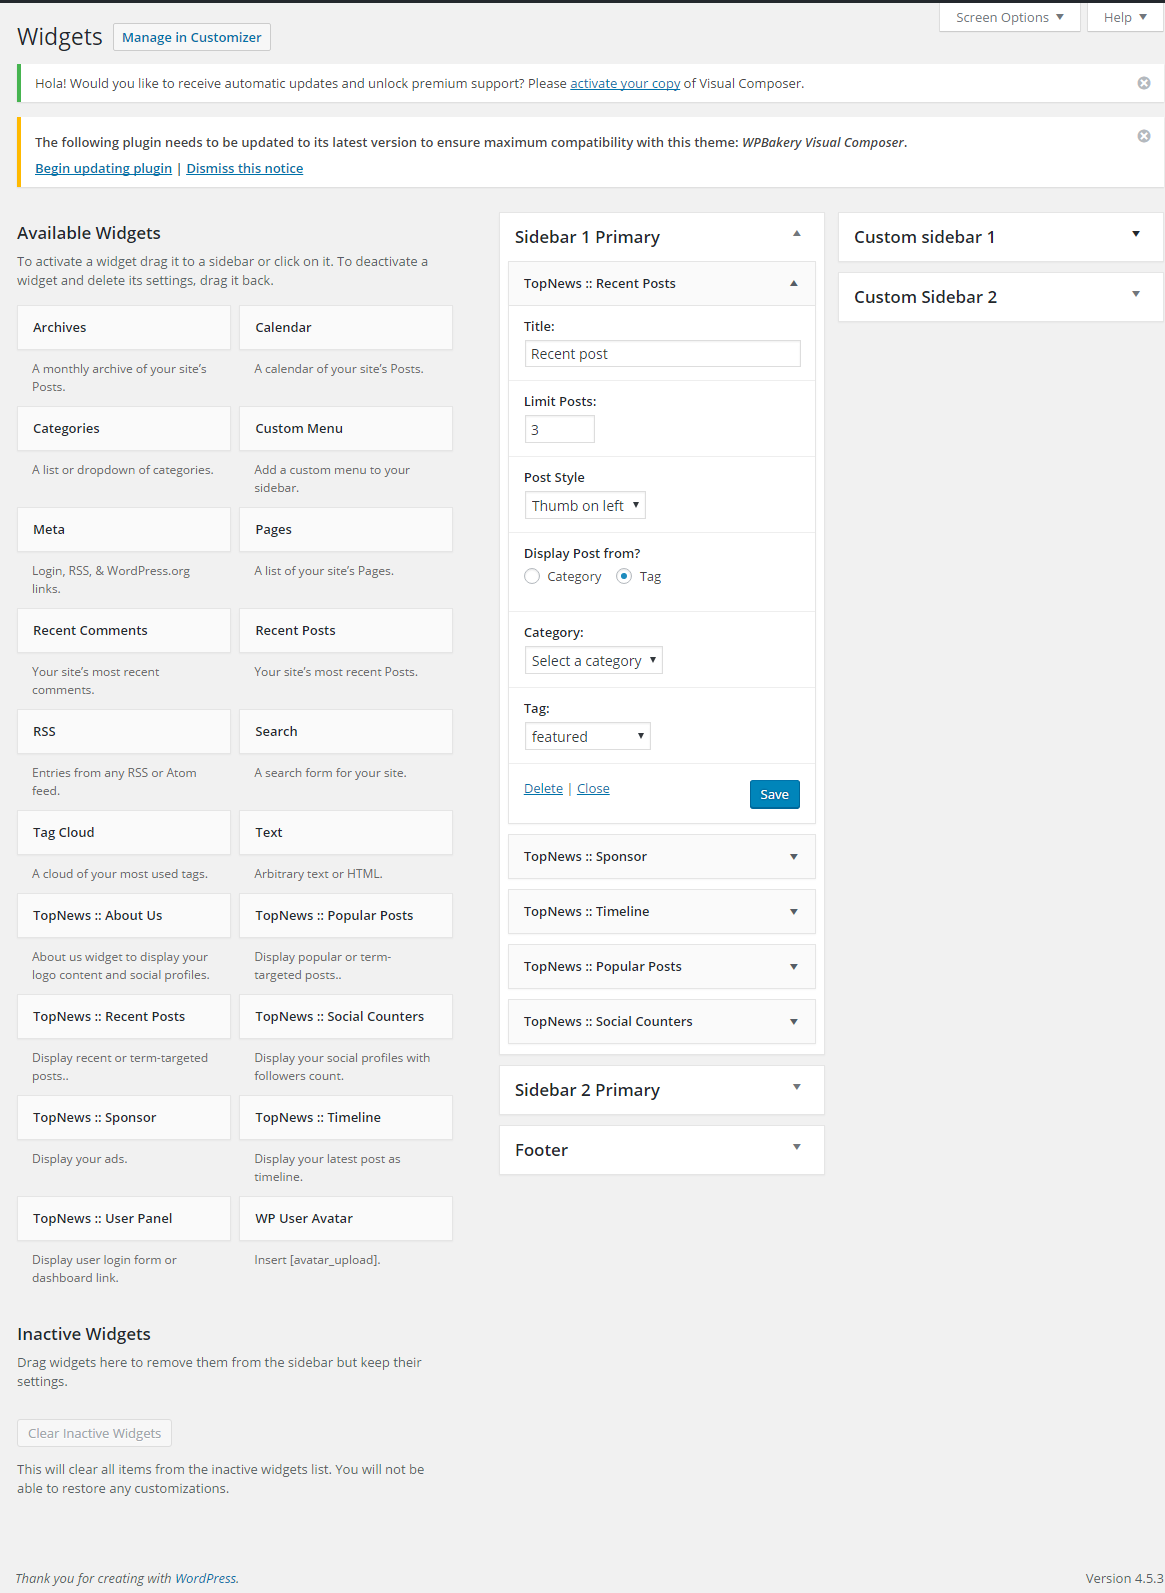
Post Stylist Widget
Go to Theme Option > Post Stylist Widget.
- Go to dashboard and click on Appearence.
- Then click on Widget.
- Choose a widget Example: TopNews::Recent Posts .
- Choose sidebar 1 or sidebar 2 Example: Sidebar 1 Primary . It is show in right sidebar. If you choose Sidebar 2 , it will show in left sidebar. As well as if you choose Footer , it will show in footer widget.
- Now click on Add Widget.
- Now put your expecting title on Title option.
- To limit your posts put limit on Limit Posts option.
- Select your post style from Post Style option.
- Where from you want to show the post. So select Category Or Tag option.
- If you choose category, select the category from Category option.
- If you choose tag, select the tag from Tag option.
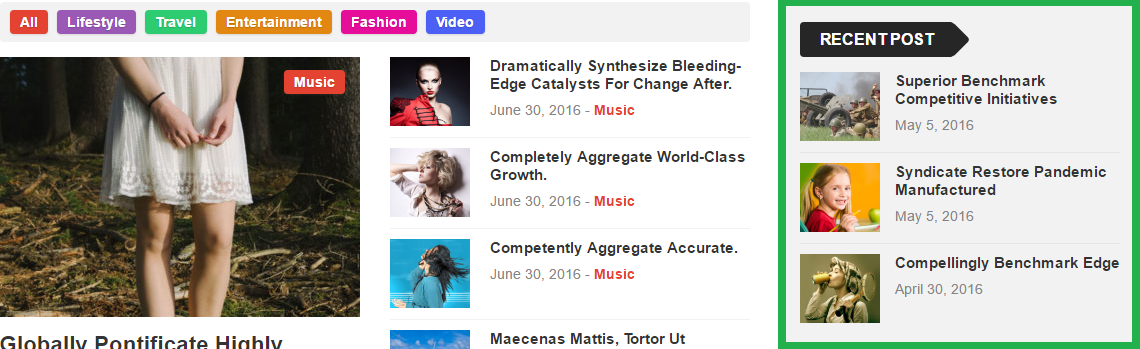
- Finally click on Save and see the outlook.
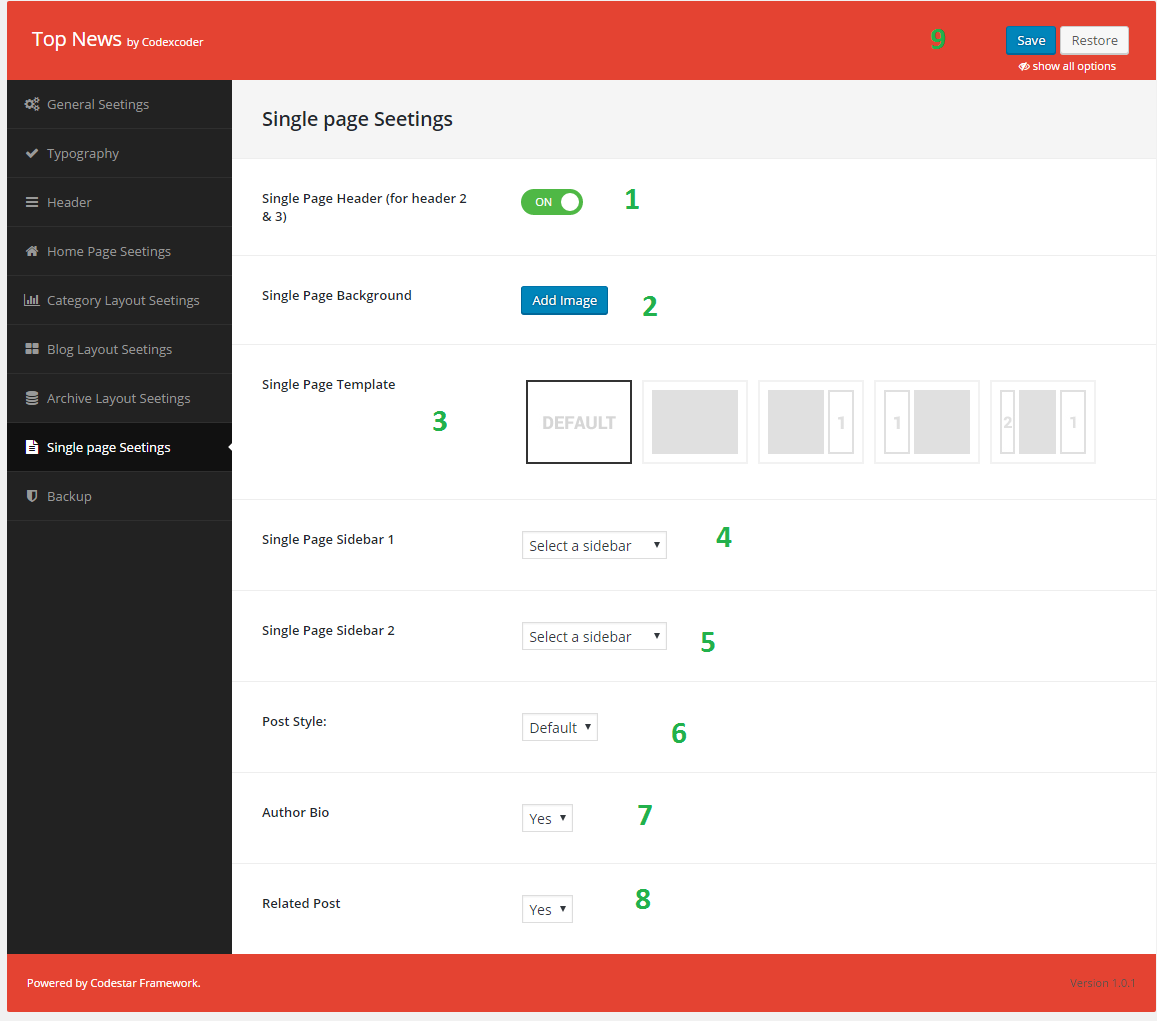
Single Page Settings
Go to Theme Option > Single Page Settings.
- You can on/off your single page header for header style 2 and 3.
- You can add an image as a single page header background by clicking add image button.
- You can choose default single page template from here as well as with one sidebar or more.
- You can also select the single page sidebar 1.
- You can able to choose single page sidebar 2.
- Also you can choose your post style.
- If you want to show the author name you can simply select Yes/No from Author Bio option.
- In the same way if you want to show the related post simply select the Related Post option.
- Finally if you want to see your backend result in front end, click on Save button and see the outlook of your work's.
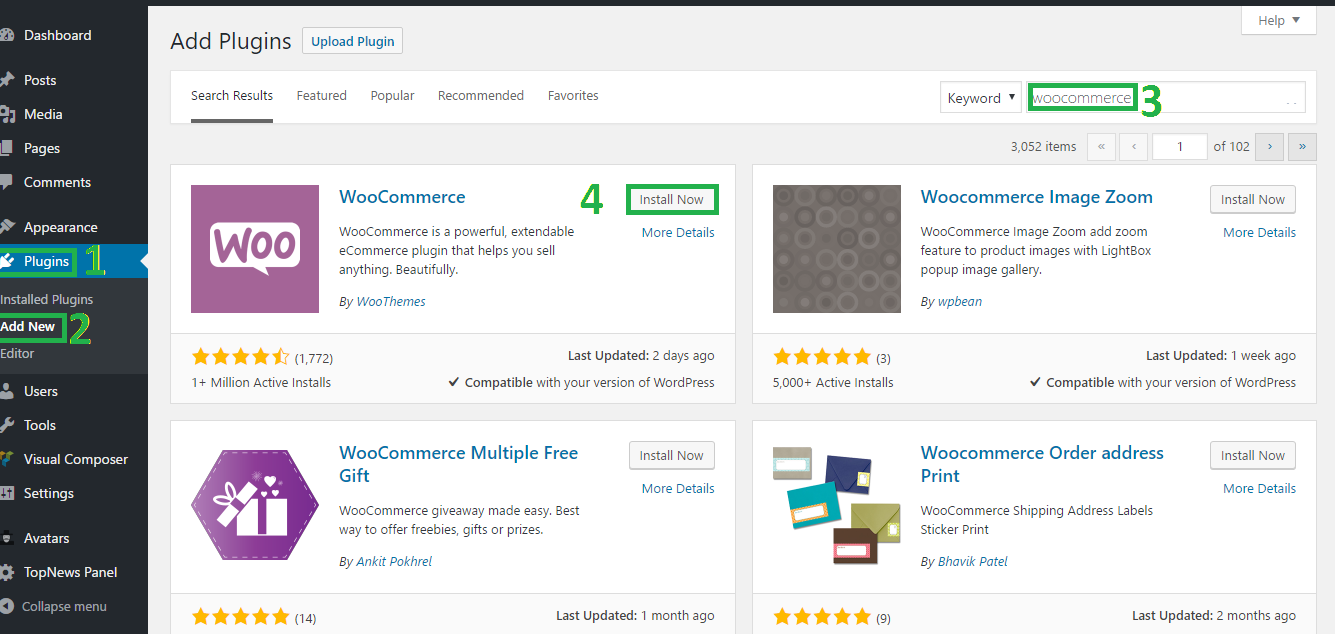
Woocommerce Settings
- Click on Plugins.
- Click on Add New.
- Write the plugins name into search box. Example: Woocommerce.
- Now click on Install Now.
5. Now click on Activate.
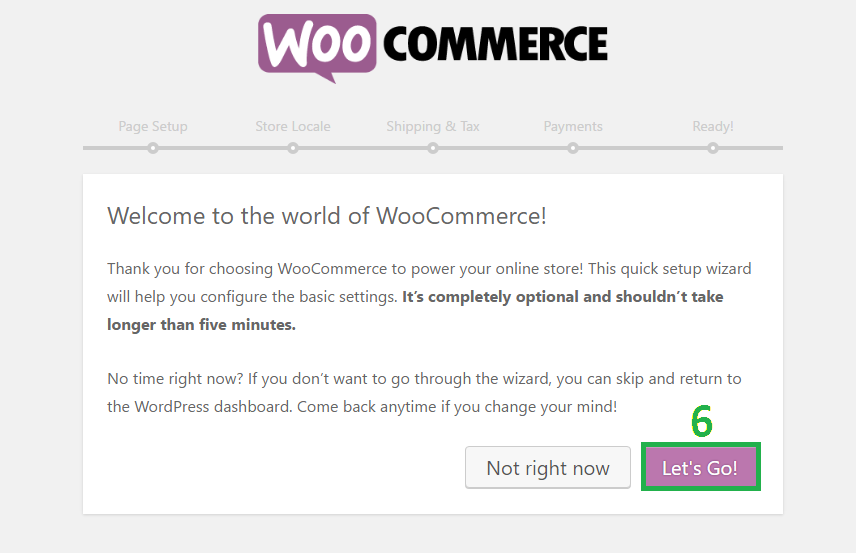
6. Click on Let's Go!.
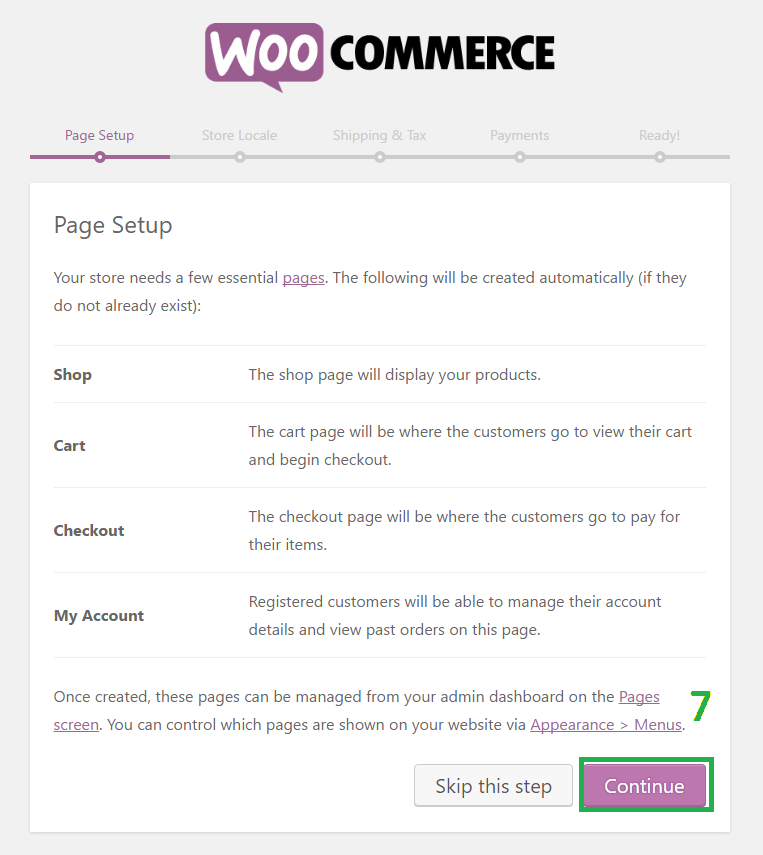
7. Click on Continue.
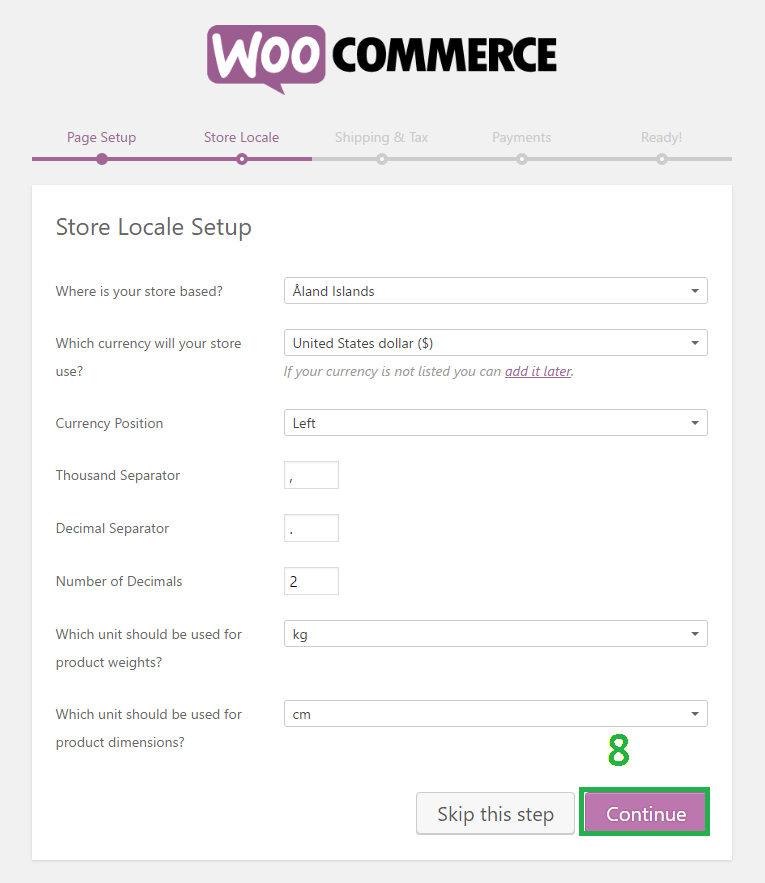
8. Fill your all requirements and click on Continue.
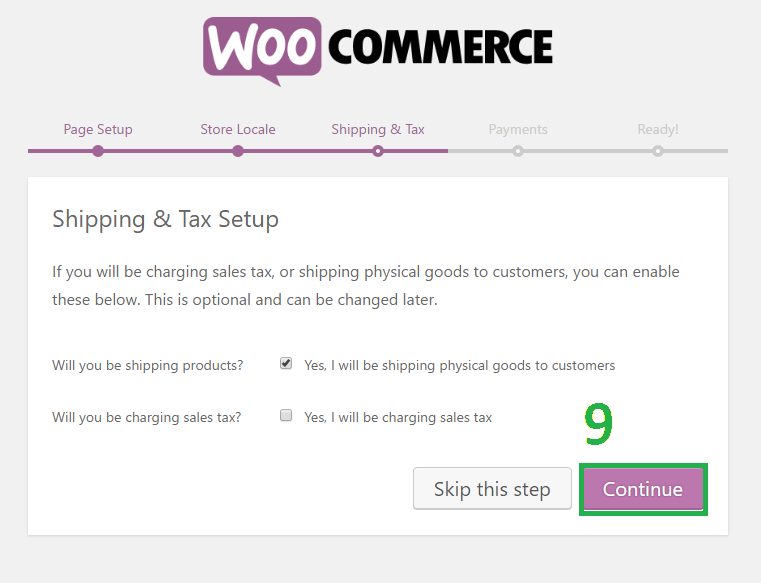
9. Put tick as your demand and click on Continue.
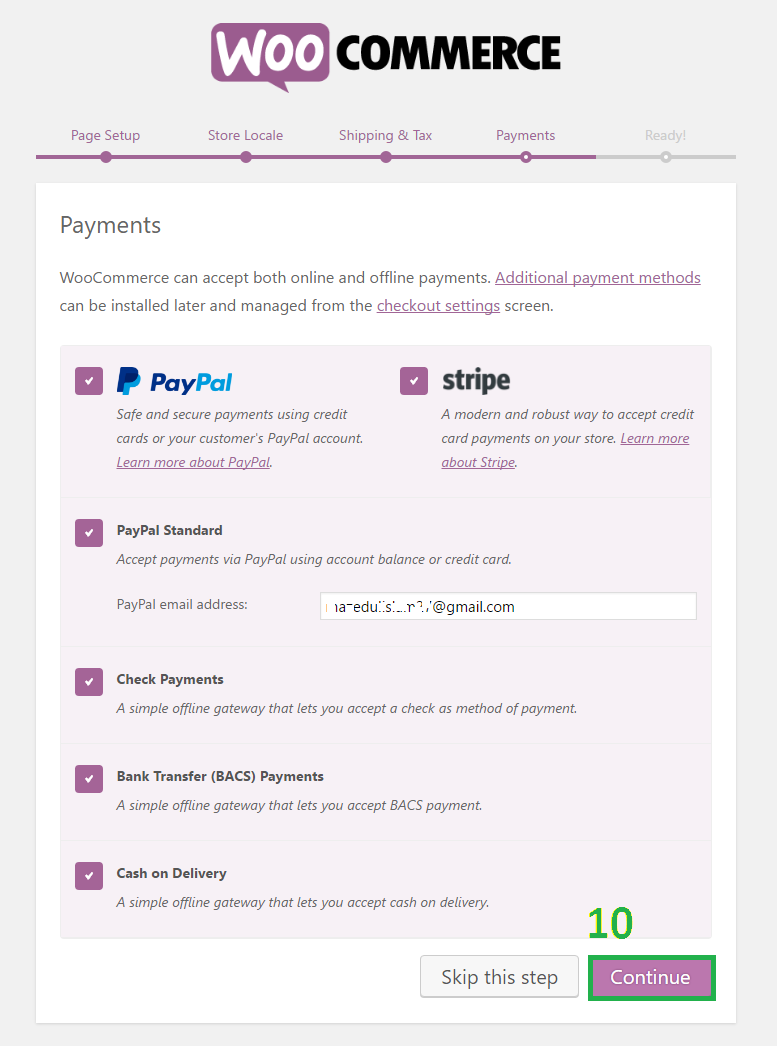
10. Choose your requirements and click on Continue.
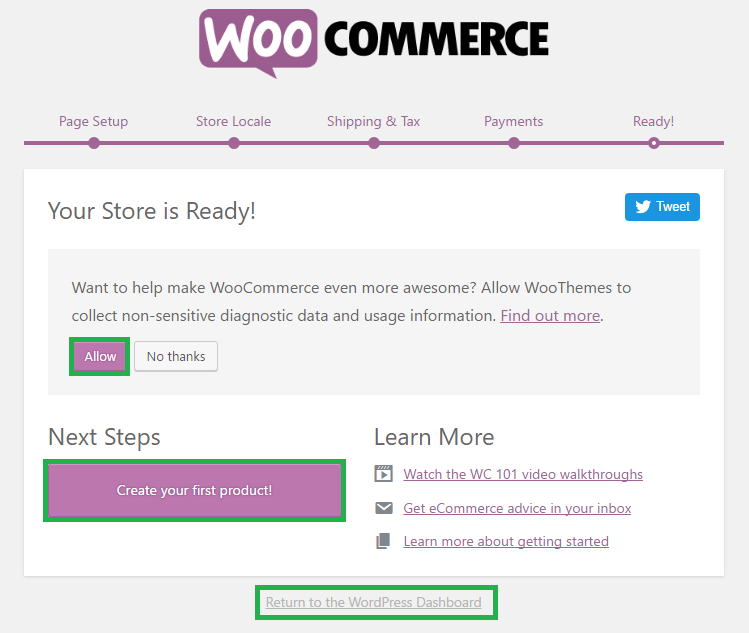
11. Click on Allow to create a woocommerce page or click on Create your first product. Or click on Return to the WordPress Dashboard to create your page from Dashboard.
Rating
Support
- Skype: codex.coder
- Support Team: support@codexcoder.com