Thank you very much to purchase a premium theme of us. Feel Free to contact with us for any issue. You can write us here: support@codexcoder.com
PlumberZone
Plumbing, Repair & Construction Wordpress Theme
- By: CodexCoder
- Email: support@codexcoder.com
PlumberZone is a Plumbing, Repair & Construction Wordpress Theme for Plumbing, Repair & Construction related site. This WP theme have most powerful admin panel and features.
First Steps
- Documentation - That's where you
- Sample Data - Demon content and theme setting json for complate setup.
- Upload - This is where all Theme files are (zipped & unzipped format)
Theme Installation
- Log into your WordPress backend
- Navigate to Appearance > Themes
- Click Install Themes/Add Themes
- Click Upload/Upload Themes
- Now you just need to find the "plumberzone.zip" in the Upload folder and hit Install now.
- After Installed then click Active Now
See video about Uploading.
width="560">
Theme Install From FTP
- Login to your FTP account and navigate to your WordPress Installation directory
- Navigate to the folder /wp-content/themes
- Upload the "PlumberZone" folder (not the .zip-file). This is the folder located inside the "Upload" folder in the zip-file you've downloaded from CodexCoder.
- Now log into your WordPress backend
- Navigate to Appearance > Themes
- Find the Theme and click Activate
Install & Setup Plugins
So at this stage you have probably noticed a warning, asking you to install recommended plugins. This is needed to get the Visual Composer, Master Slider Pro, MailPoet Newsletters, Contact Form Maker. Installing that is very simple, you just need to click Begin installing plugins and you will be redirected to the plugin installation page where you can install Plugins.
See this image
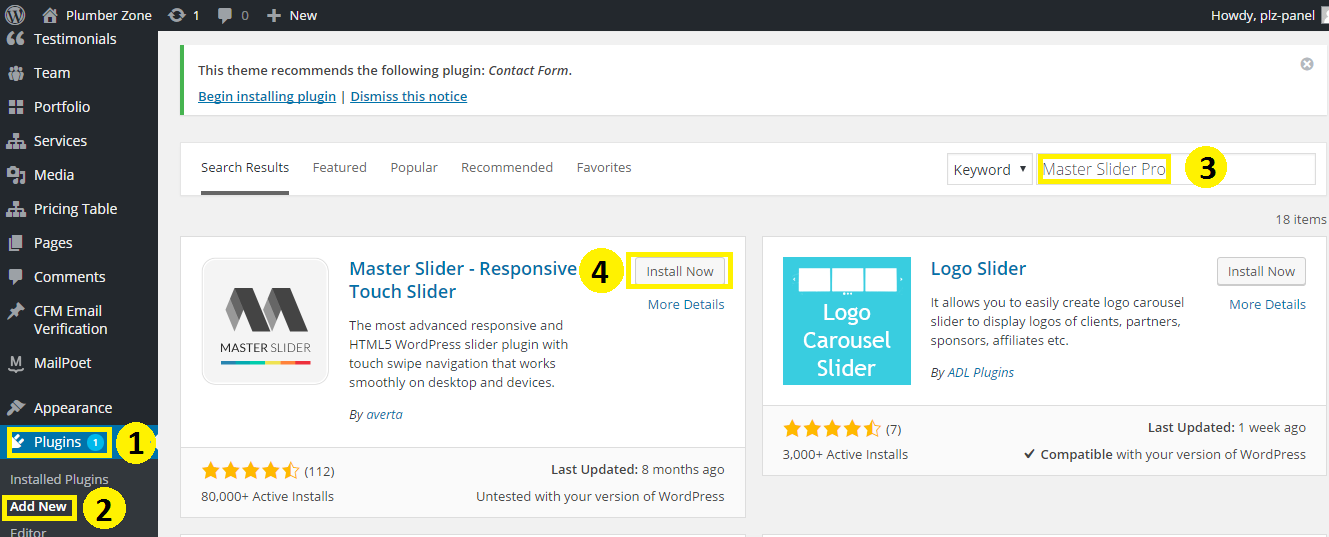
You can install your all plugins following the instruction which we show below:
1. Go to Dashboard and click on Plugins .
2. Then click on Add New .
3. Now you can see the search box as picture. Type your plugins name, Example: Master Slider Pro .
4. Finally you can get a few number of plugins and choose your demandable plugins and click on Install Now .
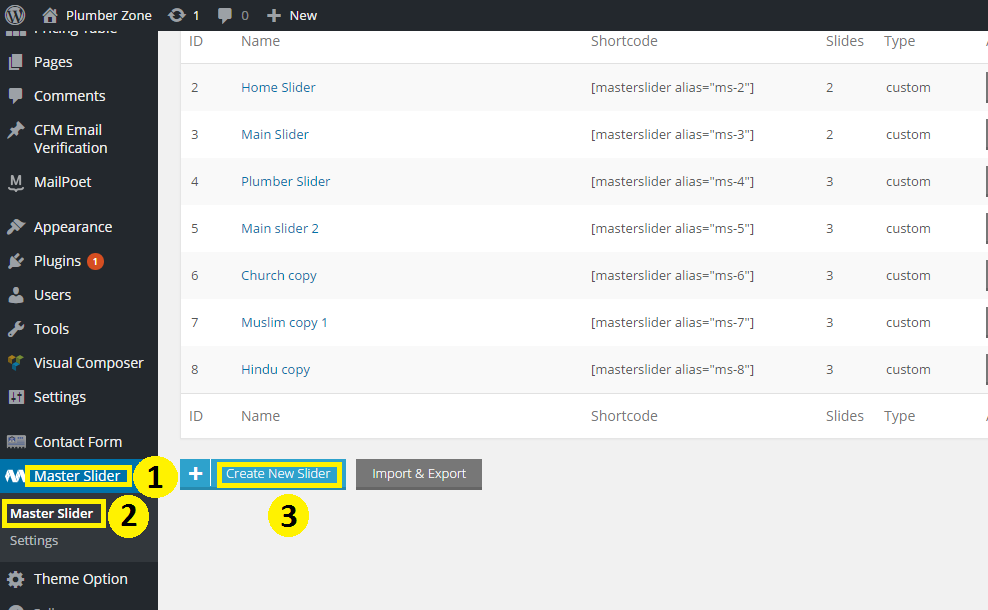
If you want to use to master slider, you need to go to Dashboard.
1. Click on Master Slider
2. Again click on Master Slider
3. Now click on Create New Slider
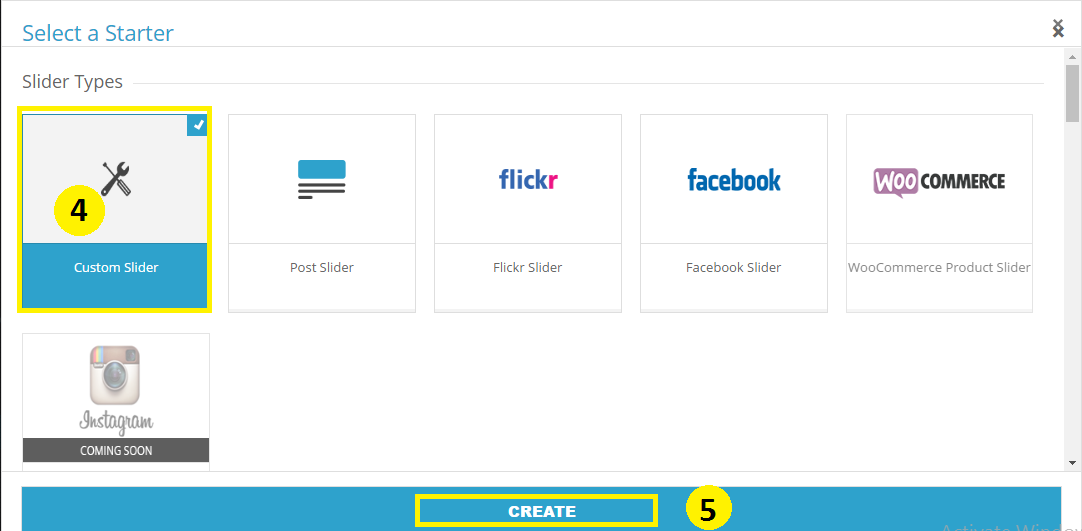
4. Then click on Custom Slider
5. Atlast you need to click on Create
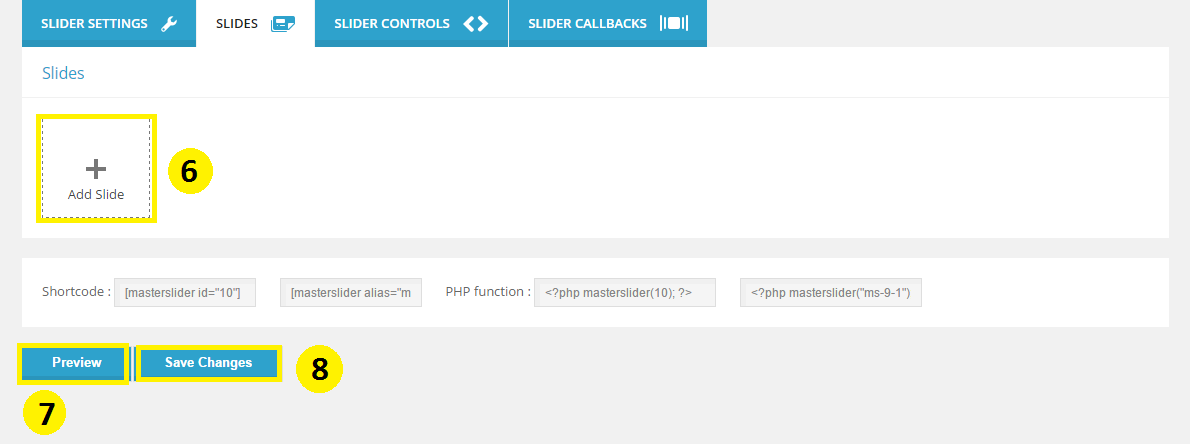
6. Now click on Add Slide .
7. You can see the preview to click on Preview
8. Or click on Save Changes
Or you can see the video:
Importing Demo Content
- Login to WordPress admin
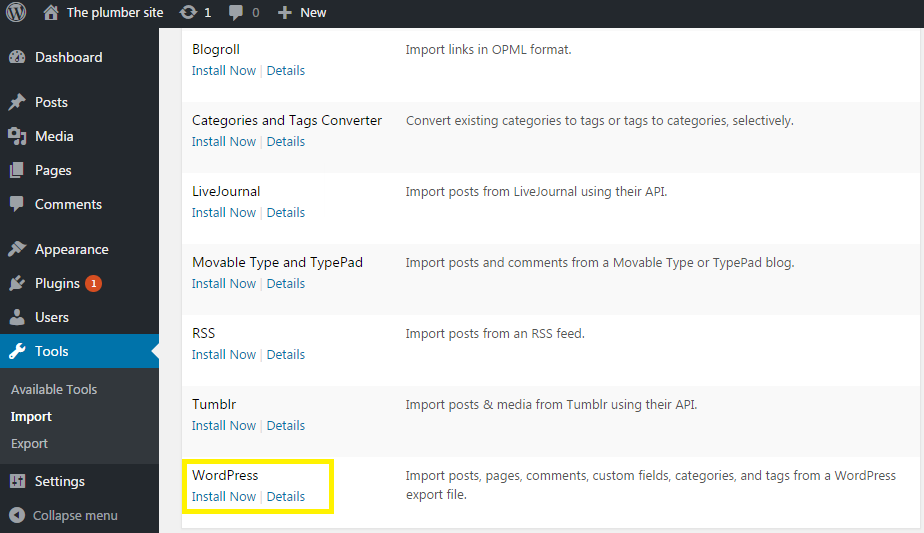
- Go into admin panel Tools > Import to begin the import process
- Click on the WordPress option If you haven’t already, you will be prompted to install the WordPress Importer free WordPress plugin. Just install it like you would any other plugin.
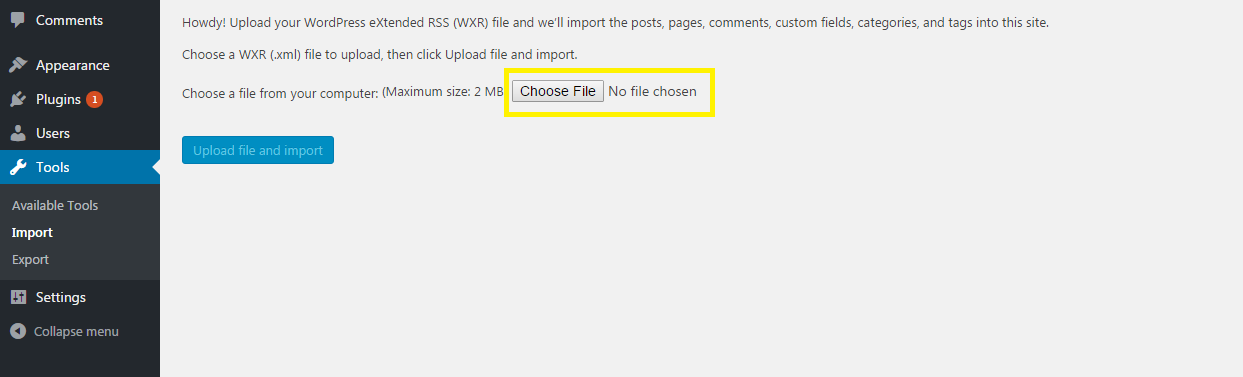
- After you activate plugin return to this screen.
- Then click the Browse button to select the xml sample data file you would like to upload, and click Upload file and import. You will find XML files in "Demo content" folder of downloaded package. In that folder each demo has its own folder within which you will find needed XML file. Next You should see the following screen.
- The importer will give you the option to either import our demo users, or to assign the posts to an existing user on your WordPress site. For each option we recommend that you assign the posts to an existing user (ideally your user account, since you are the one working on the website). You’ll also see an option download and import the file attachments. Check this box only if you want to import all of the image and media files included in our Plumber demo. Click submit to import the sample data. Once complete you should see a successful import message.


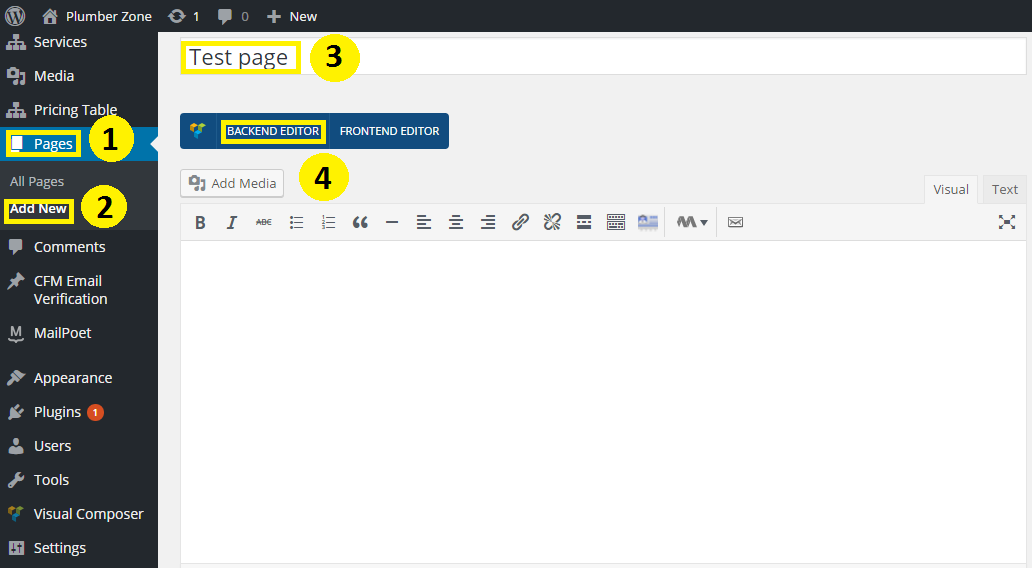
Home Page Setup
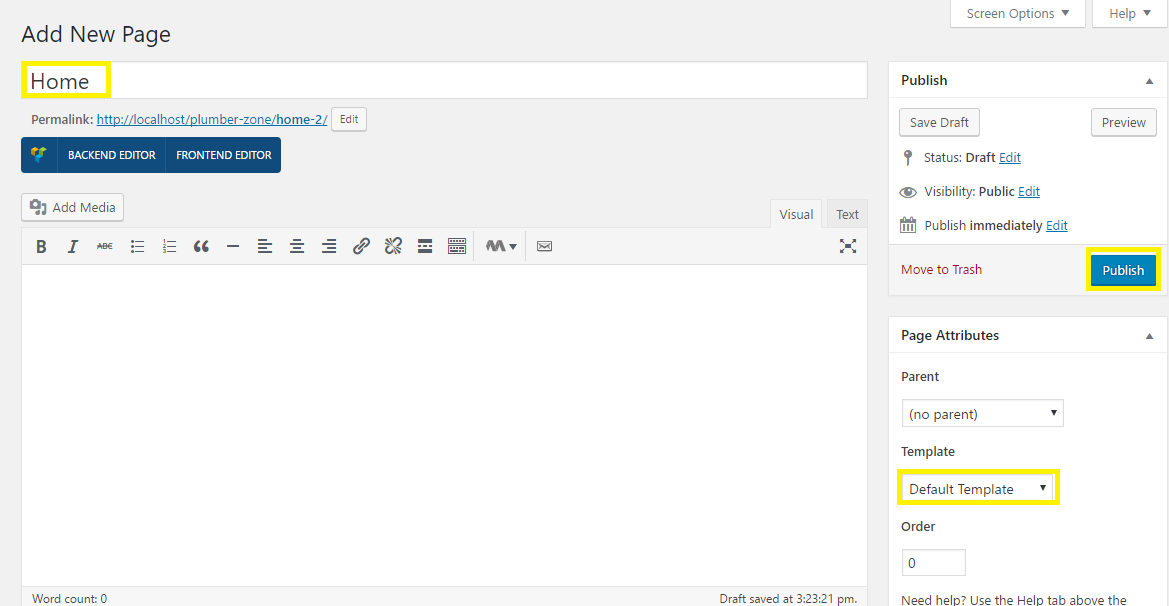
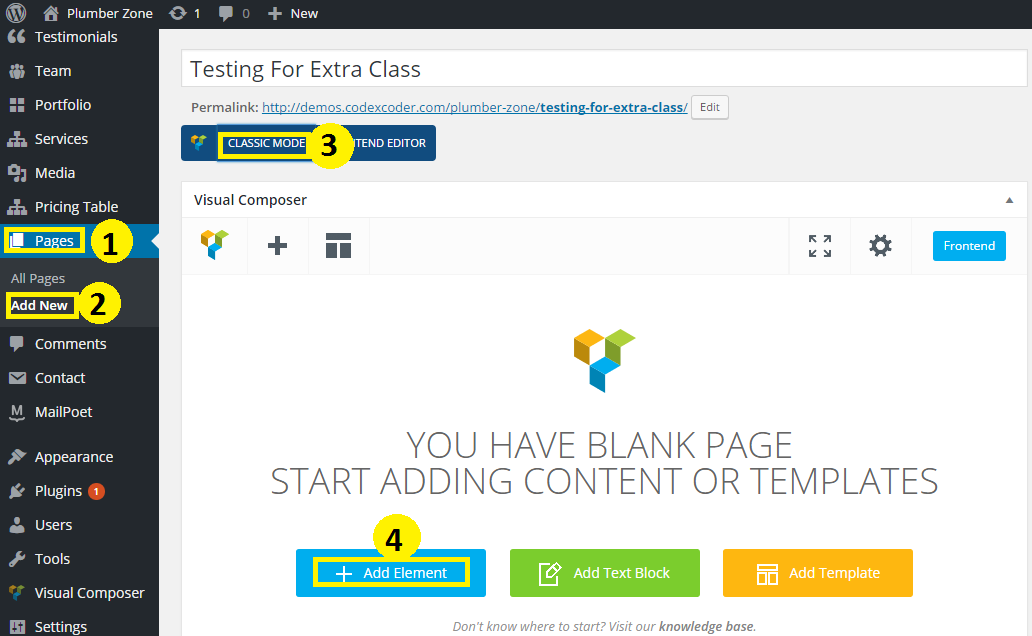
- Go to Dashboard and click on Pages
- Now click on Add new
- Write a title of your page into Title field.
- Now select the Default Template from Template option.
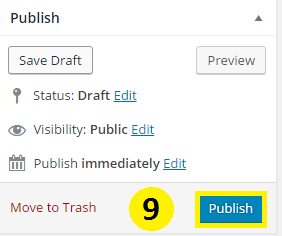
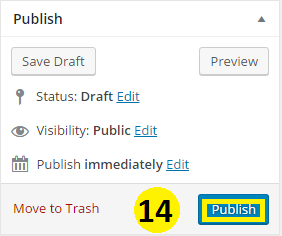
- Now click on Publish button.
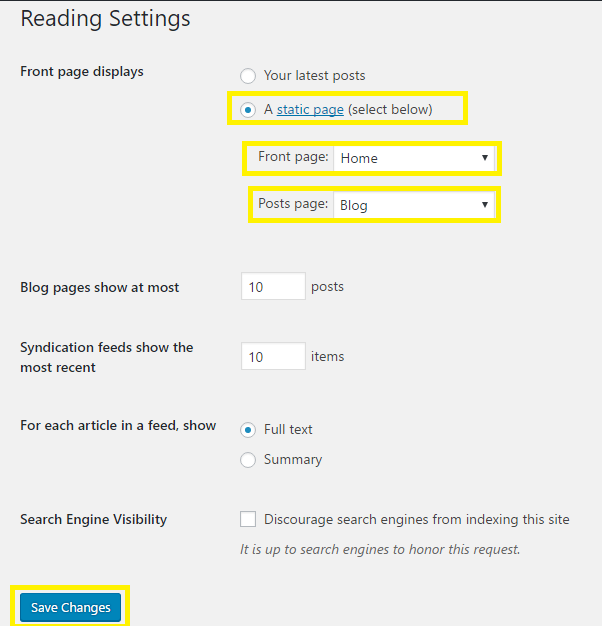
Now go to Dashboard and click on Settings > Reading. Please see the screenshot below and do as it.
Language Translations
All of our Themes are able to be translated into any language. The process of translating the theme is a user responsibility. The following instructions are given as guidance.
- Open wp-config.php and replace this:
define ('WPLANG', '');with this (subsitute the language string (bg_BG) with your own!):define ('WPLANG', 'bg_BG'); - Download and install POEDIT
- Connect to your site -> open your theme/languages directory
- Download the default.po file and open it with POEDIT.
- Translate file and save it as bg_BG (the file name must match with the string you inserted into wp-config.php)
- Two files will be generated after save. bg_BG.po and bg_BG.mo
- Upload the .mo and .po files into wp-content/themes/your-theme/languages folder
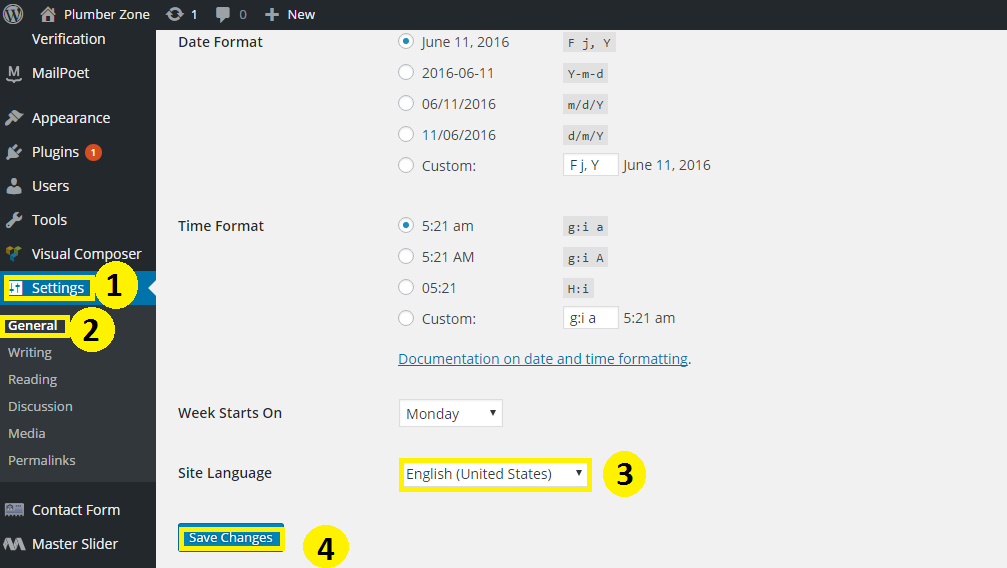
Important info, regarding translation in WordPress.
- Go to (WordPress Dashboard > Settings > General)
- Select your website langauge as shown in this screenshot:
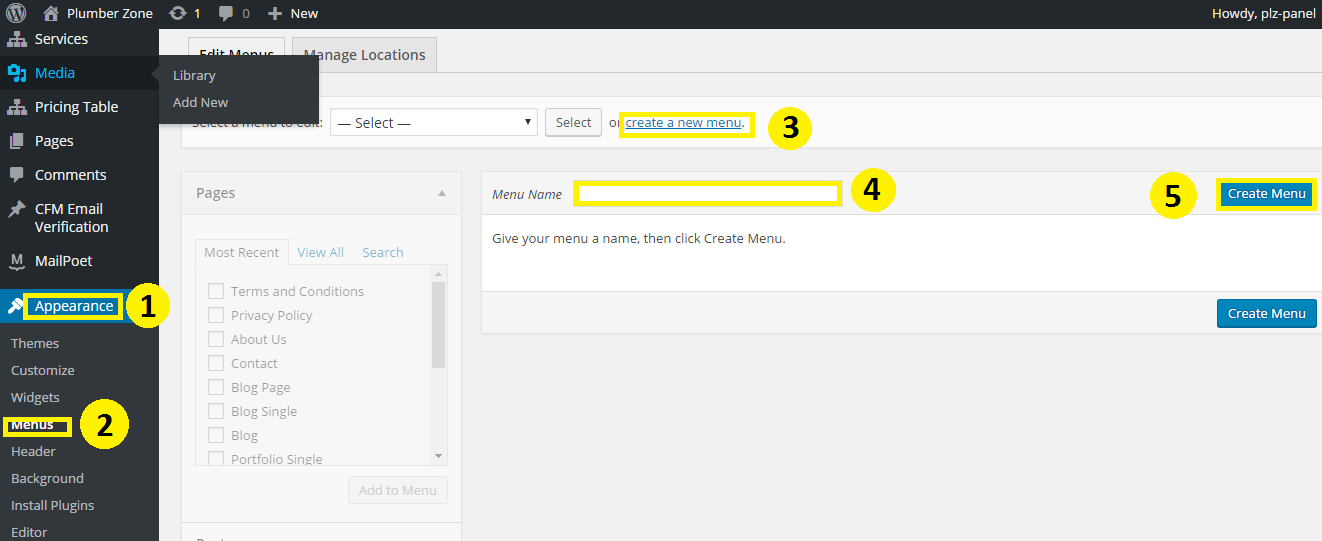
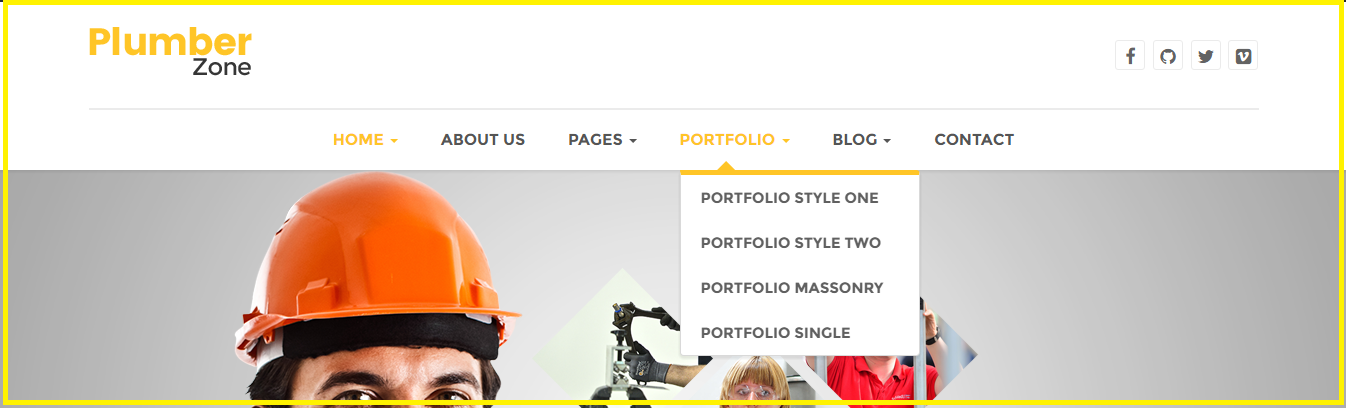
Theme Navigation
Primary Menus
- Click on Appearence
- Then click on Menus
- Then click on create a new menu(Primary Menu)
- Write your menu name. Example: Main Menu.
- Now click on Create Menu.
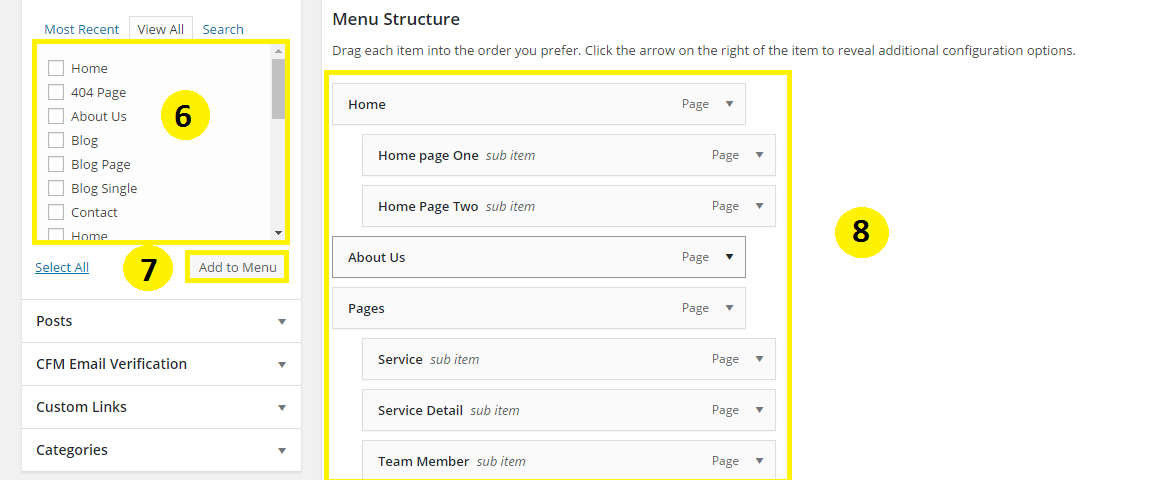
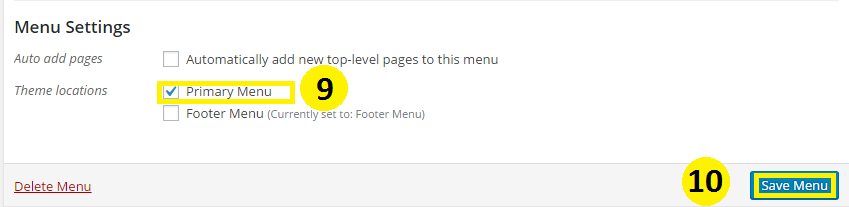
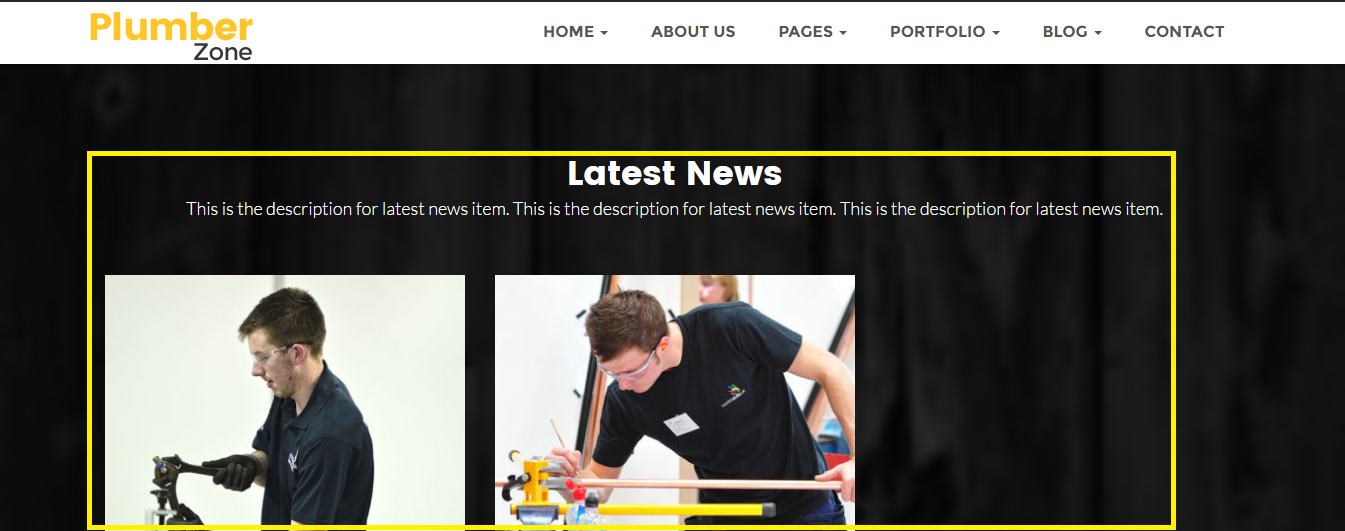
Page Builder

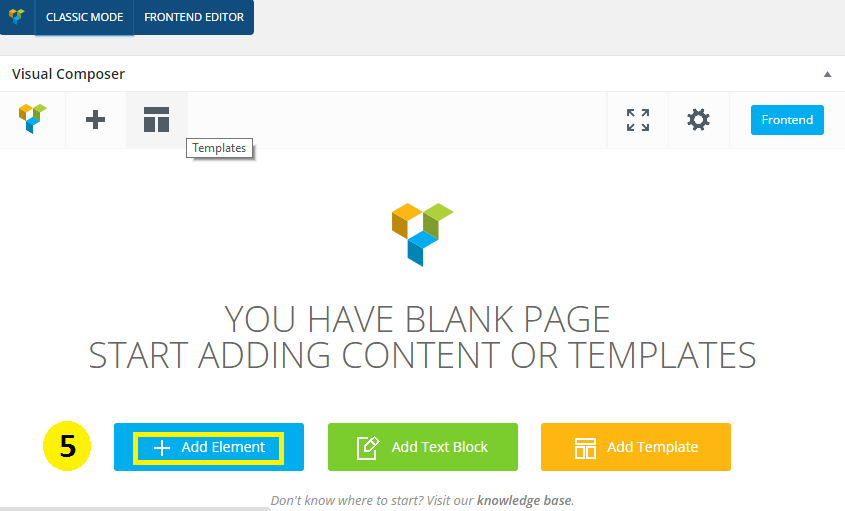
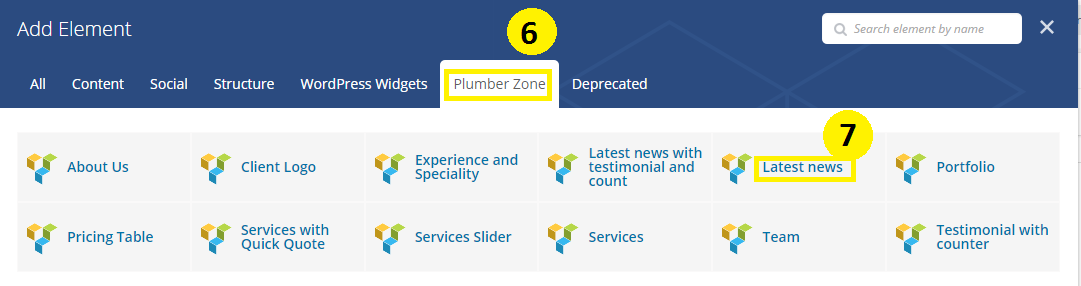
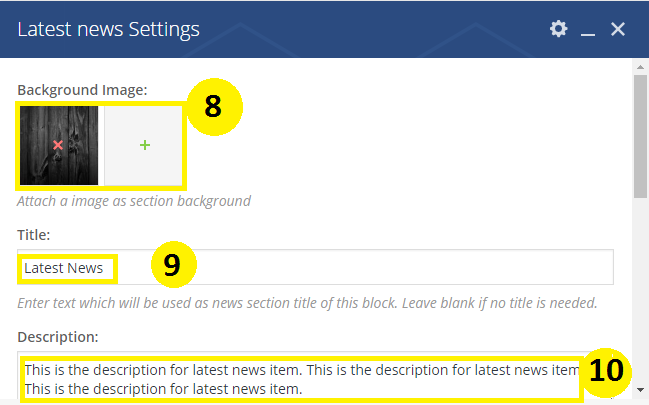
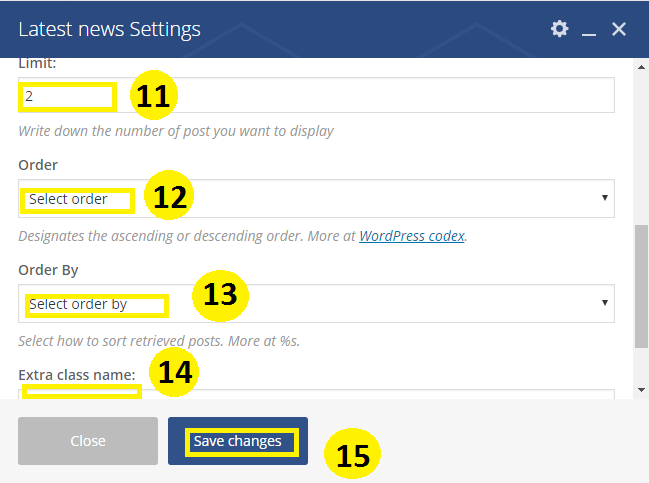
Finally, you can see the outlook of this section
Theme Options
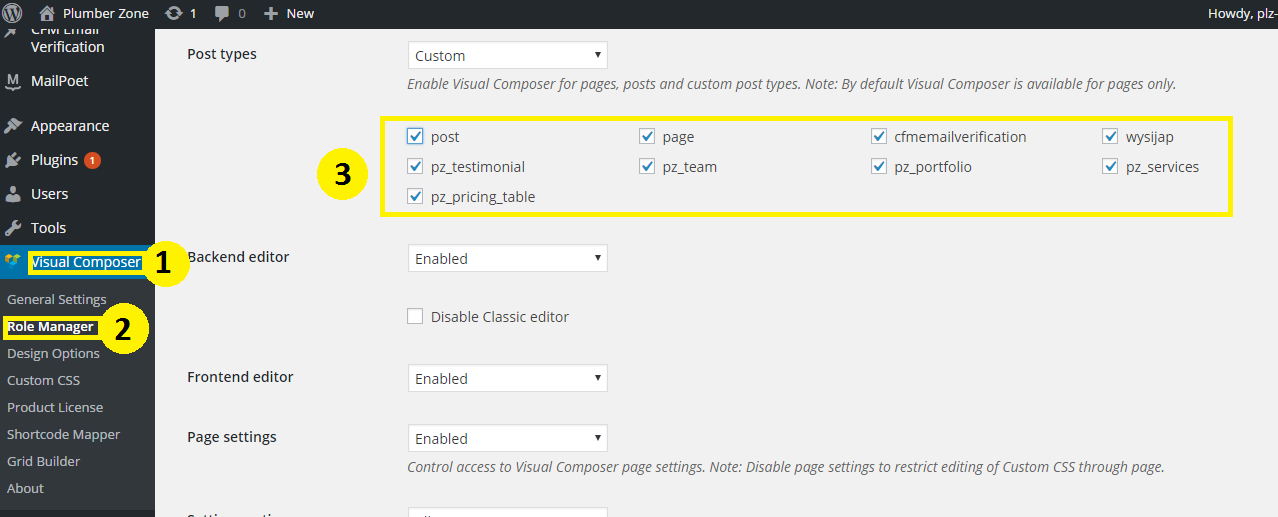
If you want to change the general options of the theme, go to your WordPress Admin Area to plumberzone Setup menu. Here you have a tabbed Navigation where you can change a lot of Options of your new Theme. There have lot's of option for plumberzone Theme.
- General Settings
- Typography
- Contact Page
- Footer Setting
General Settings
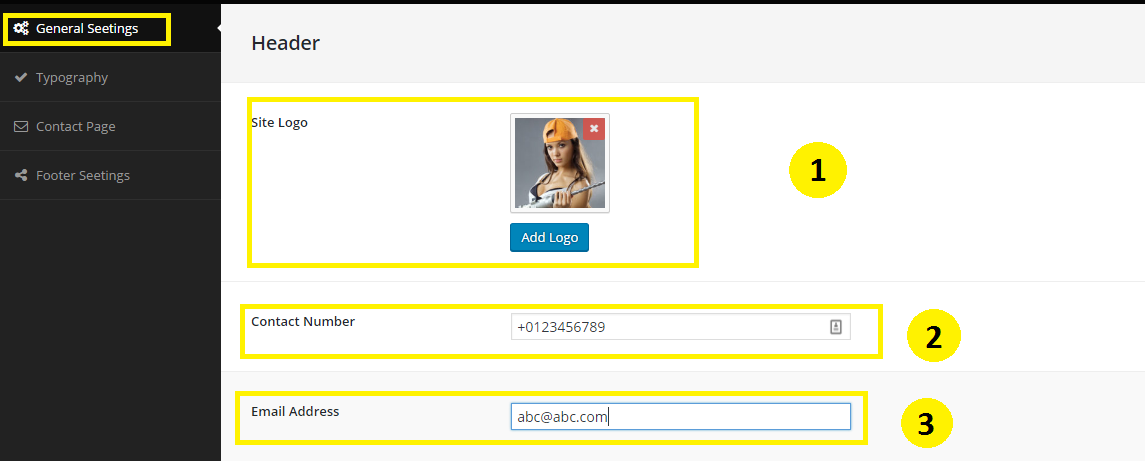
Go to Theme Option > General Settings. Here they are:
- Click on Site Logo and choose your logo images from media library.
- Then you put you contact number into Contact Number aoption.
- You also mention here your Email address from Email Address aoption.
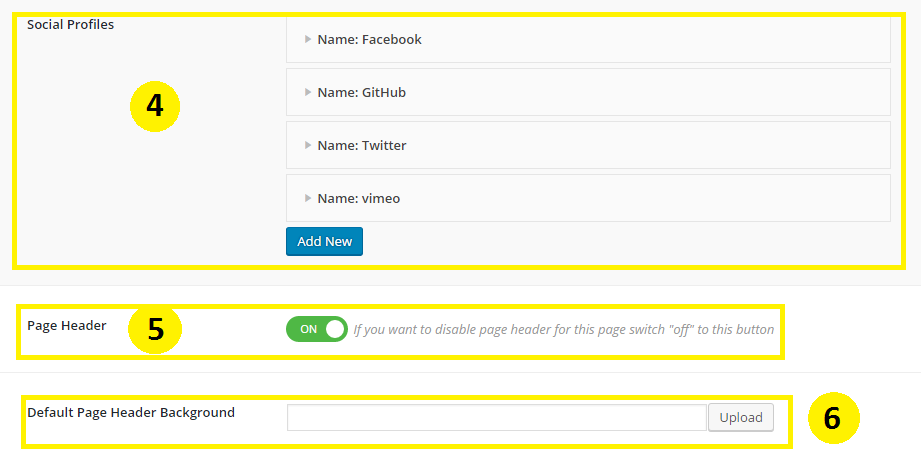
- 4. As well as you can create your top social profiles from Social Profiles option. Without this you can add new social's name from here.
- 5. You can also on/off the page header from Page Header switch.
- 6. You can able to use default page header background from Default Page Header Background option.
- 7. As well as you can use favicon for different devices from Custom Icons options.
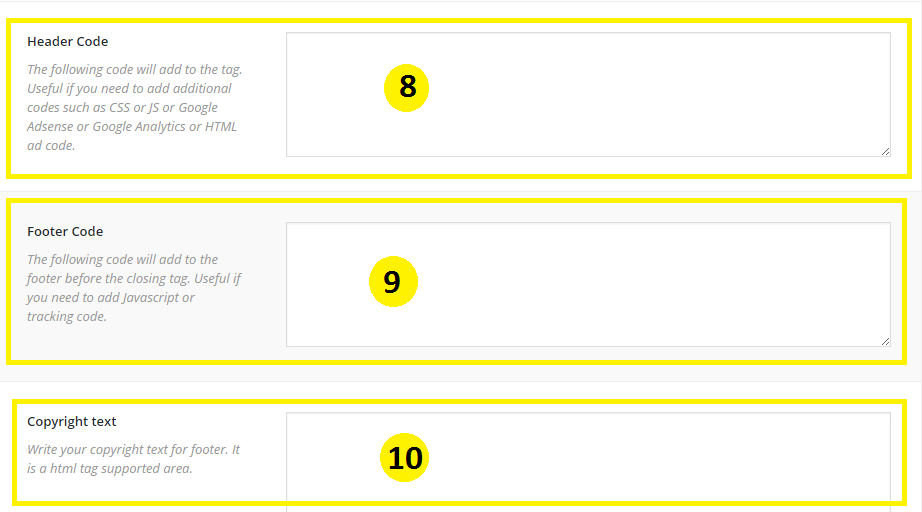
- 8. For inputing header code you can put your header code into Header Code box.
- 9. At the same way for inputing footer code you can put your footer code into Footer Code box.
- 10. At last you can input here copyright text here from Copyright Text box.
- 11. Finally click on Save button to save the page and see the outlook.

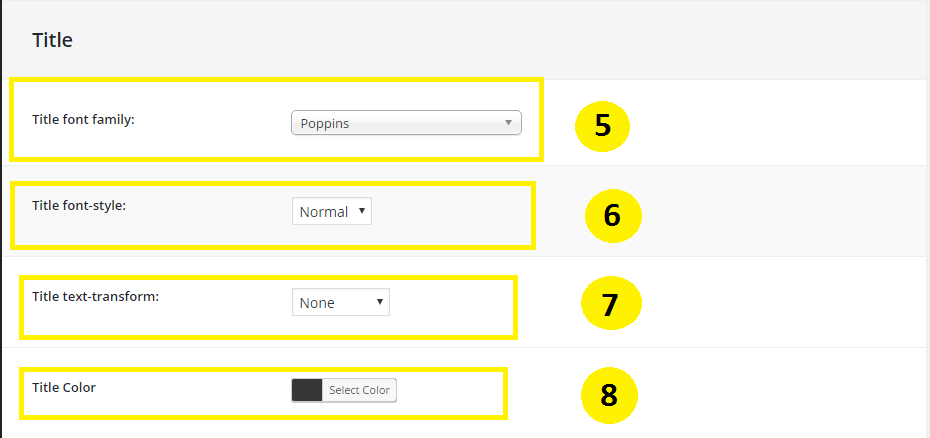
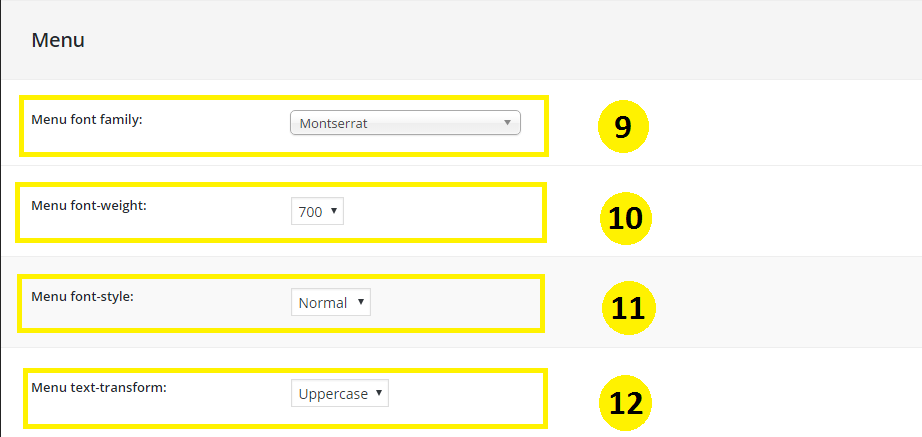
Typography
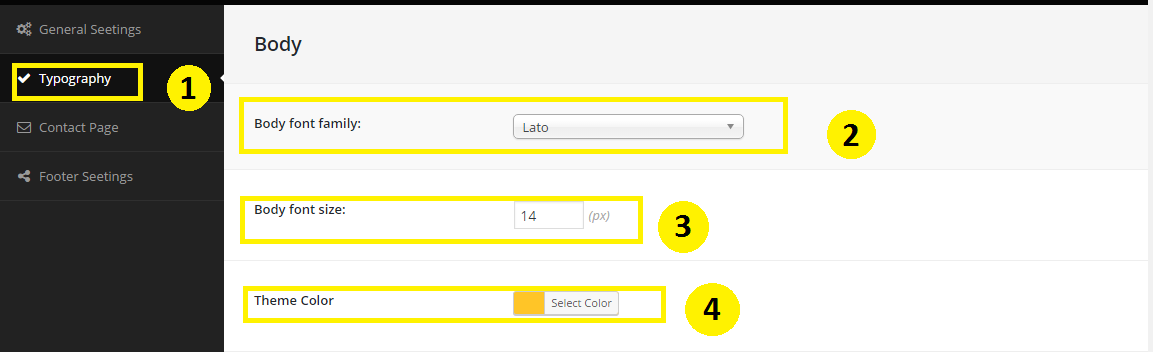
Go to Theme Option > Typography.
- Click on Typography
- In Body Font Family you can use all kinds of google fonts freely.
- You also can mention the body font size from Body Font Soze options.
- From Theme Color options you can change your Theme Color.
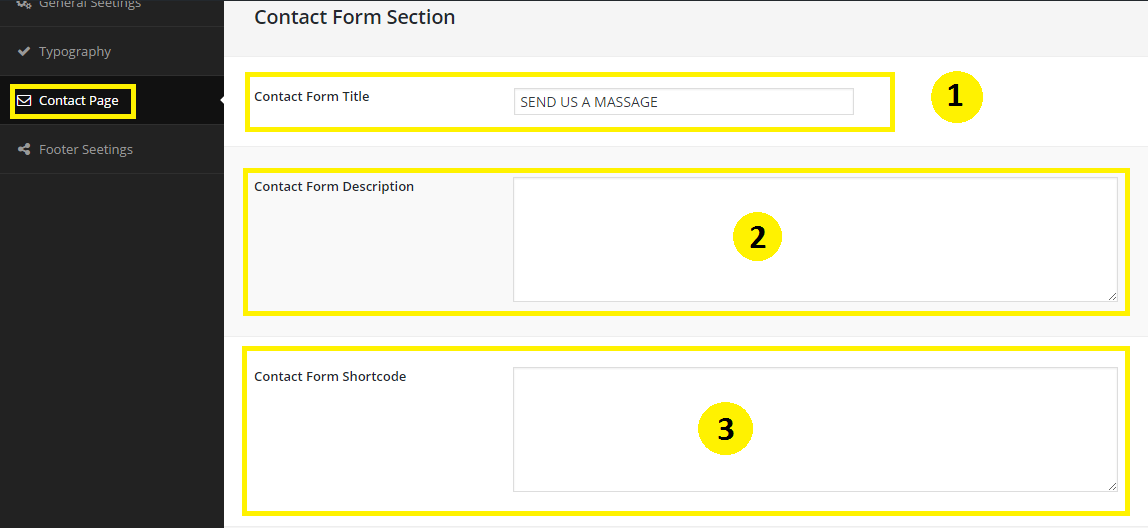
Contact Page
-
Click on Contact Page
- You can put a title from Contact form Title options.
- You can also put contact form description from Contact form Description options.
- As well as you can use a shortcode code into Contact form Shortcode options.
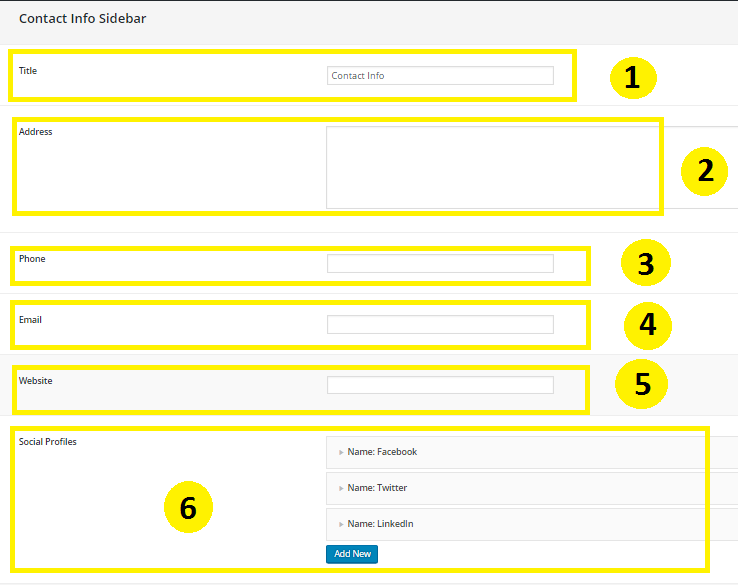
- You can put contact sidebar title from Title options.
- You can also put the sidebar address from Address options.
- In the same way you can put here phone number from Phone options.
- In the same way you can put here Email address from Email options.
- In the same way you can put here website address from Website options.
- As well as you can use use social profiles from Social Profiles options.
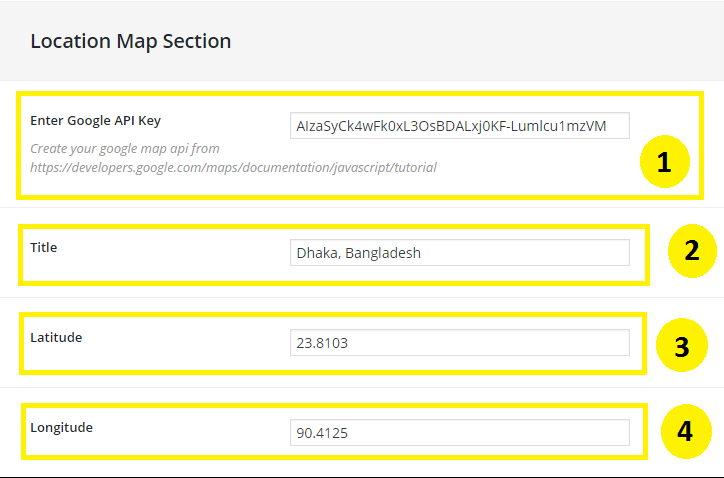
- Please put here your google map API key into Enter Google API Key options. For API key: Click here
- For location map title you can use the Title options.
- Put your latitute id here into Latitute options.
- Put your longitude id here into Longitude options.
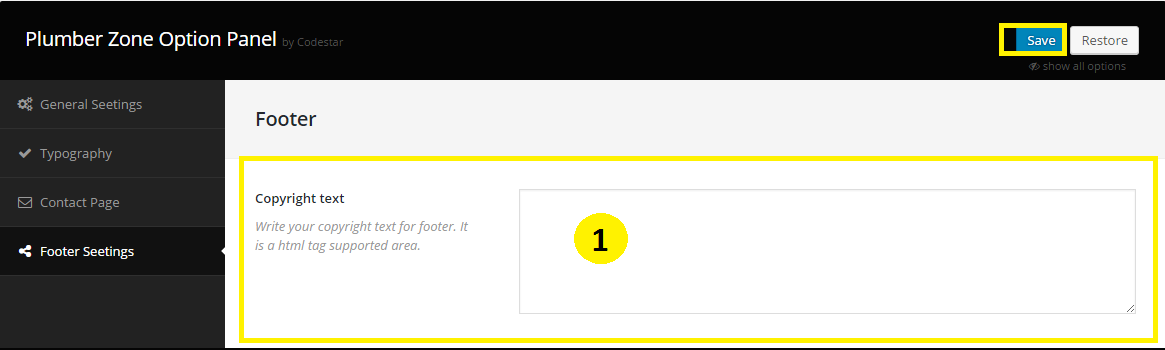
Footer Settings
- For copyright text you can put your copyright text here from Copyright Text and click on Save button.
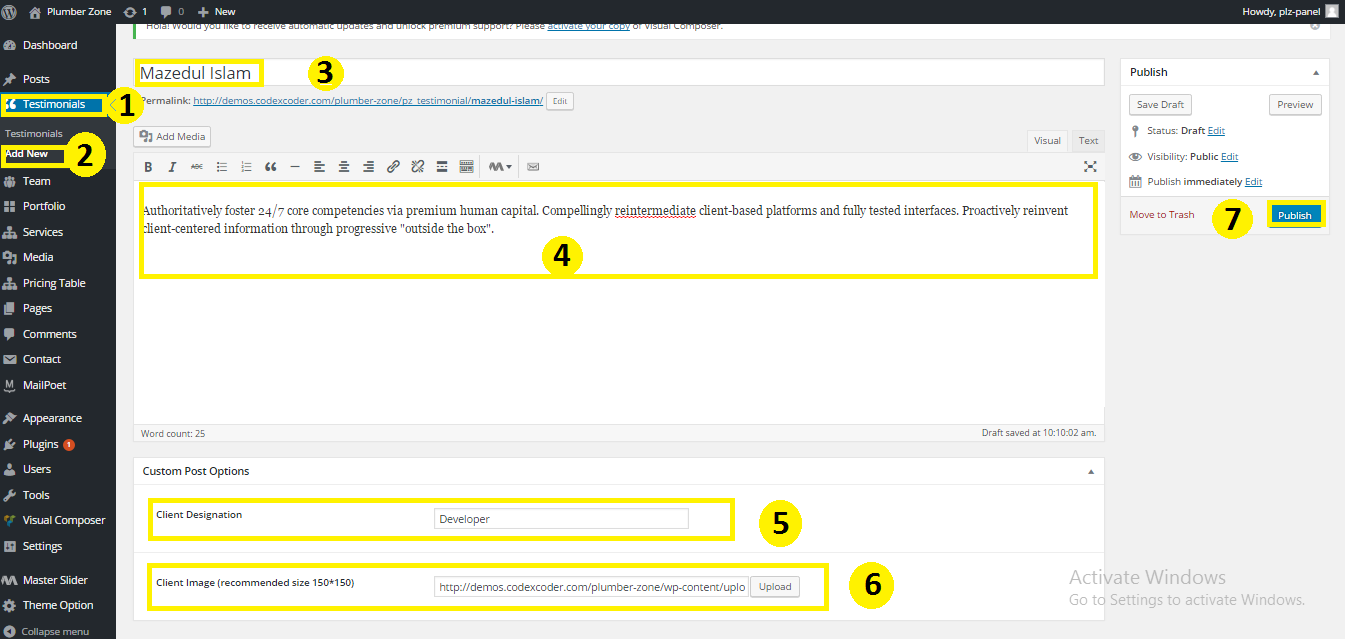
Testimonial Settings
- Go to Dashboard click on Testimonials .
- And click on Add New .
- Write a testimonial name Example: mazedul Islam .
- Put some content about client.
- You can put a designation about your client into Client Designation
- You can select your client's image from Client Image options.
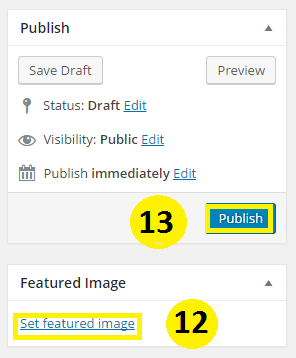
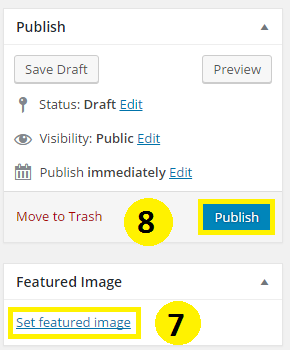
- Finally click on Publish button.
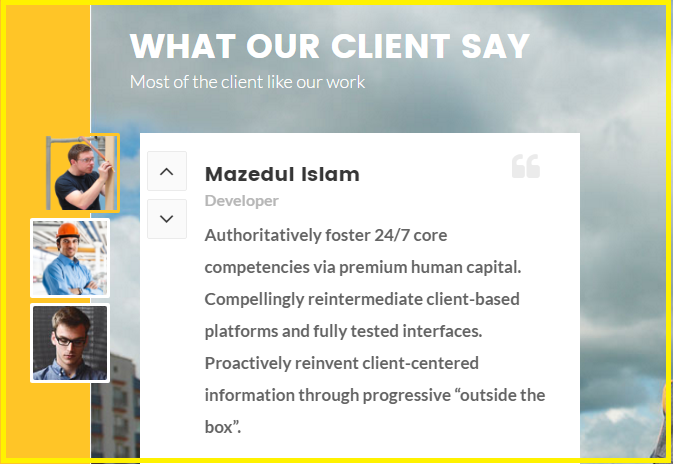
Now you can see the outlook.
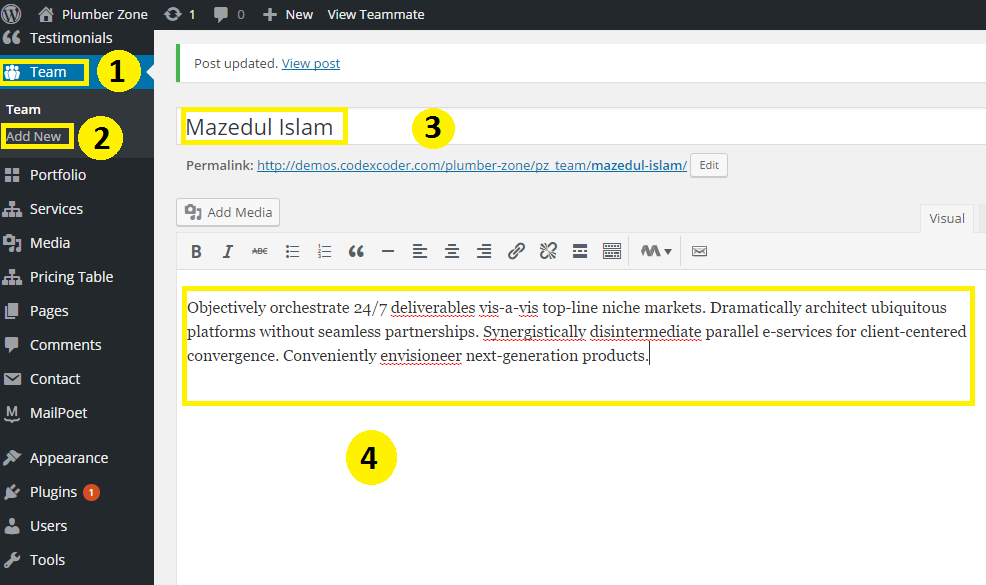
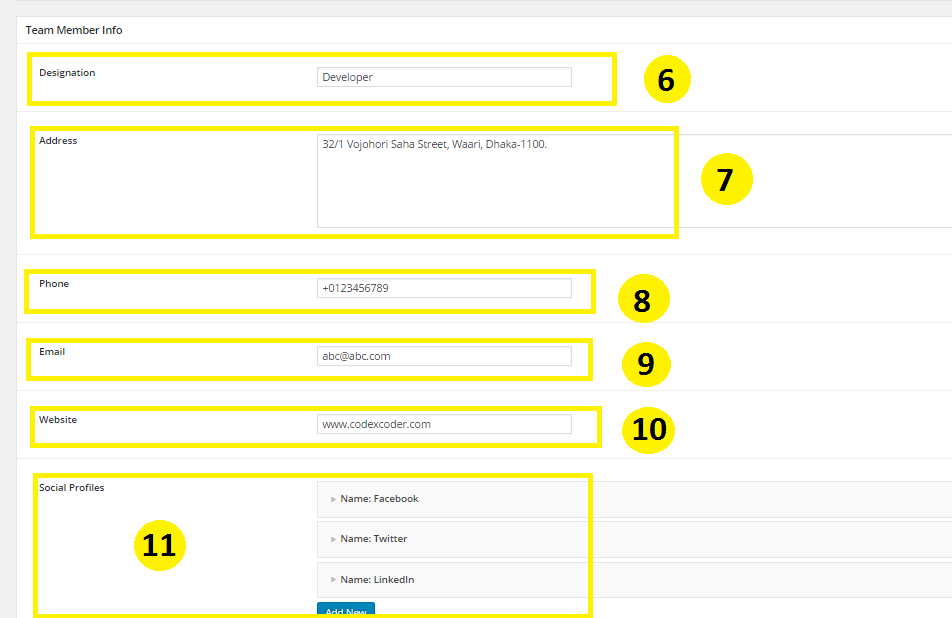
Team Settings
- Go to Dashboard click on Team .
- And click on Add New .
- Write a Team Member name Example: Mazedul Islam .
- Put some content about team member.
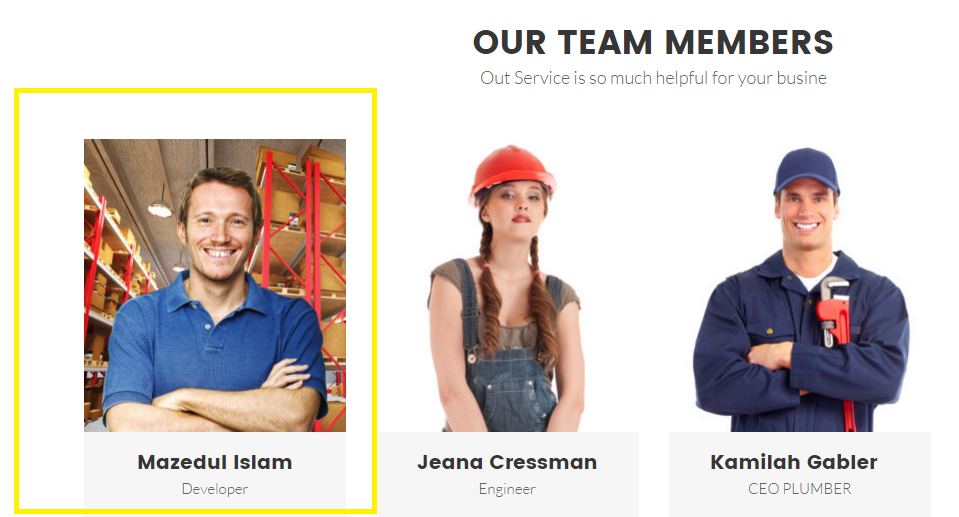
Now you can see the outlook.
Portfolio Settings
- Go to Dashboard click on Portfolio .
- And click on Add New .
- Write a title on Title area.
- Write some content about your portfolio here.
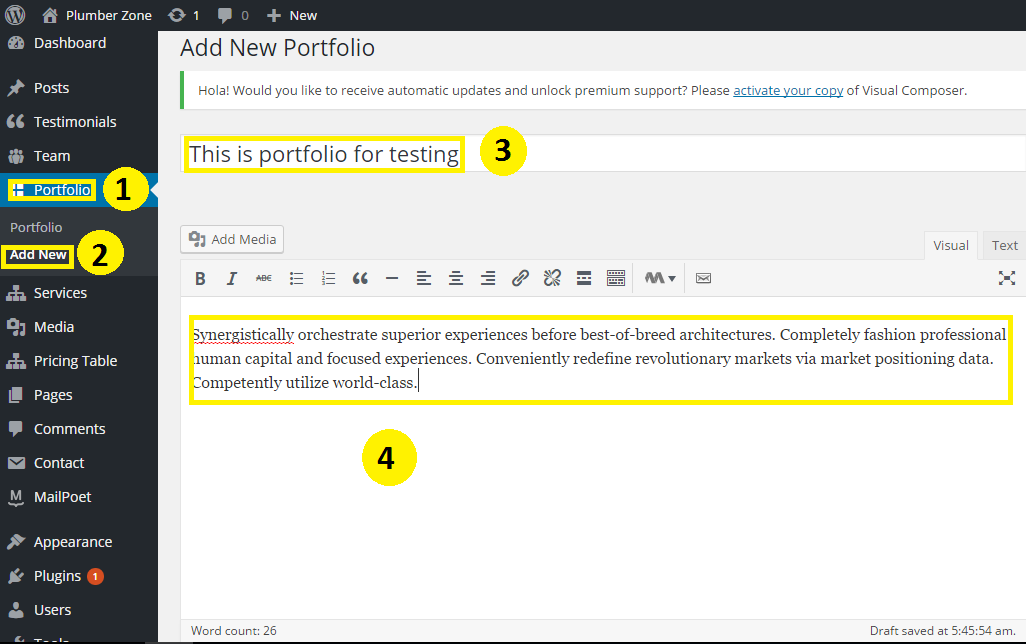
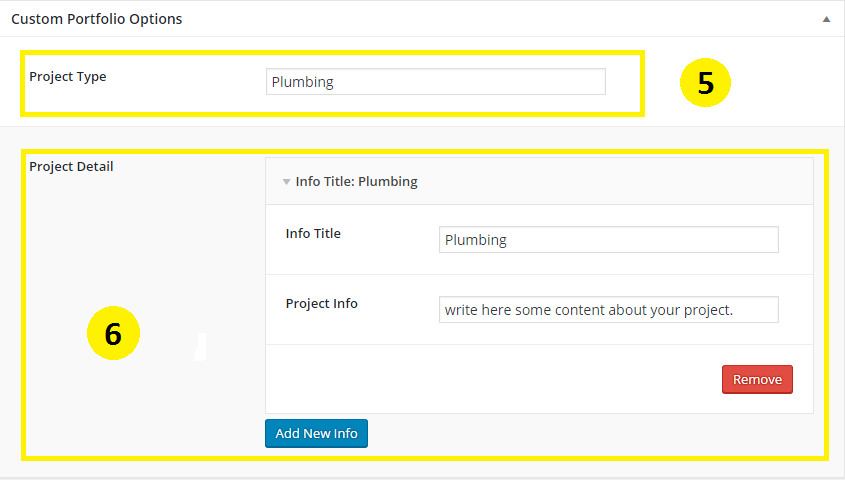
Now you can see the outlook of this section
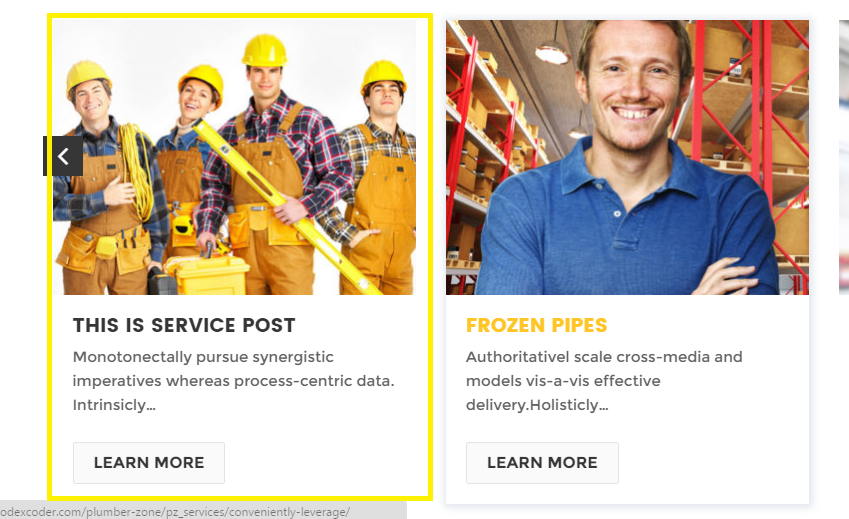
Service Settings
- Go to Dashboard click on Service .
- And click on Add New .
- Write a title on Title area.
- Write some content about your service here.
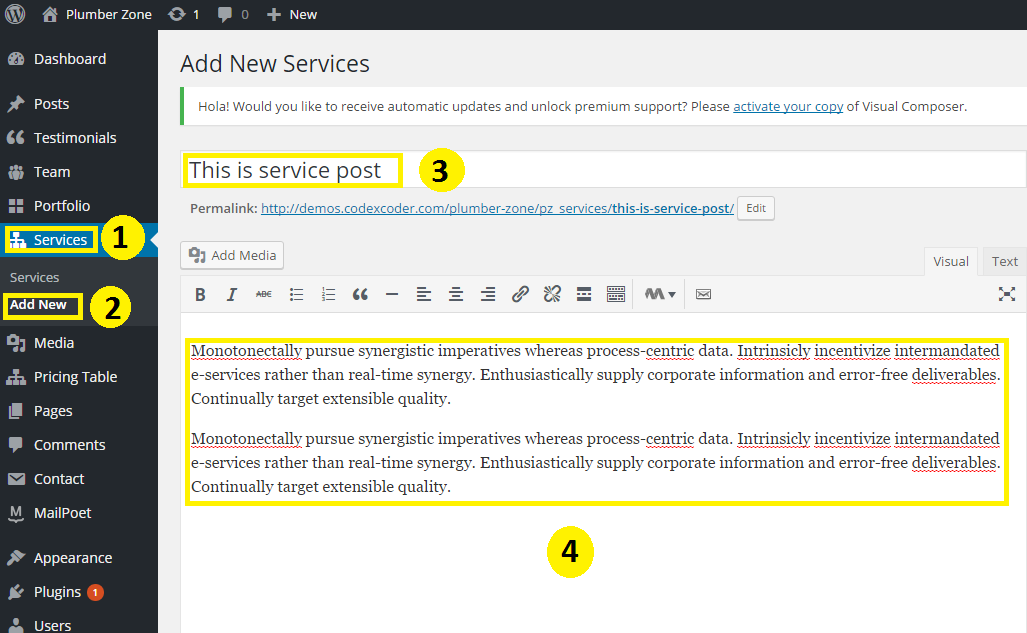

Now you can see the outlook of this section
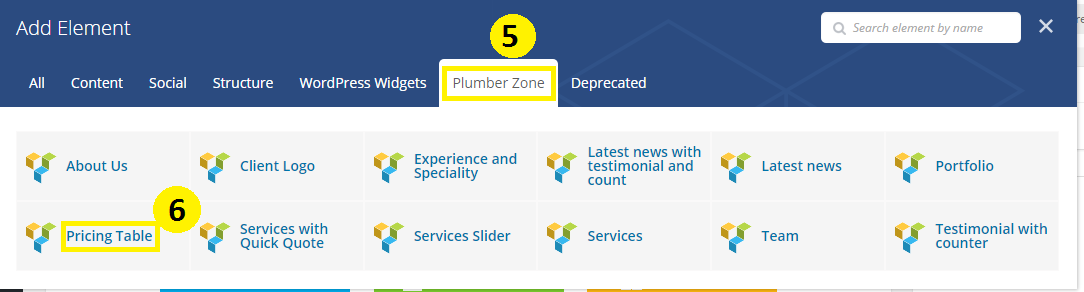
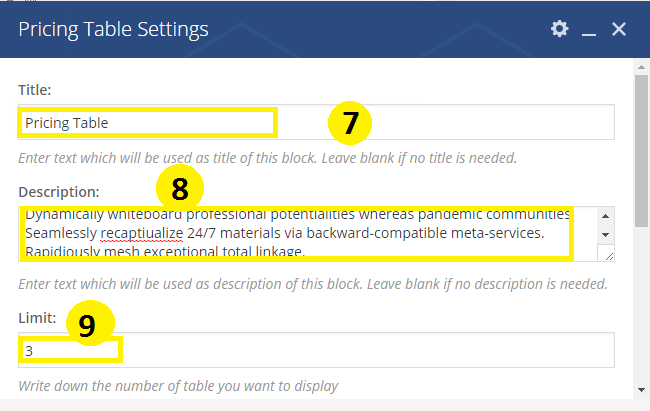
Pricing Settings
- Go to Dashboard click on Pricing .
- And click on Add New .
- Write a title on Title area.
- You can mention here your package rate from Package Rate option.
- You can also mention here your package duration from Package Period option.
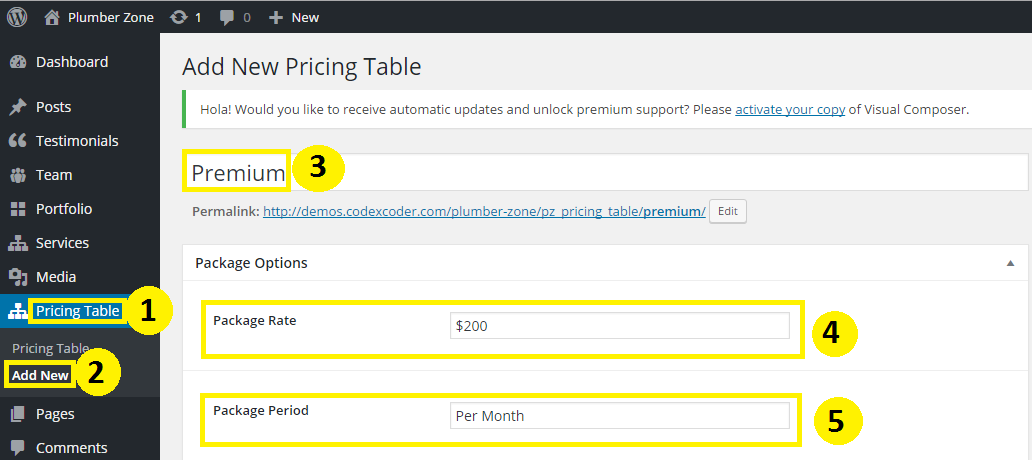
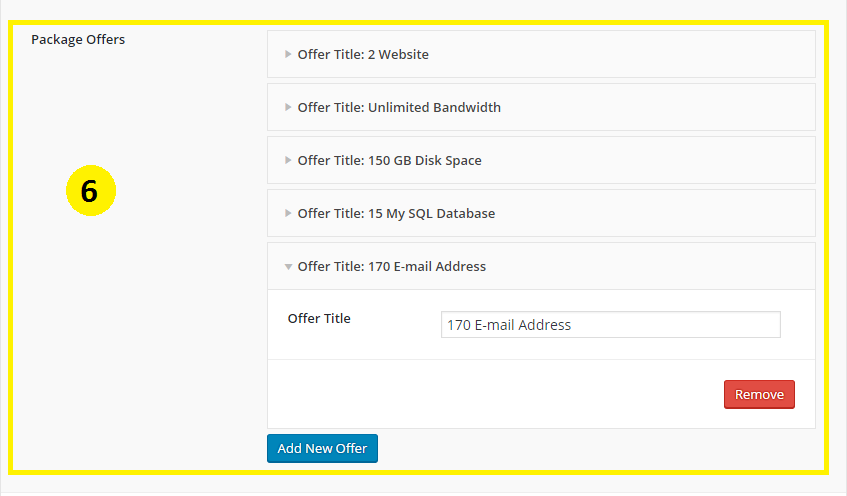
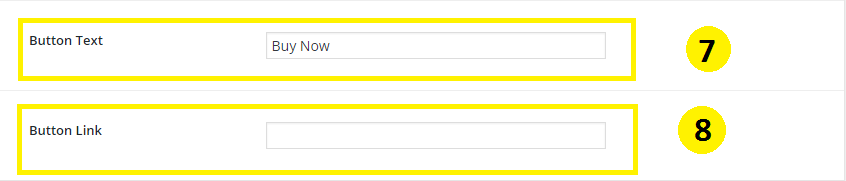
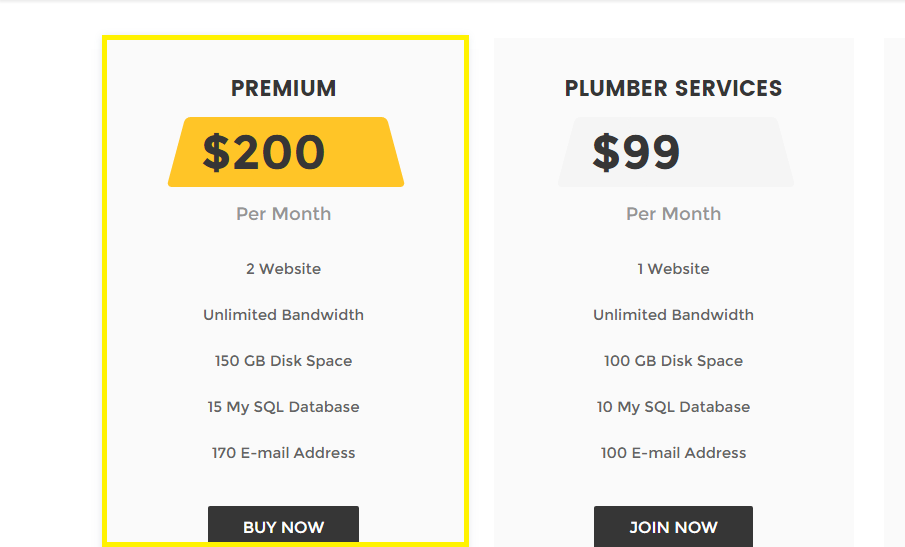
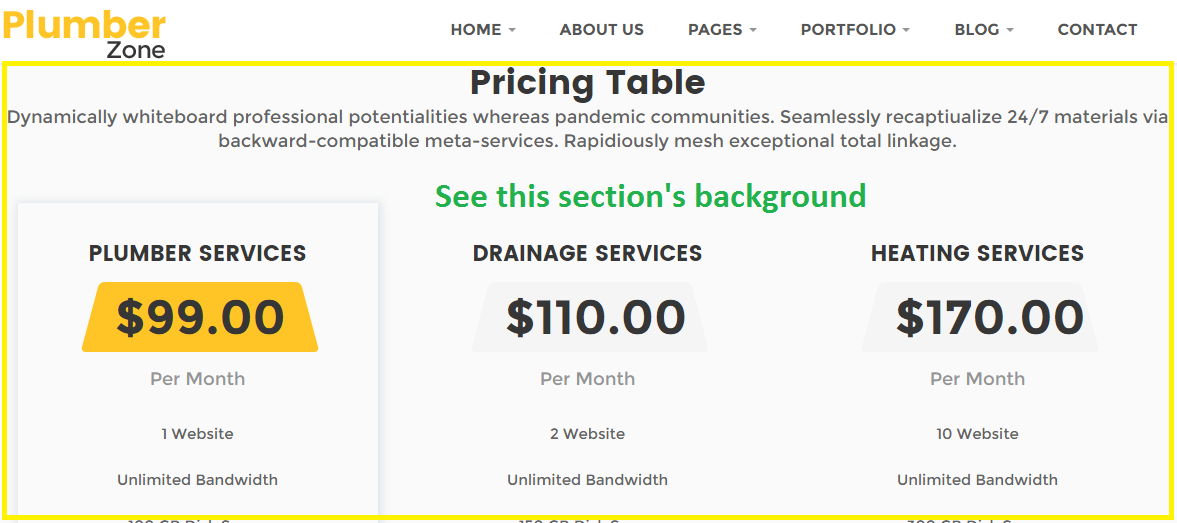
Now you can see the outlook of this section
Extra Class Setting with shortcode
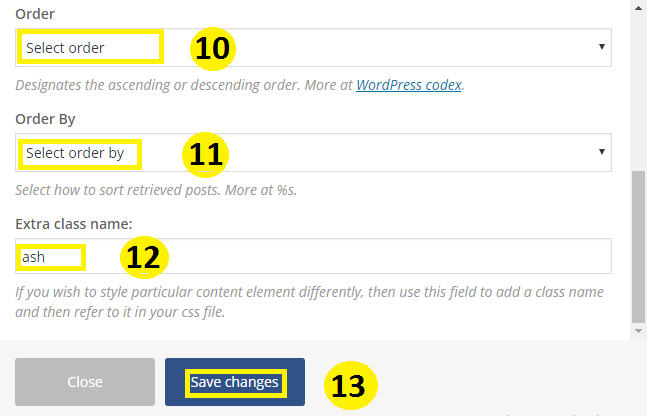
Now you can see the outlook like below:
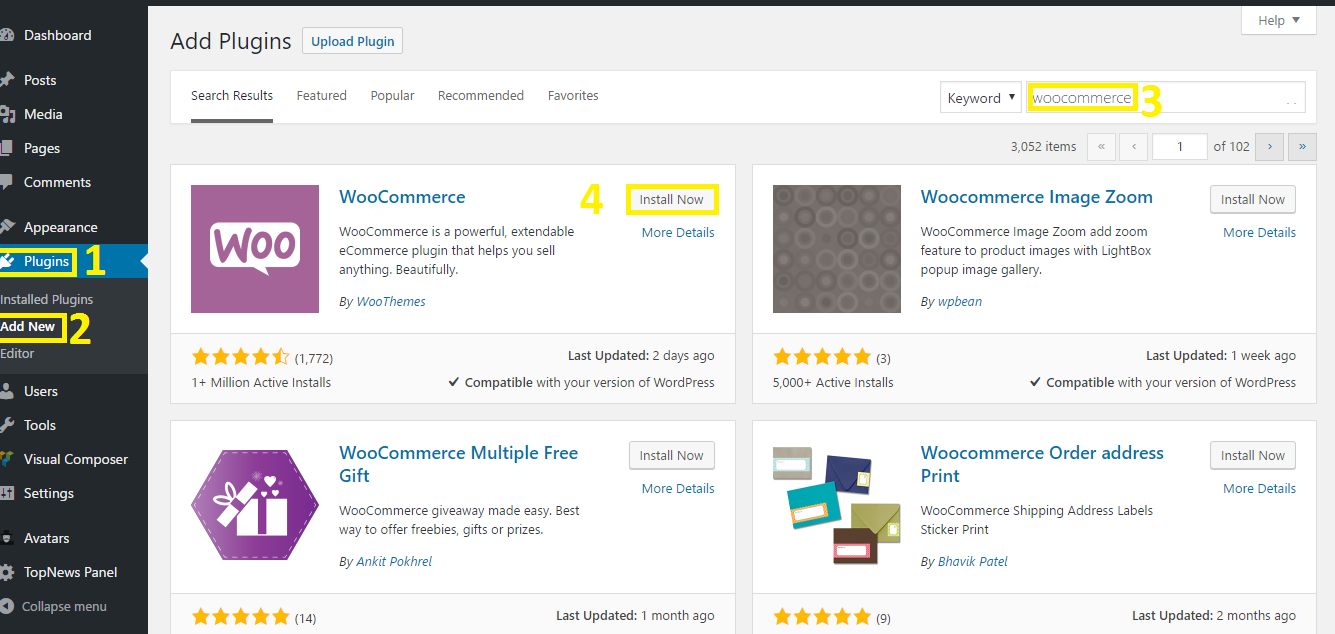
Woocommerce Settings
- Click on Plugins.
- Click on Add New.
- Write the plugins name into search box. Example: Woocommerce.
- Now click on Install Now.
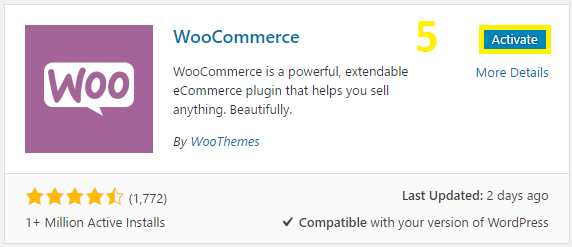
5. Now click on Activate.
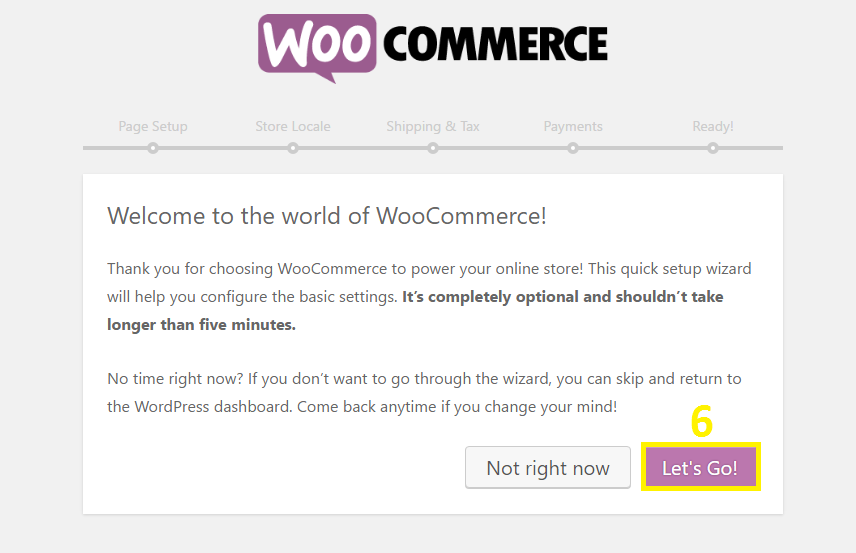
6. Click on Let's Go!.
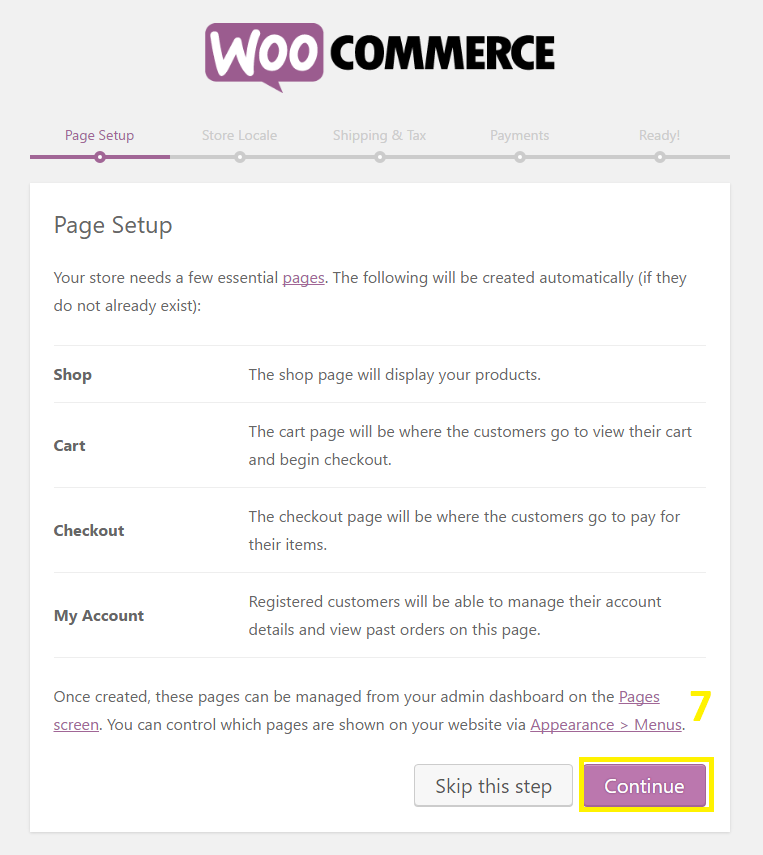
7. Click on Continue.
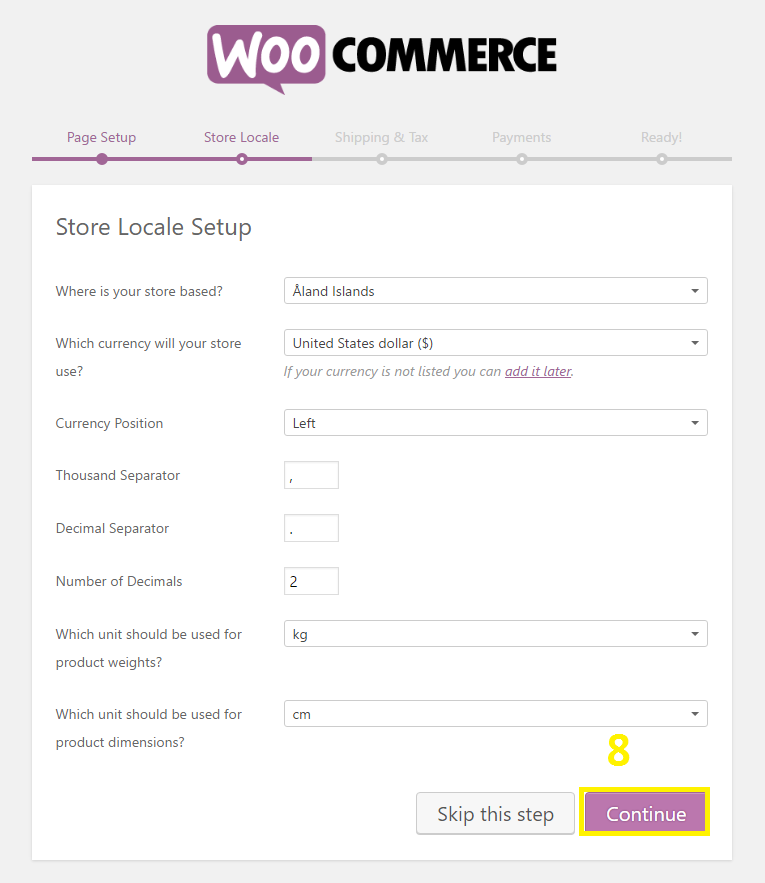
8. Fill your all requirements and click on Continue.
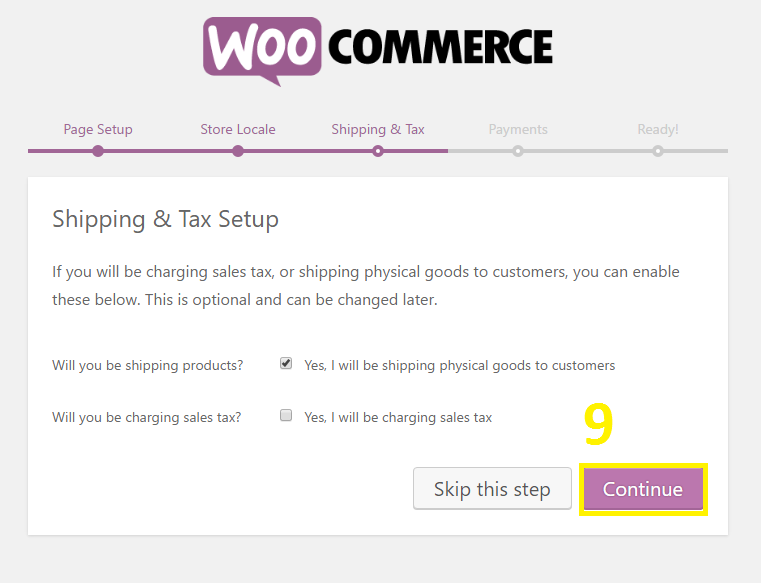
9. Put tick as your demand and click on Continue.
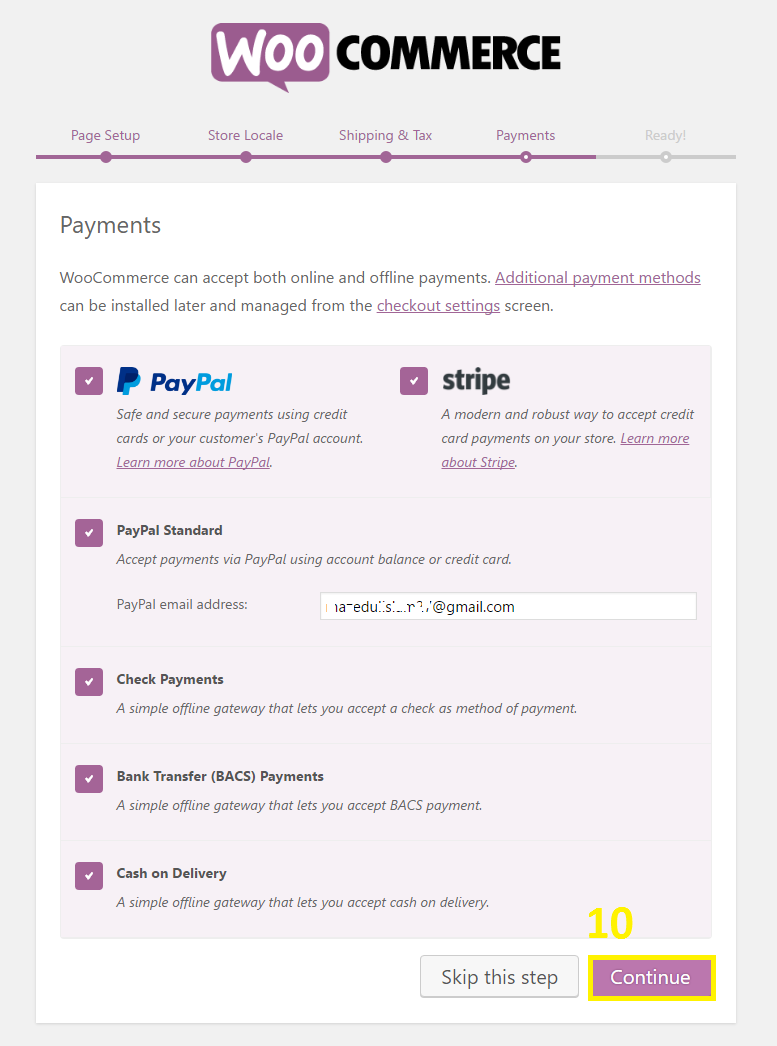
10. Choose your requirements and click on Continue.
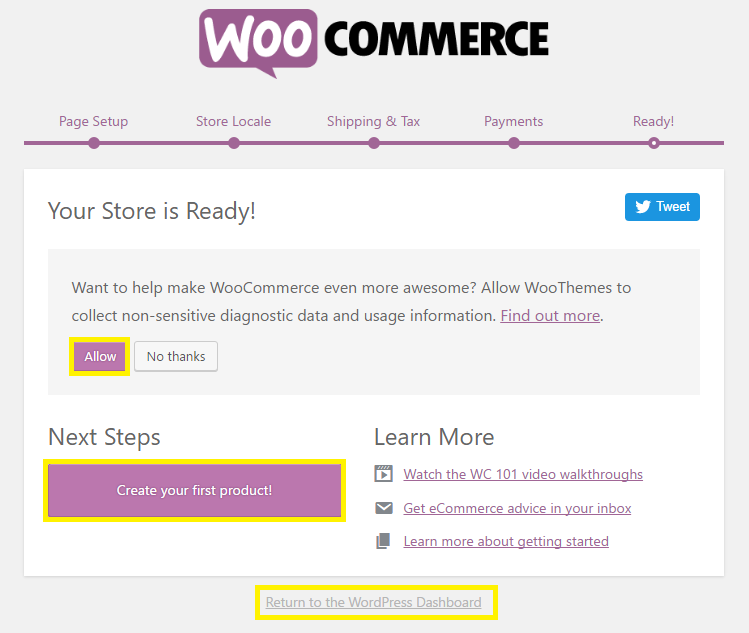
11. Click on Allow to create a woocommerce page or click on Create your first product. Or click on Return to the WordPress Dashboard to create your page from Dashboard.
Rating
Support
- Skype: codex.coder
- Support Team: support@codexcoder.com