Thank you so much for purchase our Gentle Man CV/RESUME WordPress theme. Feel Free to contact with us for any issue. You can write us here: support@codexcoder.com
GentleMan
A Beautiful, one page clean, modern, user friendly, fast-loading, customizable, flexible, and functional CV/RESUME WordPress theme.
- By: CodexCoder
- Email: support@codexcoder.com
A Beautiful, clean, modern, user friendly, fast-loading, customizable, flexible, and functional CV/RESUME WordPress theme. It uses the best clean SEO practices, overall it is fast, simple, and easy to use. We offer a strong support and friendly help 24/7.
Before you start playing around with this Premium Theme, let's check what you've downloaded so far:
- Documentation - That's where you
- Sample Data - Demo content and theme setting json for complate setup.
- Upload - This is where all Theme files are (zipped & unzipped format)
The first option how to install Gentle Man WordPress Theme would be to directly upload the gentle-man.zip file via WordPress Theme Uploader.
-
Log into your WordPress backend
-
Navigate to Appearance > Themes
-
Click Install Themes/Add Themes
-
Click Upload/Upload Themes
-
Now you just need to find the "gentle-man.zip" in the Upload folder and hit Install now.
-
After Installed then click Active Now
Theme Install From FTP
The second option how to install this Theme would be the upload via FTP manager. It really dosen't matter which of the two ways you choose, just choose the one you feel more comfortable with.
-
Login to your FTP account and navigate to your WordPress Installation directory
-
Navigate to the folder /wp-content/themes
-
Upload the "gentle-man" folder (not the .zip-file). This is the folder located inside the "Upload" folder in the zip-file you've downloaded from CodexCoder.
-
Now log into your WordPress backend
-
Navigate to Appearance > Themes
-
Find the Theme and click Activate
After installing the theme, you can see the notice below screenshot:
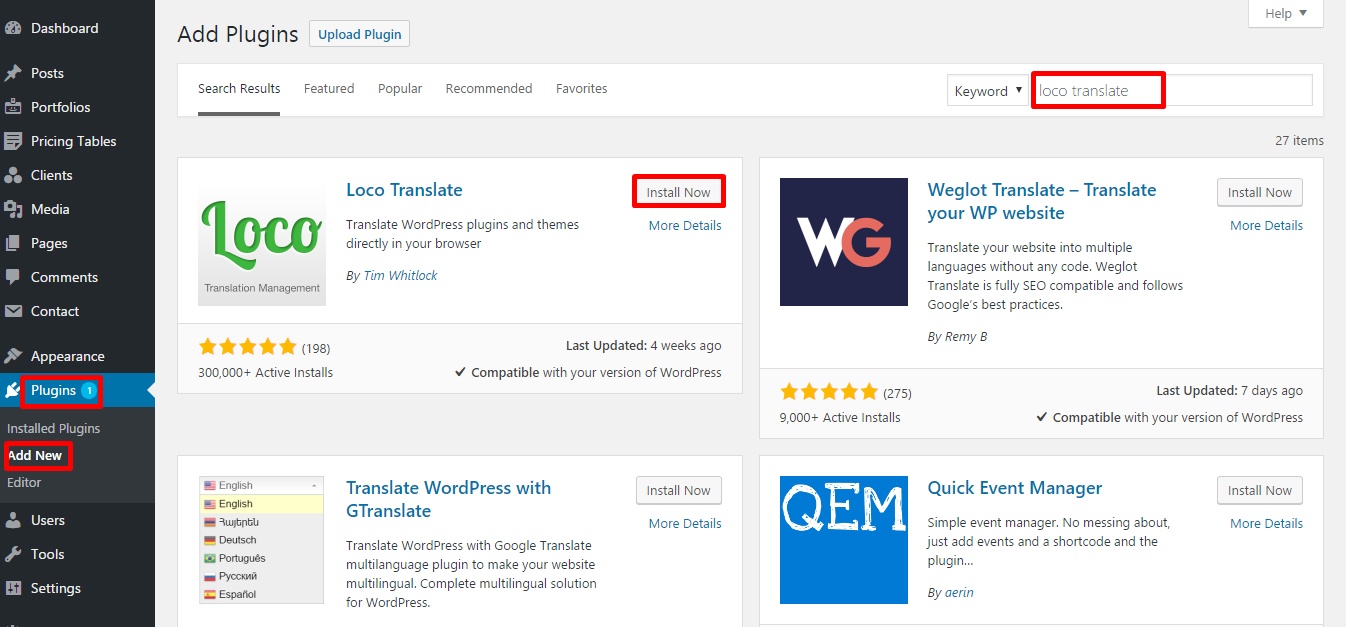
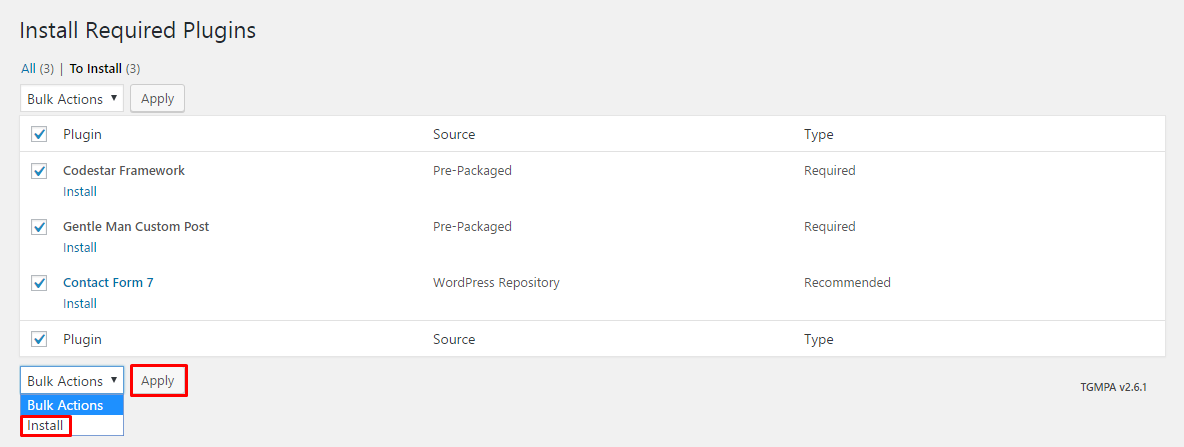
Now click on Begin Installing Plugins.

Put tick all the plugins and select the Install and click on Apply.
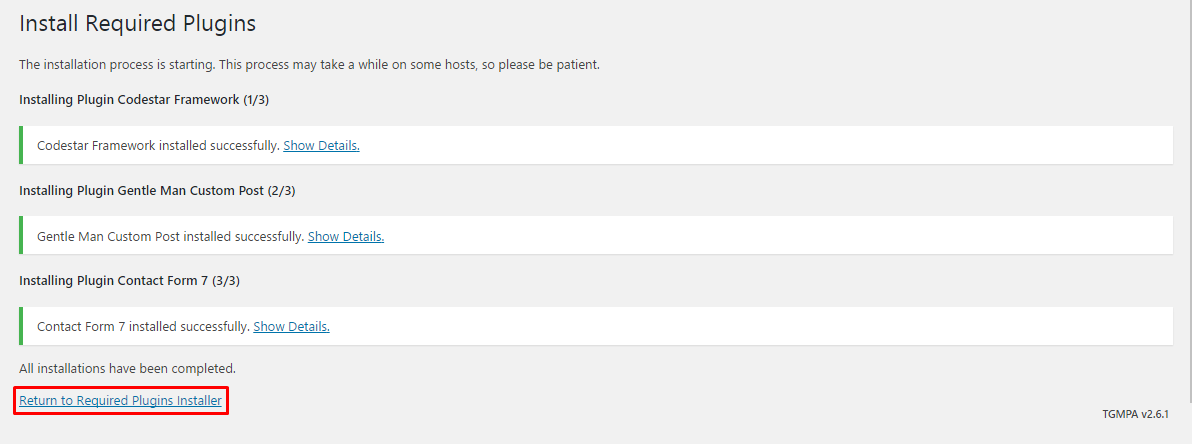
Now you can see the all installed plugins name and their installed message.
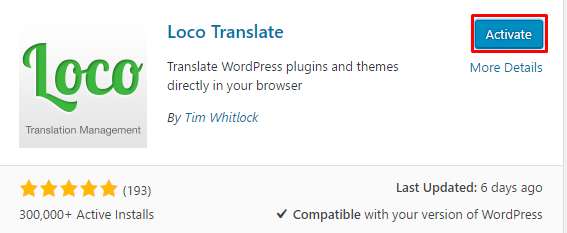
Finally, you put tick all plugins and click on Activate option individually or from Bulk Actions and click on Apply
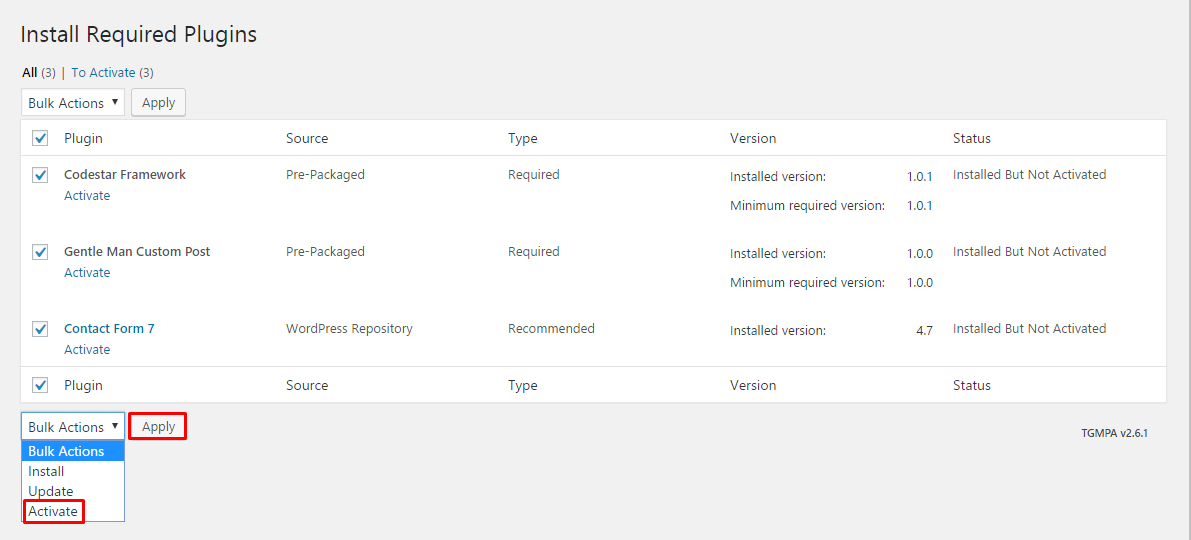
Now you can see the plugins are activated and you will able to use theme.
The theme comes with a demo package. This package includes posts, pages, comments, settings, image and so on. This demo package is imperative in helping you to learn how the theme works. To import demo Data, you can follow these steps:
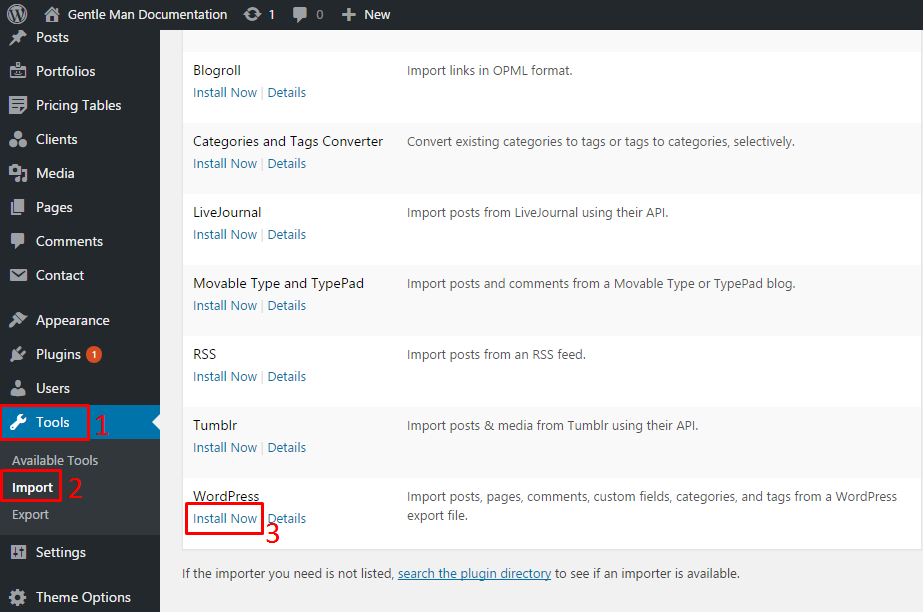
- Go to dashboard and click on Tools.
- Click on Import to begin the import process
- Then click on WordPress (Install Now) .
- Now click on Run Importer .

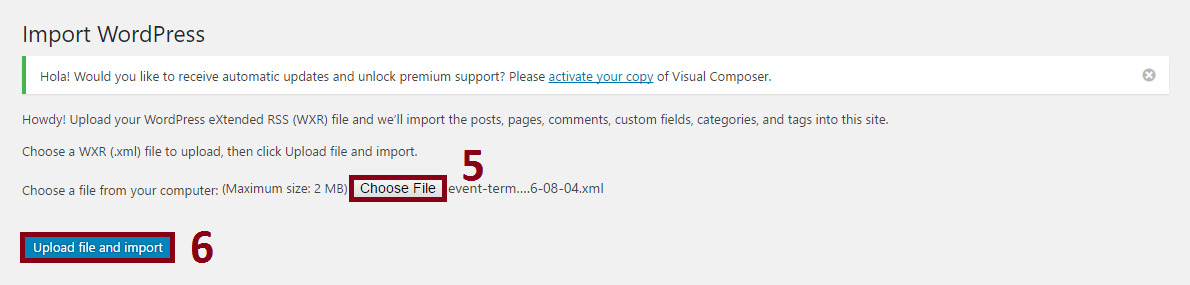
- After clicking on run importer you can able to see the Choose File button. Click on the button and choose your required demo data from Demo Data folder. Choose your expecting demo folder and import xml file.
- Now click on Upload file and import button.
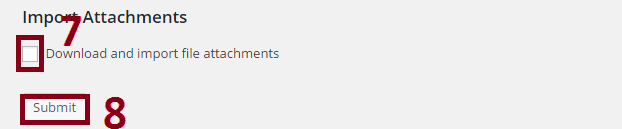
- Now you can see the screenshot below: Now put tick on Import Attachments option.
- And click on Submit button.
- Now you can see the screenshot below: Finally click on Have Fun and go back to your dashboard. Your demo will be imported.

After installating and activating top-news, you need to perform the following tasks to enable landing page.
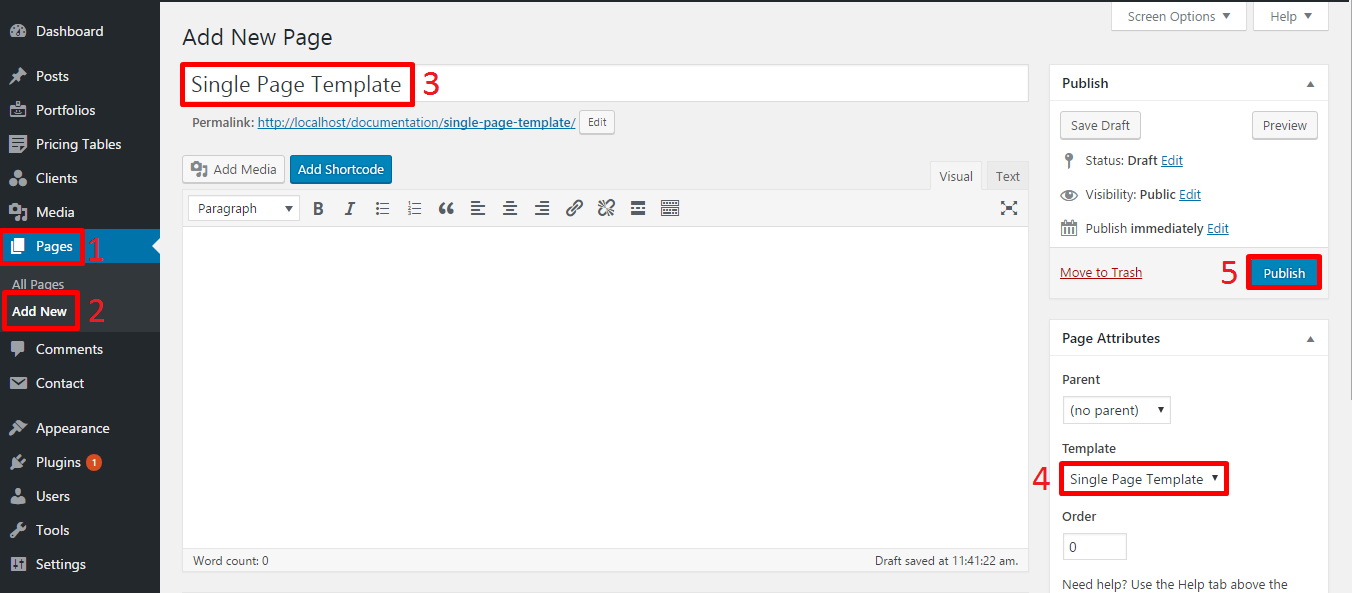
- Go to Dashboard and click on Pages
- Now click on Add new
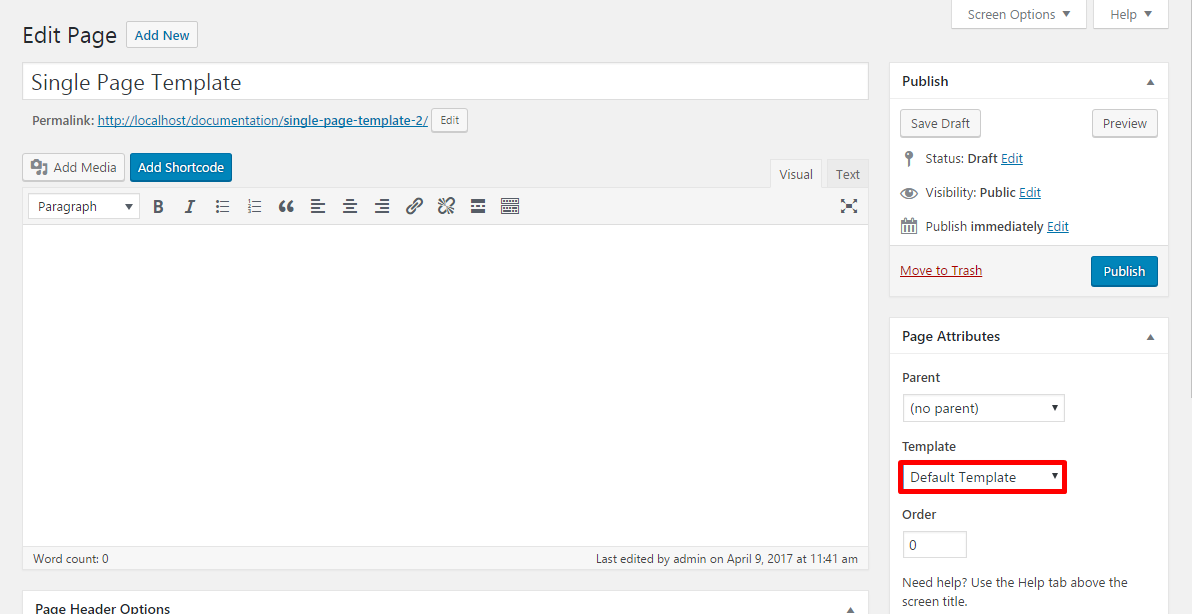
- Write a title of your page into Title field.
- Now select the Default Template from Template option.
- Now click on Publish button.
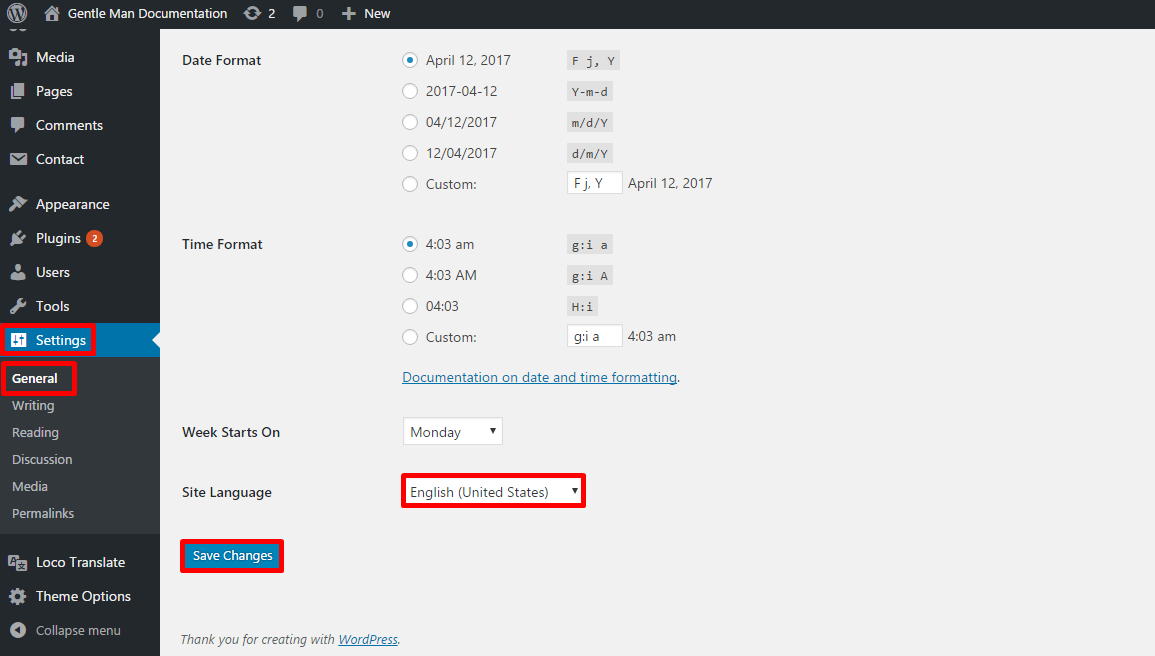
Now go to Dashboard and click on Settings > Reading. Please see the screenshot below and do as it.

But if you want to show your homepage as Single Page Template, you need to select Default Template as screenshot below .
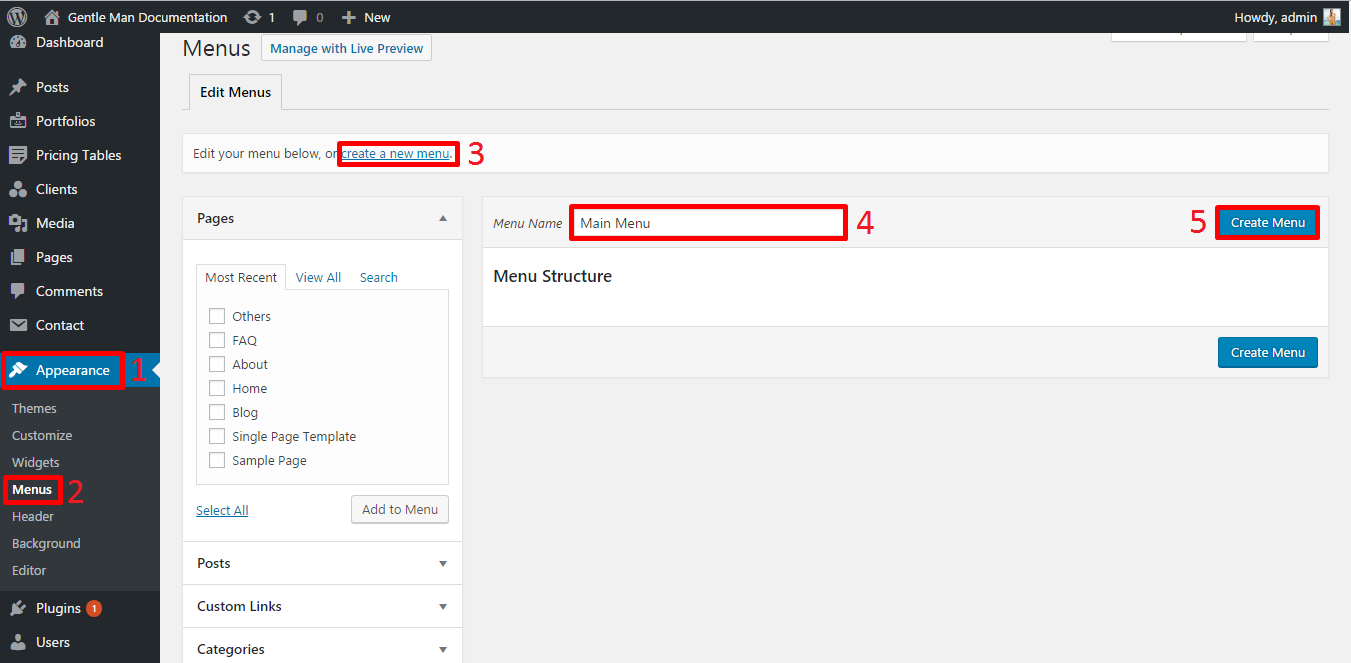
For your primary menu first go to dashboard
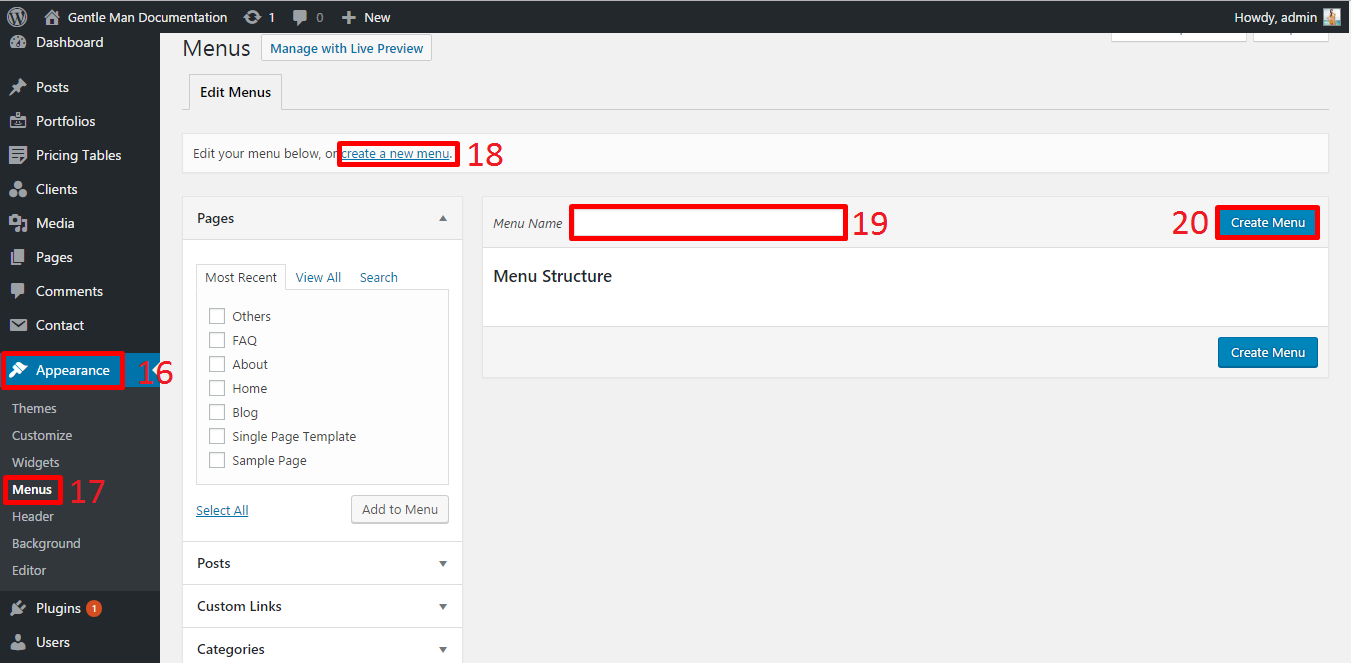
- Click on Appearence
- Click on Menus
- Click on create a new menu(Primary Menu)
- Write your menu name. Example: Main Menu.
- Click on Create Menu.
Select menu's element from Pages or Custom Links. (Put tick)
Click on Add to Menu button.
Now decorate your menu drugging up and down by cursor.
Put tick in Primary.
Click on Save Menu.
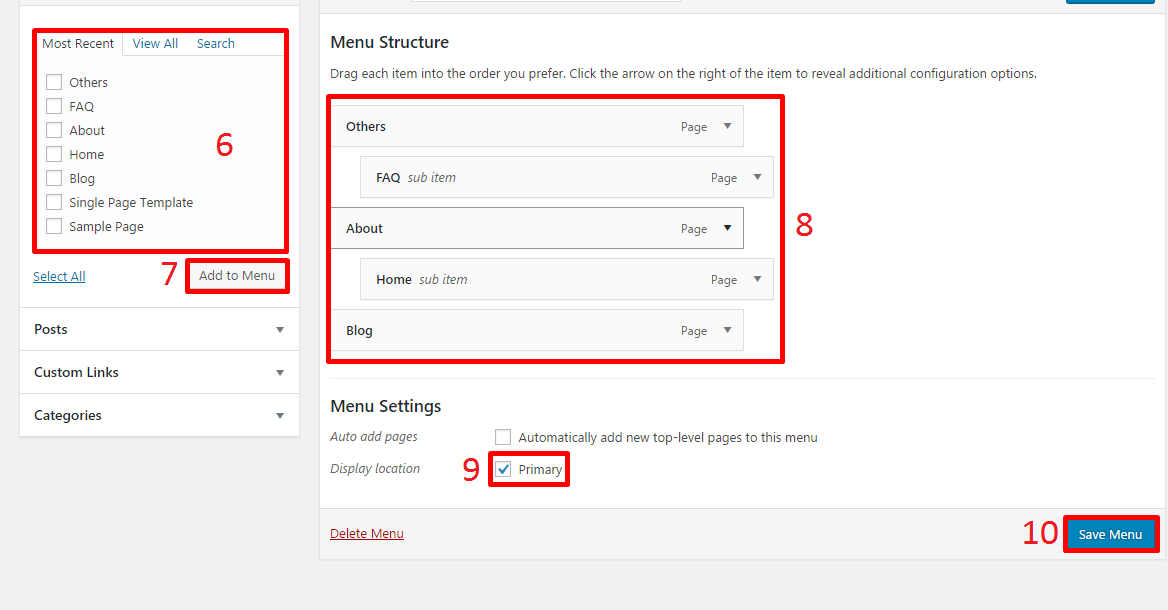
Now you can see the outlook of menu on top.

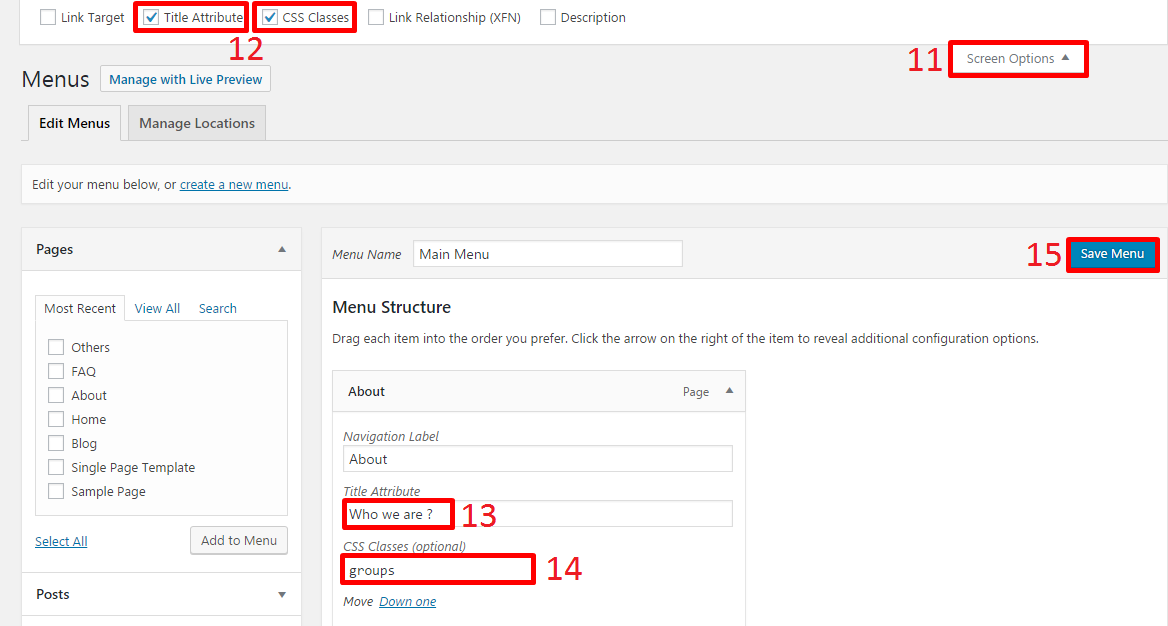
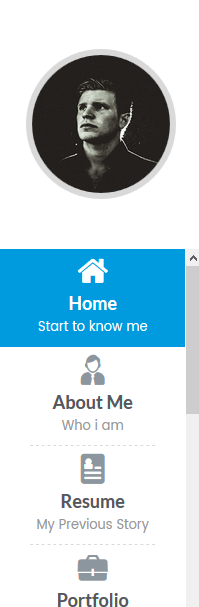
If you select Menu on left from Theme Options, you will be able to choose an icon and sub-heading for each menu item.
Click on Screen Options.
Put tick in Title Attribute and CSS Classes.
- Title Attribute : Put your subheading for this menu item.
- CSS Classes (optional) : Put fontawesome icon name.["Icon list : http://fontawesome.io/icons "]
Click on Save Menu.
Now you can see the outlook of your selected menu on left item.
- Click on Appearence
- Click on Menus
- Click on create a new menu(Primary Menu)
- Write your menu name. Example: Single Page Menu.
- Click on Create Menu.
- Custom Links : For single page menu item, you must have to add only custom links (pages, posts or categories are not allowed).
- URL : you have to put a section id form the list. you can't change this.[ Section id list : banner, about, resume, portfolio, services, blog, pricing, client, contact ]
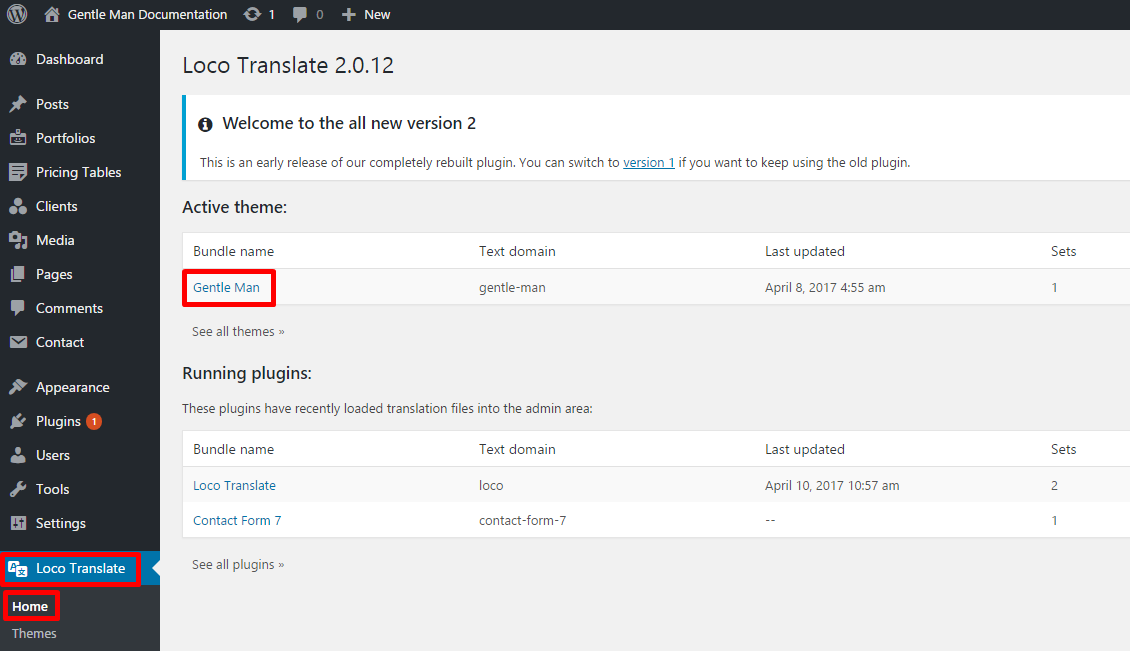
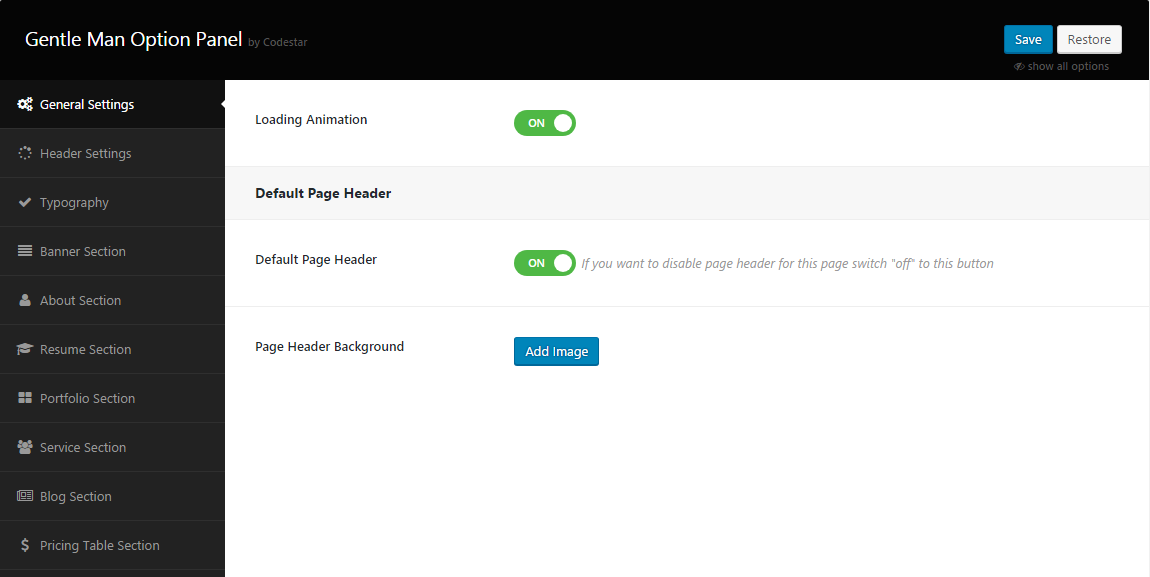
If you want to change the general options of the theme, go to your WordPress Admin Area to GentleMan Setup menu. Here you have a tabbed Navigation where you can change a lot of Options of your new Theme. There have lot's of option for GentleMan Theme.
- General Settings
- Header Settings
- Typography
- Banner Section
- About Section
- Resume Section
- Portfolio Section
- Service Section
- Blog Section
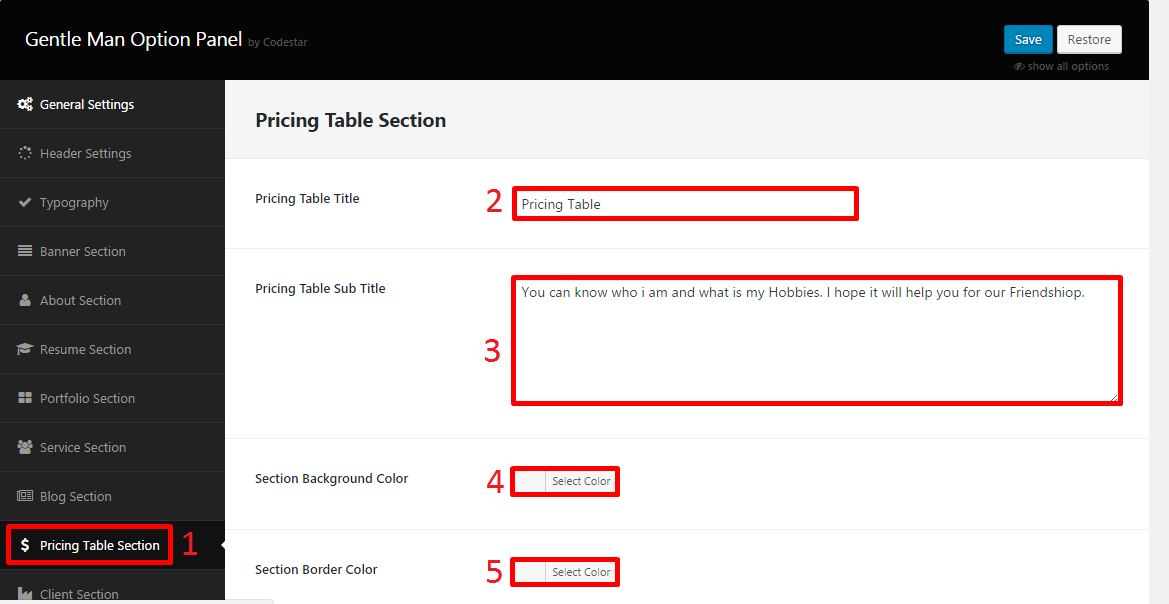
- Pricing Table Section
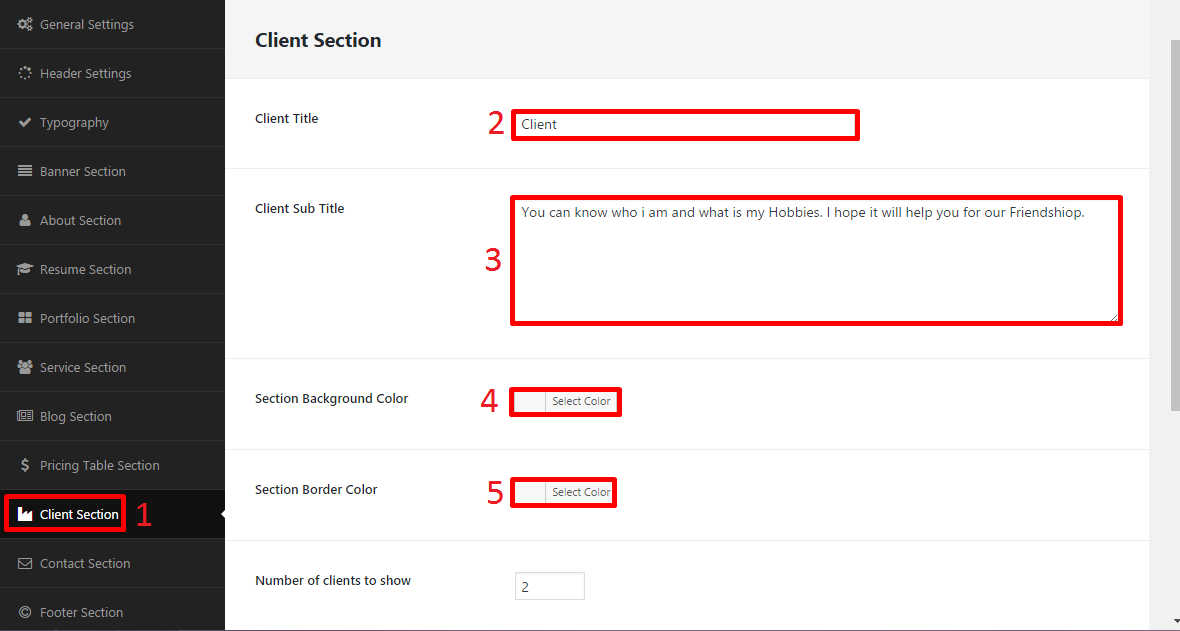
- Client Section
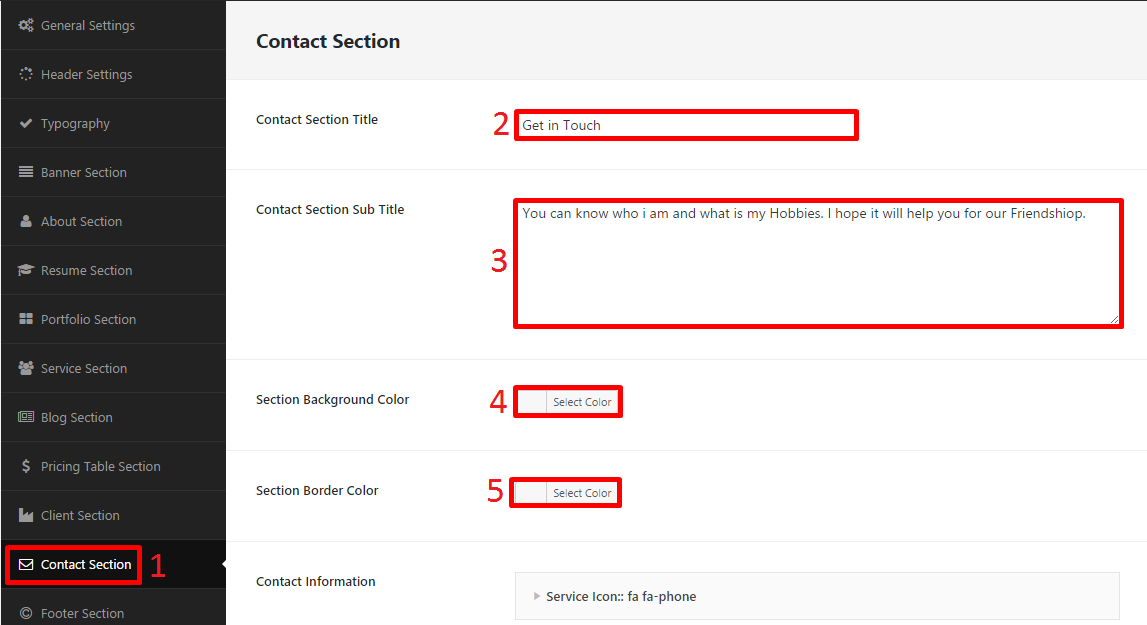
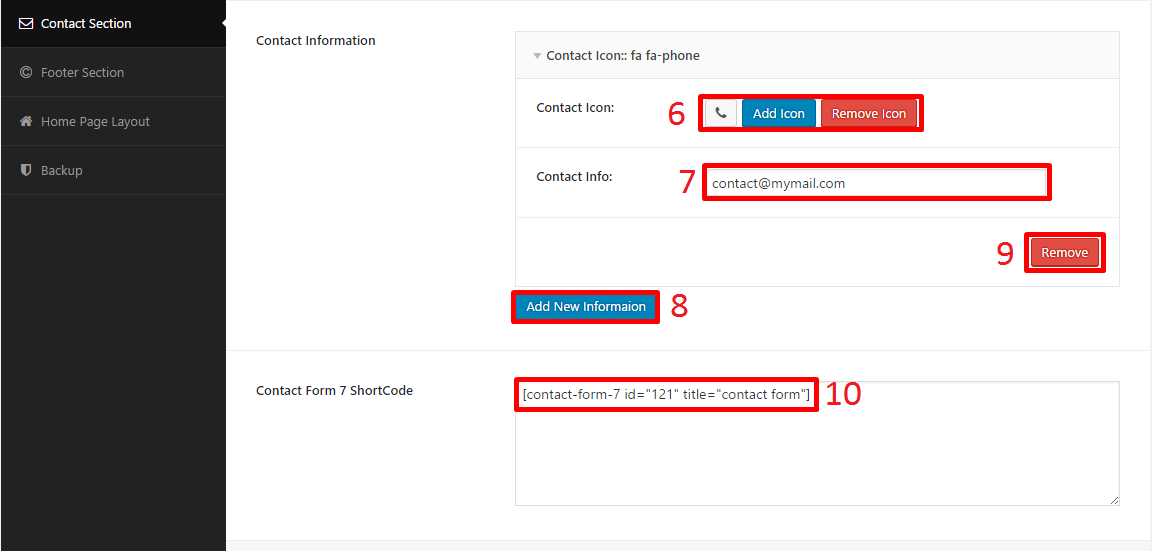
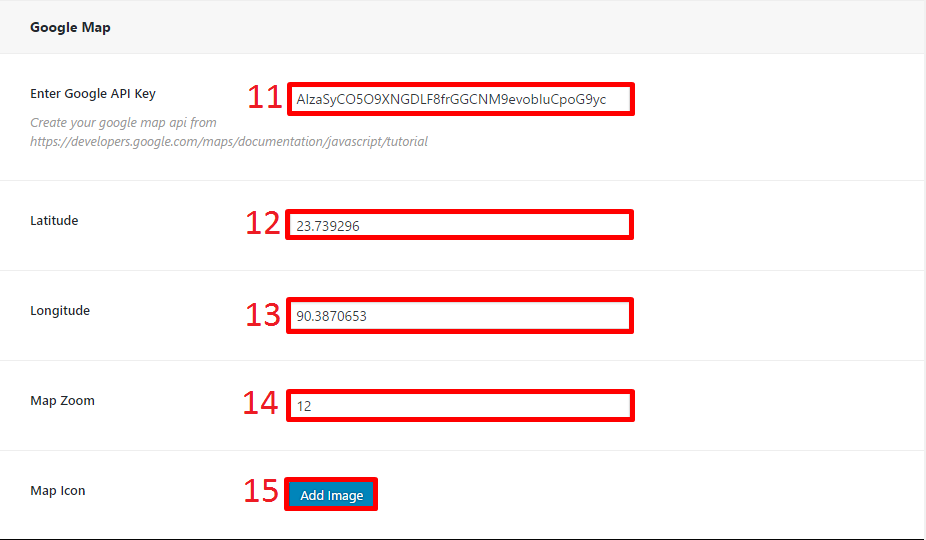
- Contact Section
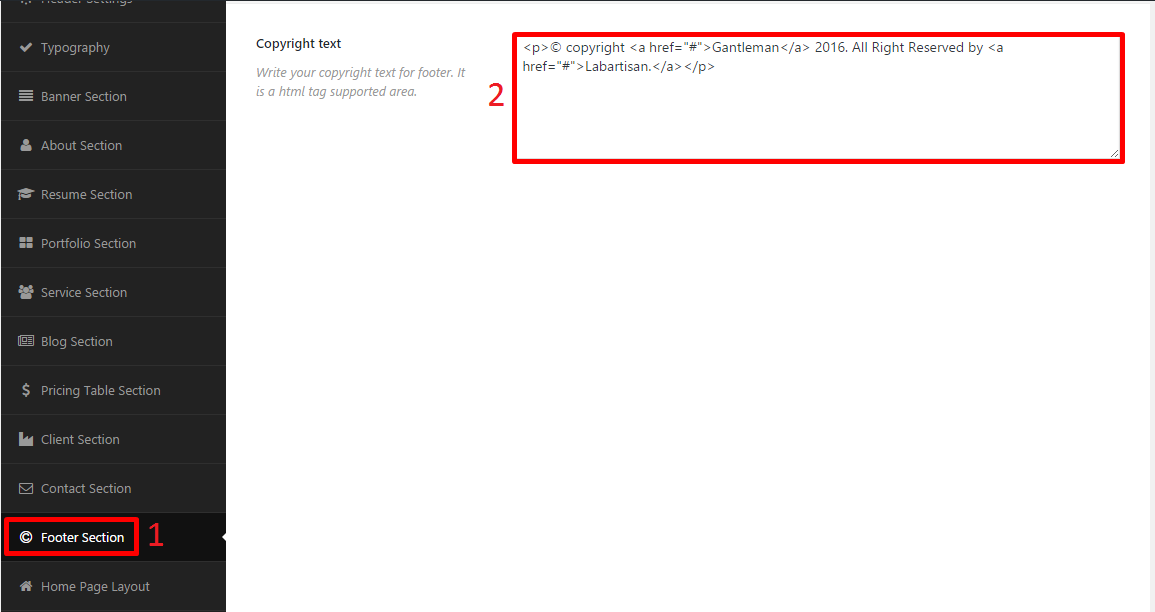
- Footer Section
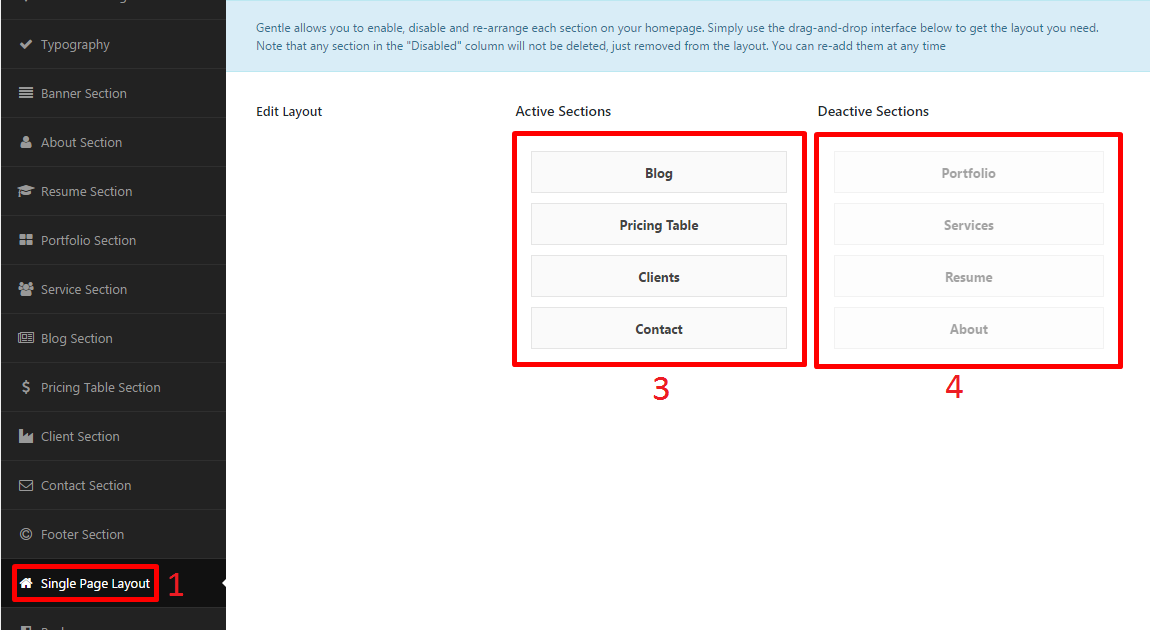
- Homepage Layout
Notice: Before adjusting the different settings, you should first click on the Save Options button, to insert all default data to the database and make sure everything looks good.
Go to Theme Option > Header Setting.
- From Header Setting option, you can use your menu position.
- From here you can also upload site logo for top menu and profile picture for let menu.
- Click on Save button to save.
.

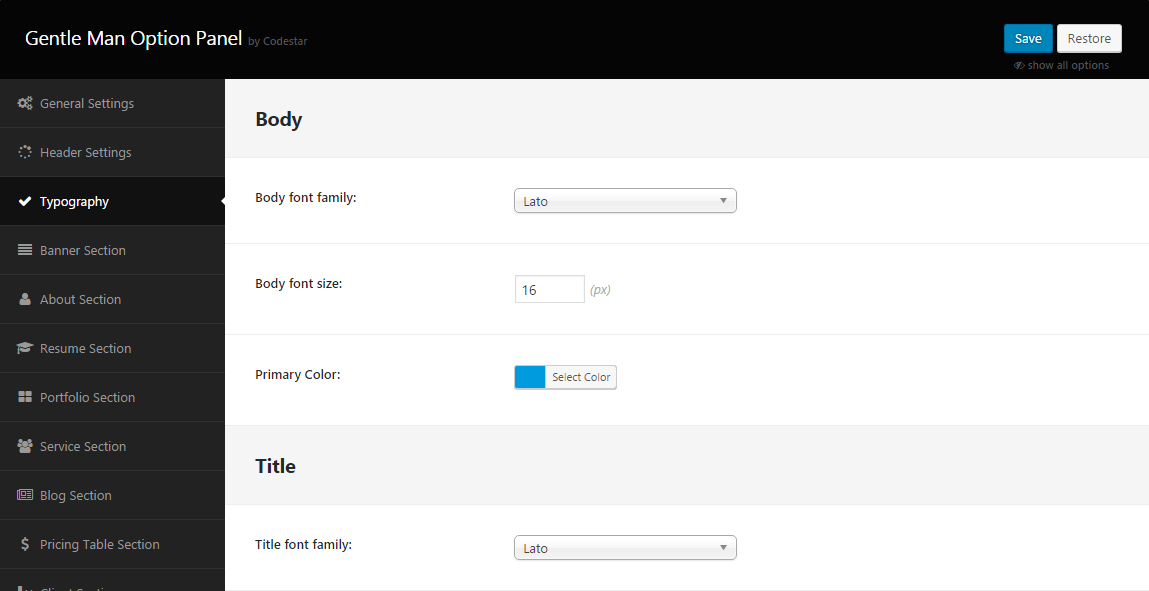
Go to Theme Option > Typography.
- Click on Typography
- Body Font Family : Use unlimited google font.
- Body Font Size : Put font size.
- Primary Color : Select a primary color.
- Title font family : Theme all title will take this font family.
- Title font weight : Theme all title will take this font weight.
- Title font size : Theme all title will take this font size.
- Title font family style : Theme all title will take this font family style.
- Menu font family : Menu will take this font family.
- Menu font weight : Menu will take this font weight.
- Menu font size : Menu will take this font size.
- Menu text-transform : Menu will take this text transform .
- Finally, click on Save button to save.
.
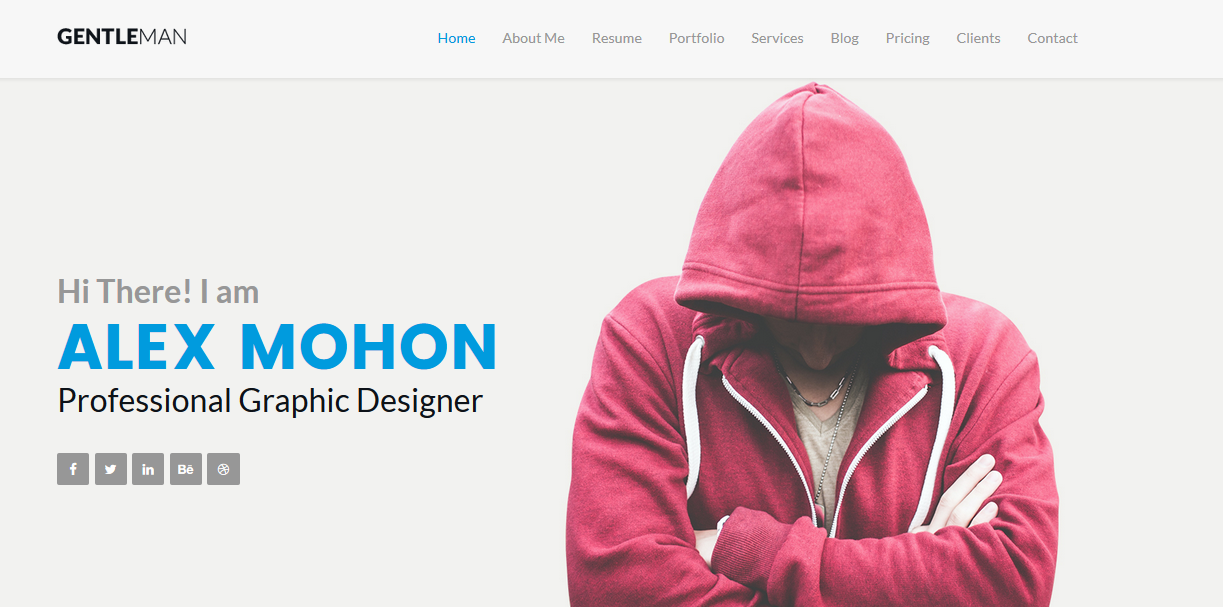
Go to Theme Option > Banner Section.
- Click on Banner Section
- Subtitle : Put your subtitle.
- Title : Put your title.
- Designation : Put your designation.
- Background Image : Upload your background image.
- Social Profile : Add your social profile.
- Finally, click on Save button to save.
.

Now you can see the result below:
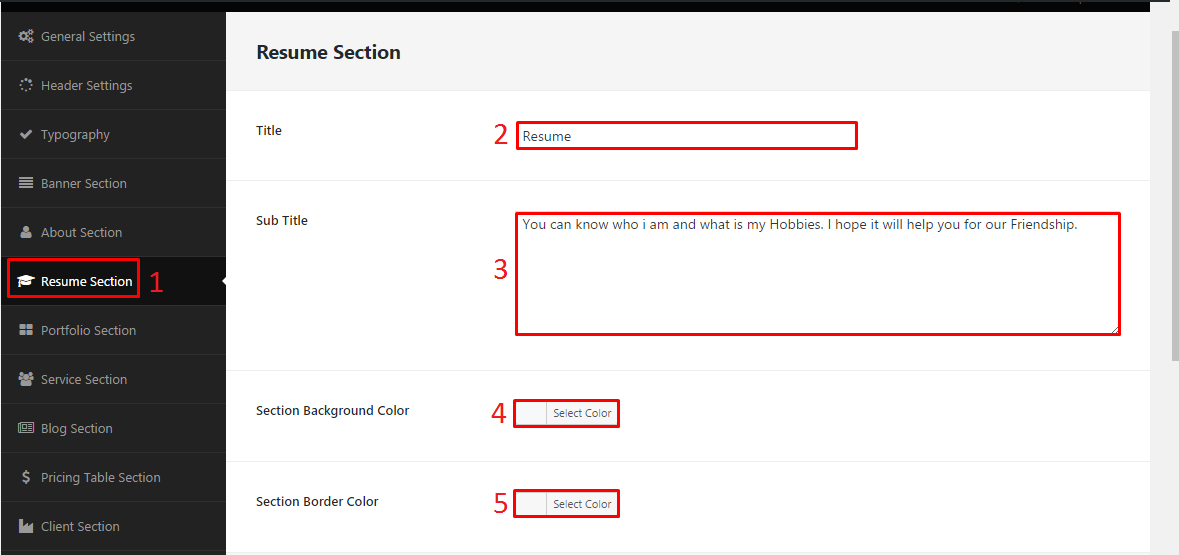
Go to Theme Option > Resume Section.
- Click on Resume Section
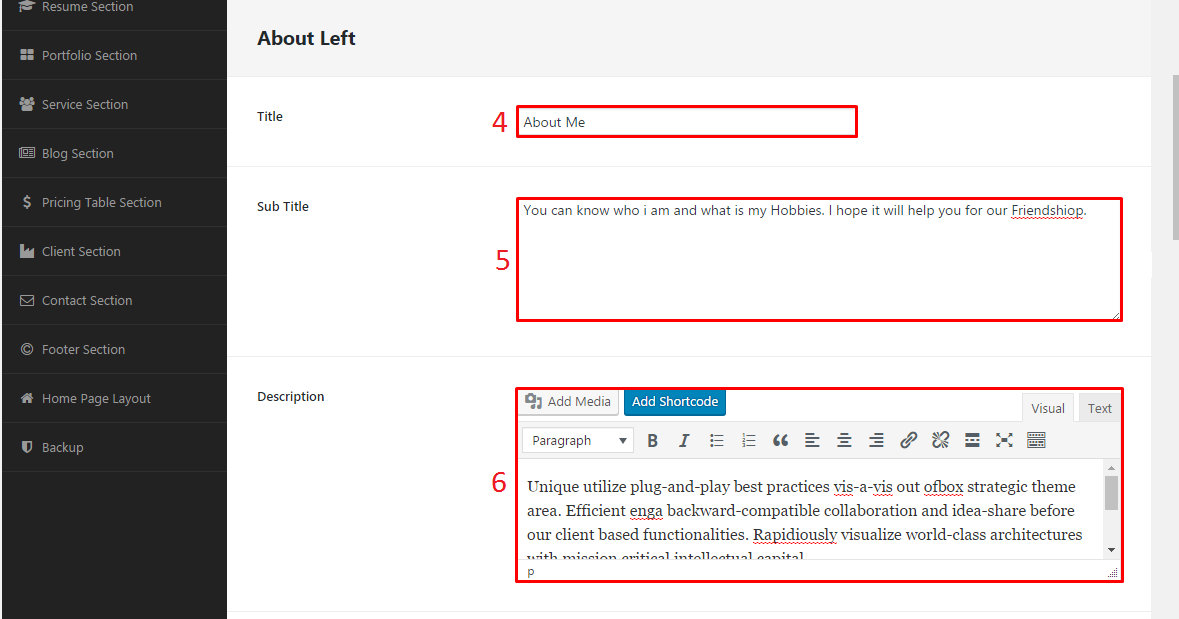
- Section title : Write section title.
- Section sub title : Write section sub title.
- Section Background Color : Select a color for background in this section.
- Section Border Color : Select a color for top and bottom border in this section.
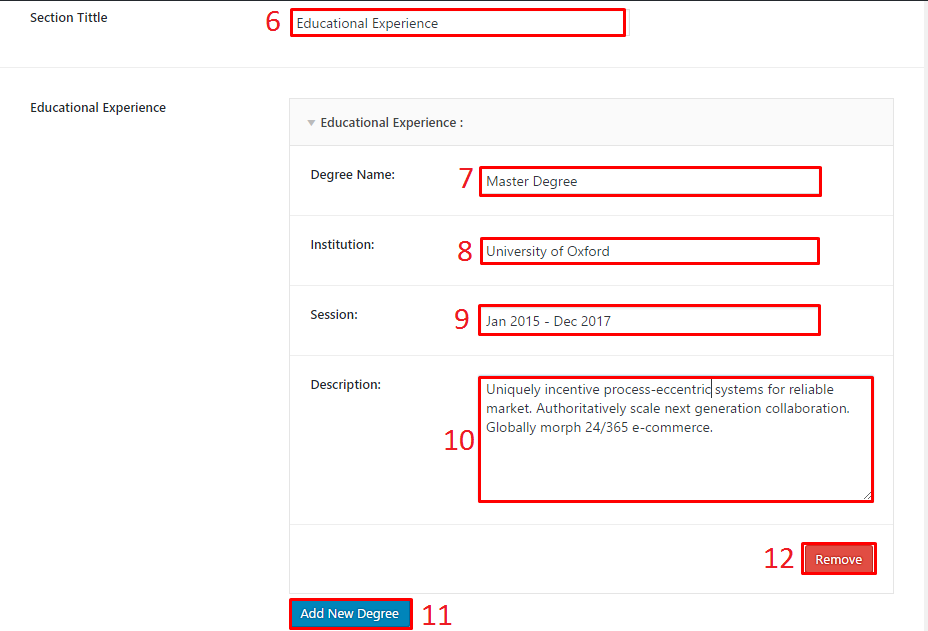
- Sub Section title : Write sub section title.
- Degree Name : Write your degree name.
- Institution : Write your institution name.
- Session : Write your degree session.
- Description : Write a description about your degree.
- Add New Degree : You can add unlimited Degree.
- Remove Degree : You can aslo remove your Degree.
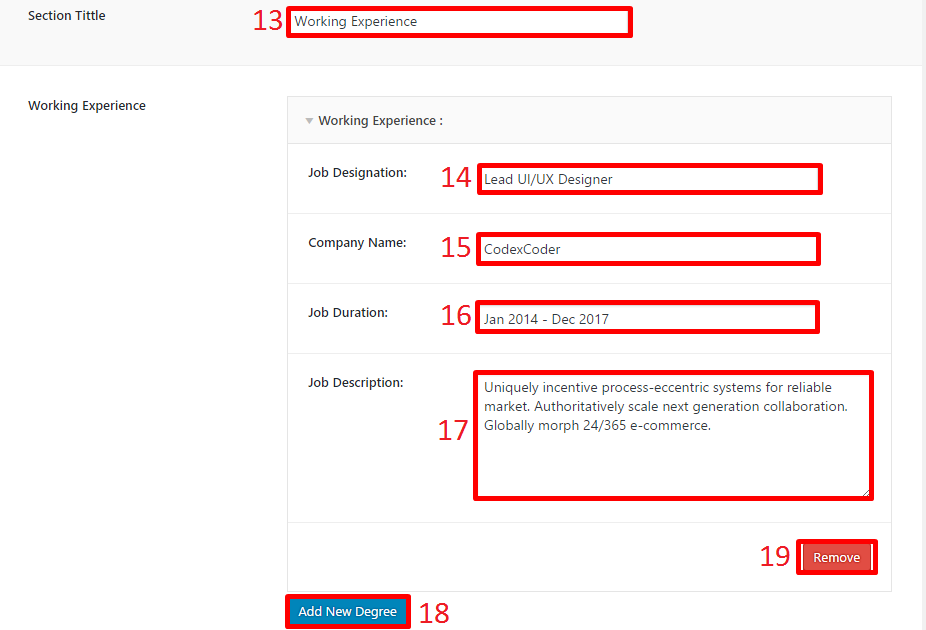
- Sub Section title : Write sub section title.
- Job Designation : Write your designation.
- Company Name : Write your company name.
- Job Duration : Write your job duration.
- Job Description : Write a description of your job.
- Add New Experience : You can add unlimited Experience.
- Remove Experience : You can aslo remove your Experience.
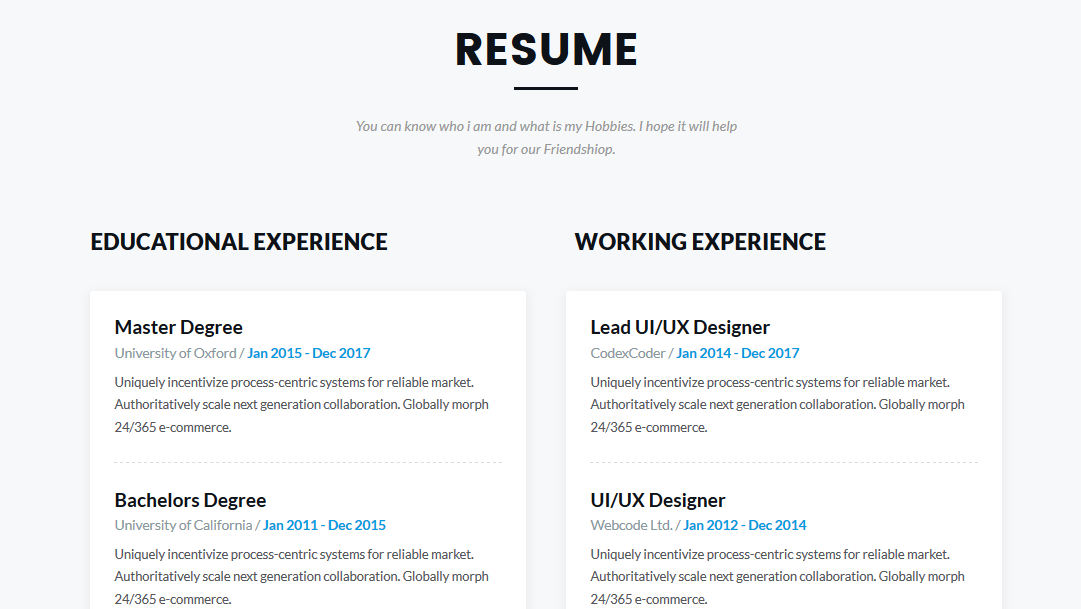
- Finally, click on Save button to save.
.
Now you can see the result below:
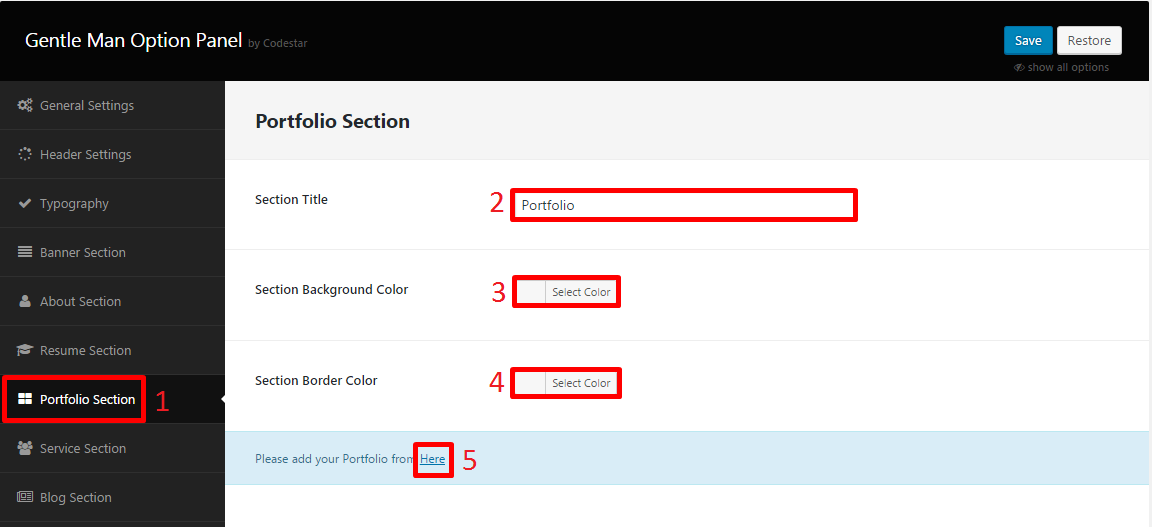
Go to Theme Option > Portfolio Section.
- Click on Portfolio Section
- Section title : Write section title.
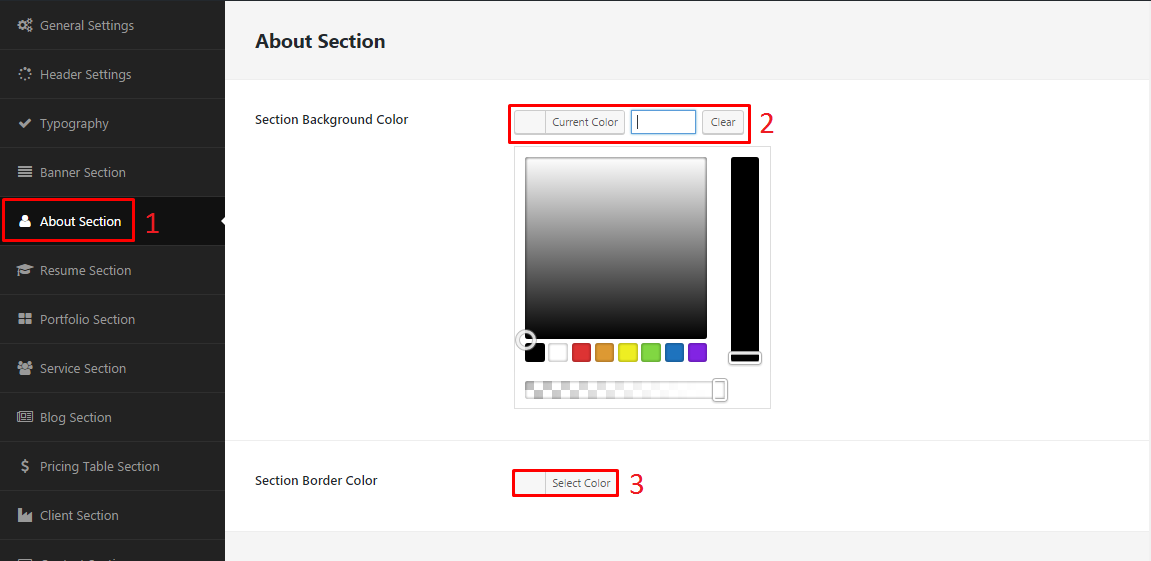
- Section Background Color : Select a color for background in this section.
- Section Border Color : Select a color for top and bottom border in this section.
- Portfolio : You can add your portfolio from here.
- Finally, click on Save button to save.
.
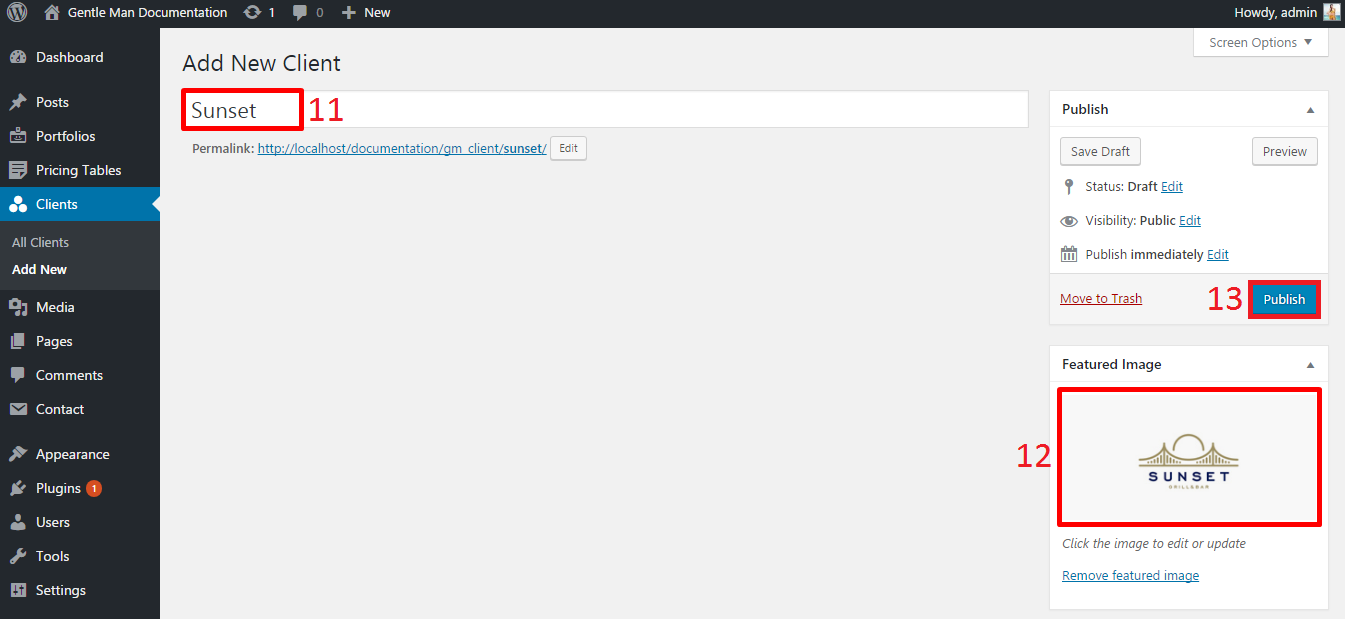
- Portfolio Title: Write your portfolio title.
- Portfolio Category: Add portfolio category.
- Portfolio Image: Add portfolio image.
- Publish: Click publih to save and display your portfolio item.

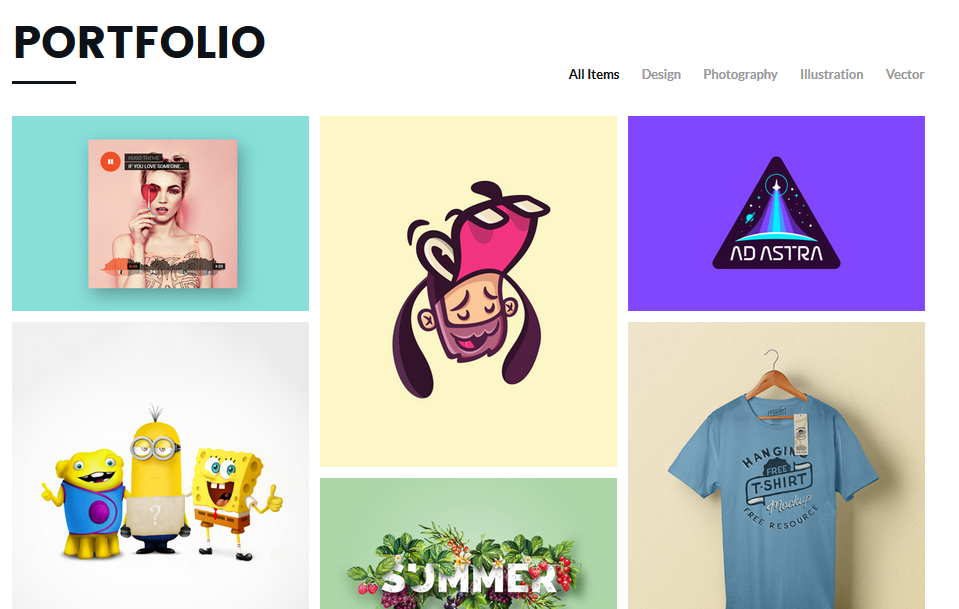
Now you can see the result below:
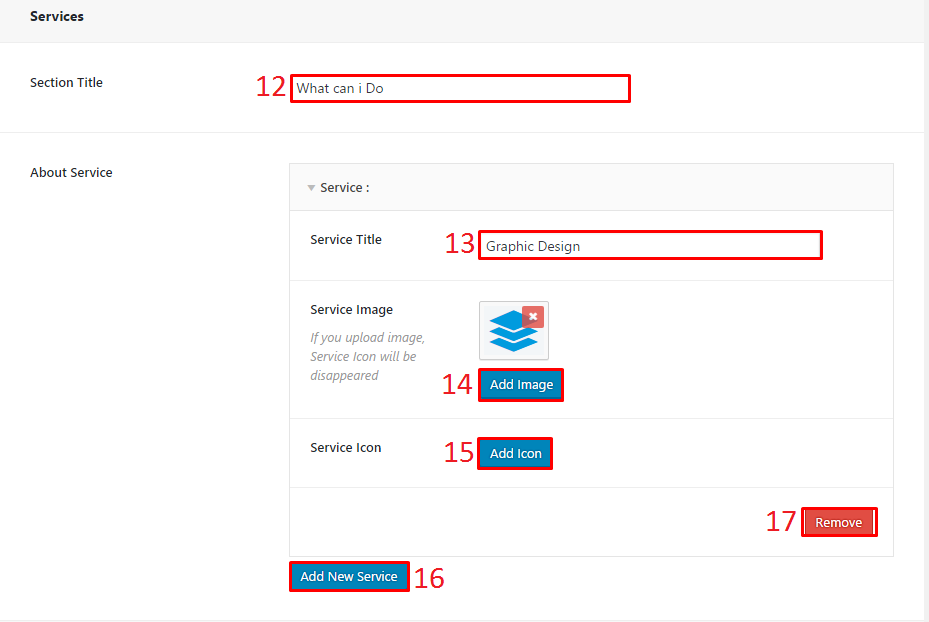
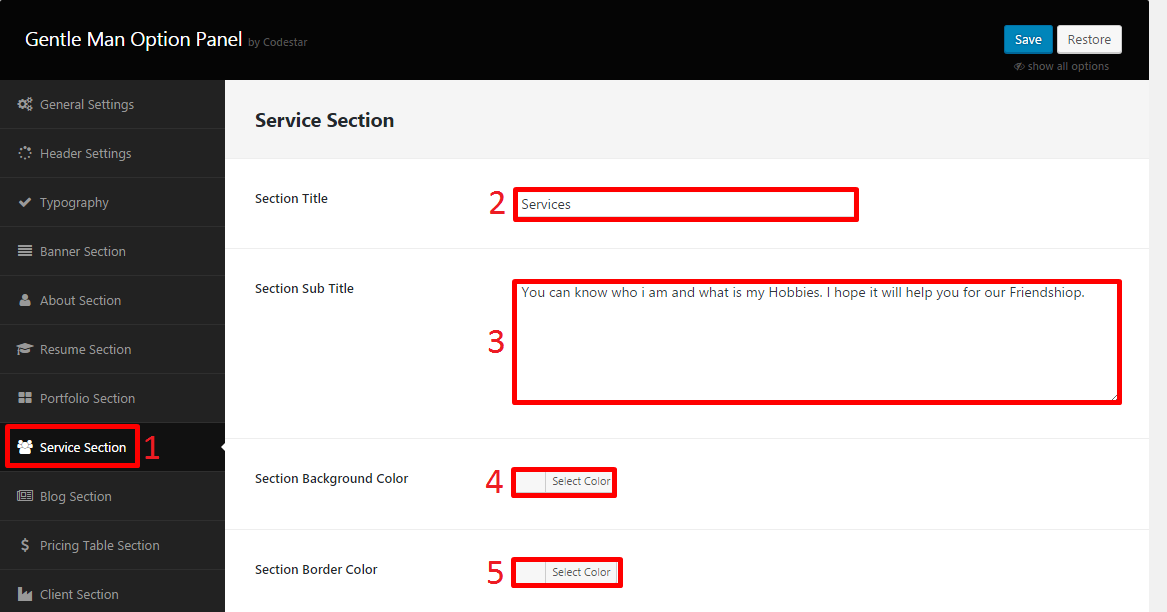
Go to Theme Option > Service Section.
- Click on Service Section
- Section title : Write section title.
- Section sub title : Write section sub title.
- Section Background Color : Select a color for background in this section.
- Section Border Color : Select a color for top and bottom border in this section.
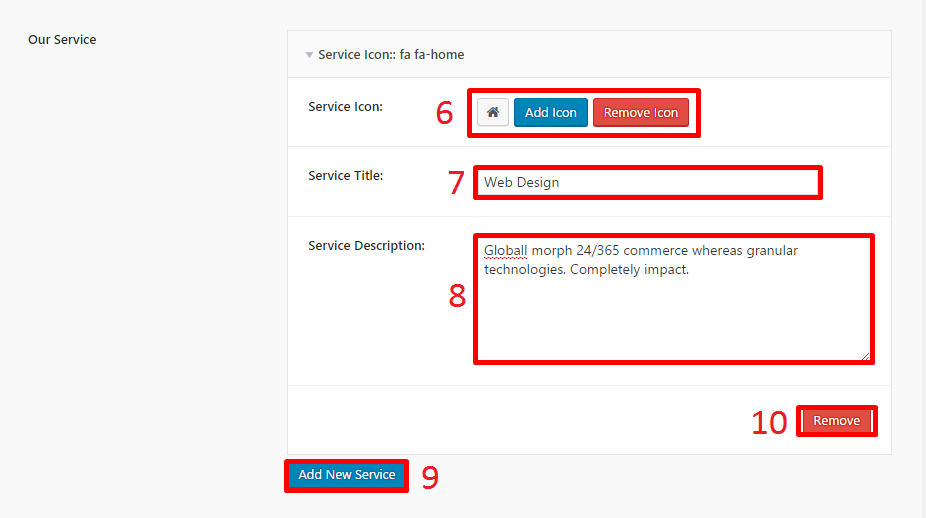
- Service Icon : You can add or romove icon for your service.
- Service Title : Add your service title.
- Service Description : Add your service Description.
- Add New service : You can add unlimited service.
- Remove service : You can aslo remove your service.
- Finally, click on Save button to save.
.
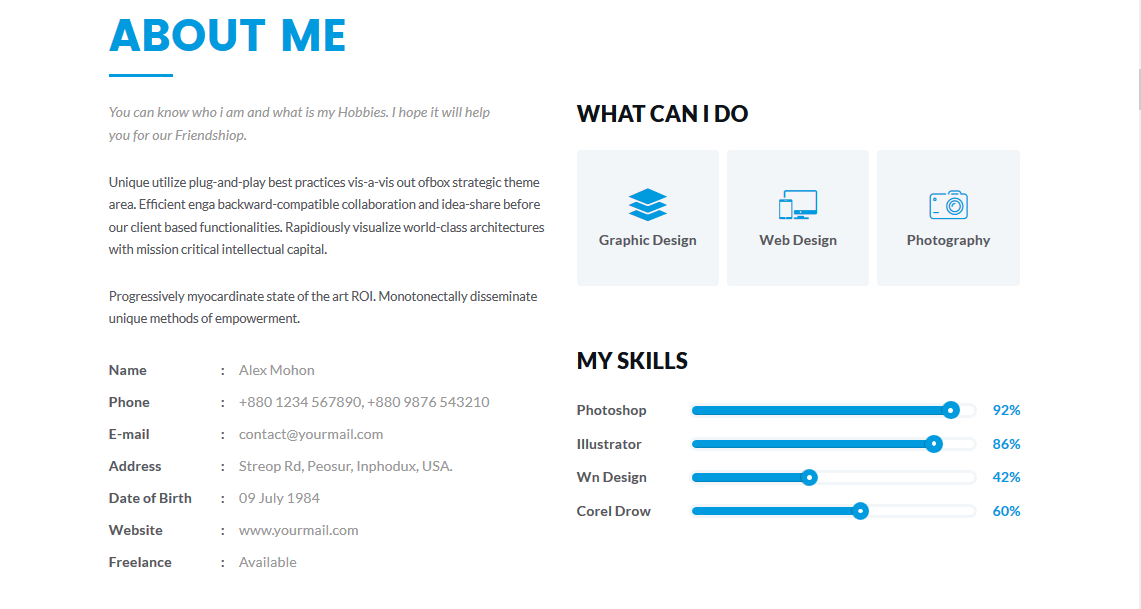
Now you can see the result below:

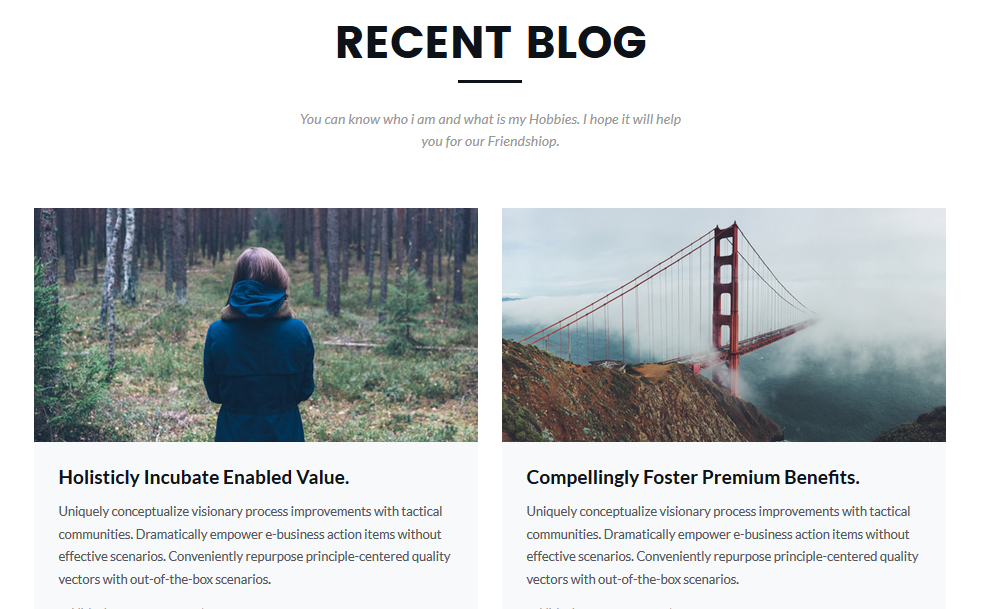
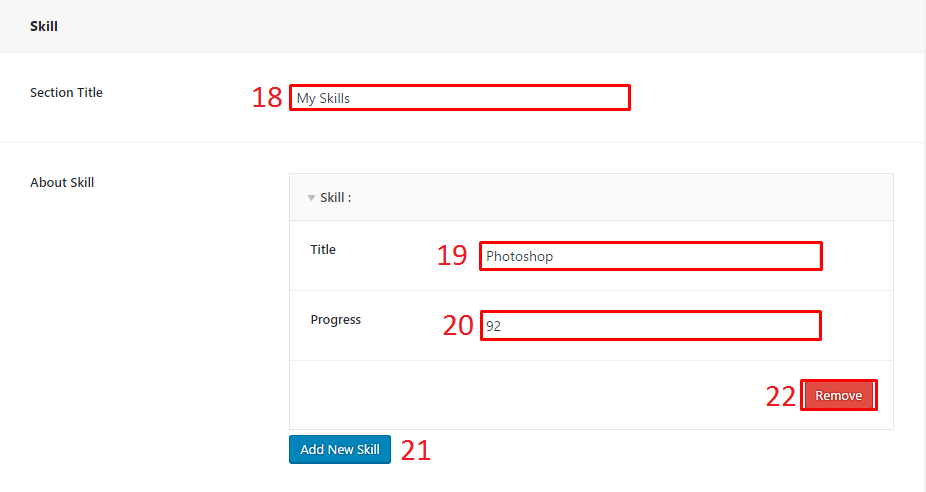
Go to Theme Option > Blog Section.
- Click on Blog Section
- Section title : Write section title.
- Section sub title : Write section sub title.
- Section Background Color : Select a color for background in this section.
- Section Border Color : Select a color for top and bottom border in this section.

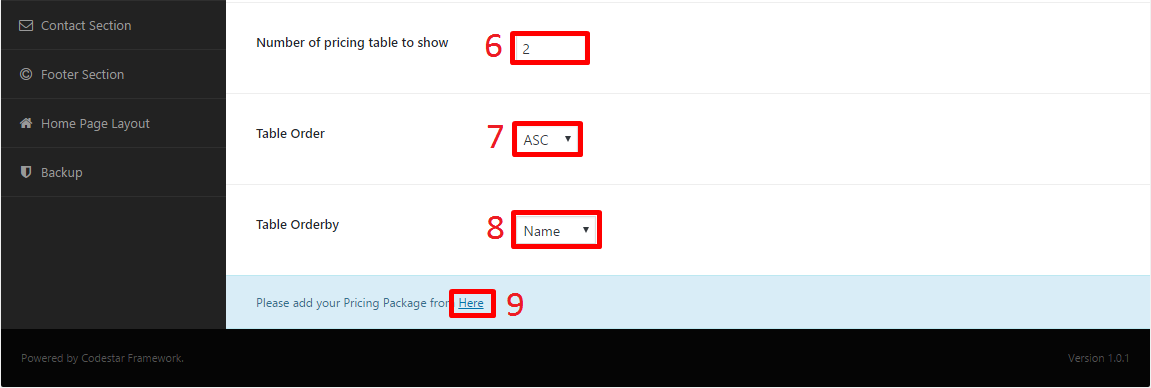
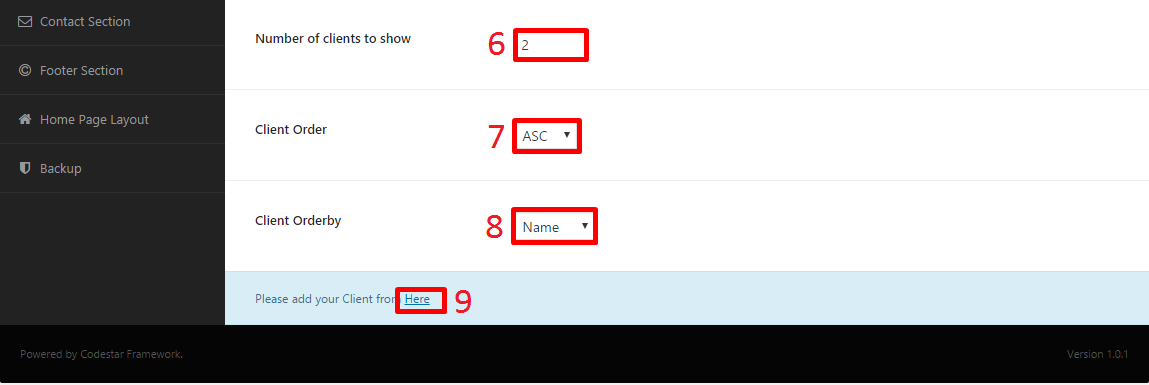
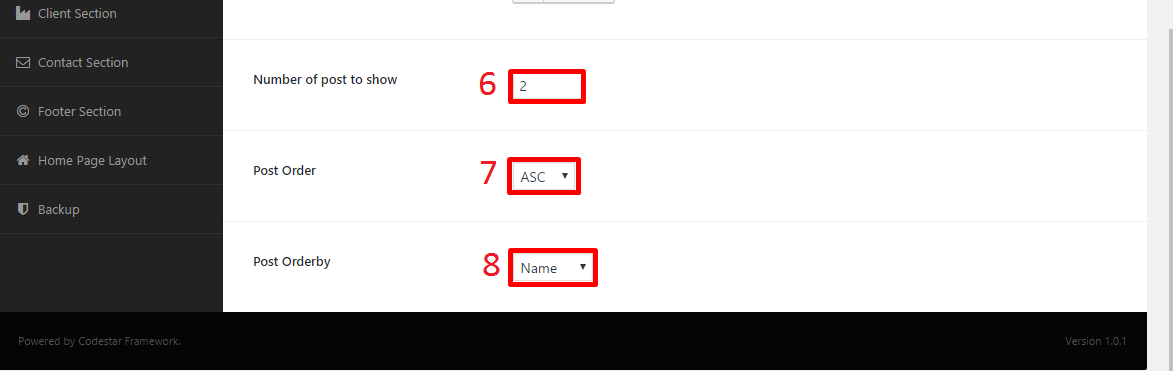
- Number of post to show : Set a number, how many posts you want to display.
- Post Order : You can set your post order.
- Post Orderby : You can set your post orderby.
- Finally, click on Save button to save.
.
Now you can see the result below: